
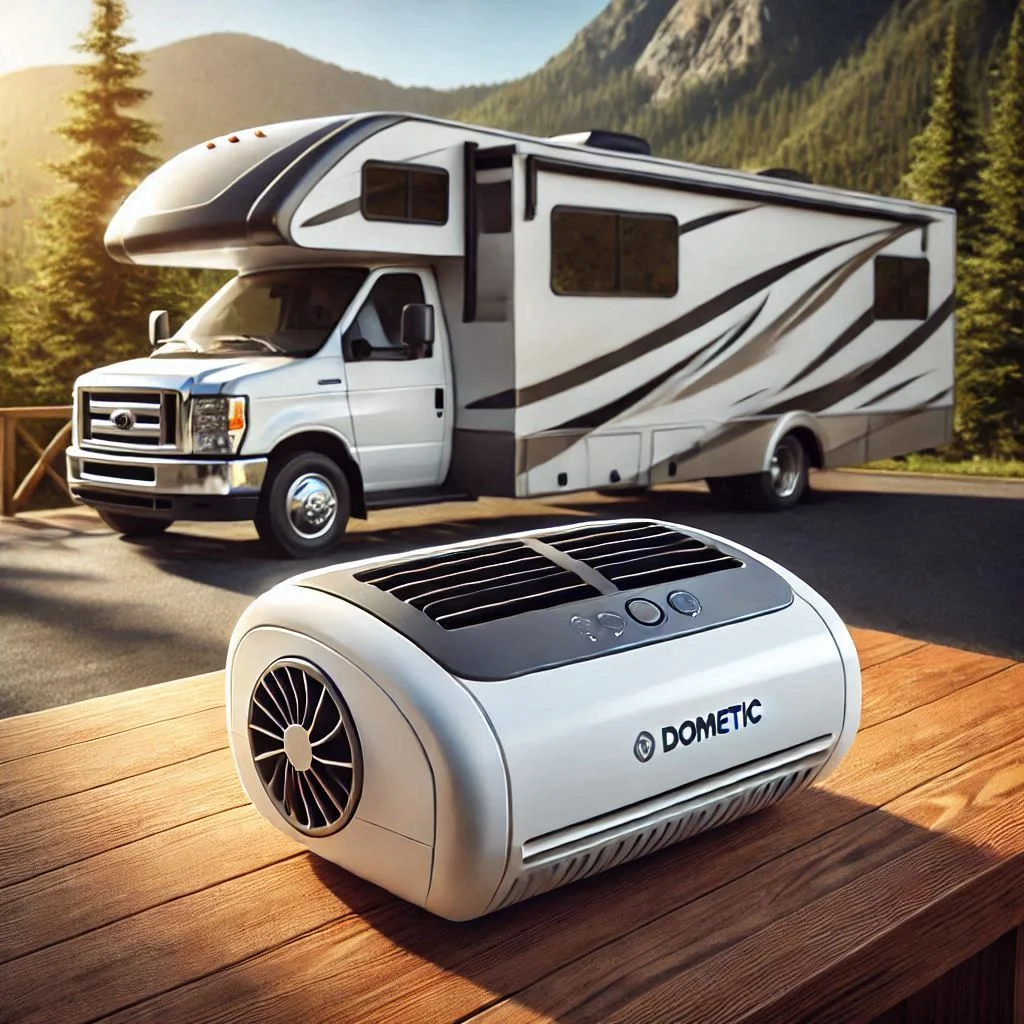
Introduction to Dometic RV Air Conditioner Installation
A Dometic RV air conditioner is an essential appliance for any RV owner who wants to maintain a comfortable environment during their travels. Known for their durability, reliability, and energy-efficient performance, Dometic air conditioners are designed to provide consistent cooling in the confined spaces of recreational vehicles, especially during warm or hot weather.
Why Is It Important for RV Owners?
When traveling in an RV, staying comfortable can often depend on your ability to control the temperature. Without a reliable air conditioning system, the heat can quickly make the interior of your RV unbearable, especially during summer trips. A Dometic RV air conditioner not only ensures a cool atmosphere inside but also helps with air circulation, improving overall air quality within the vehicle.
Having a Dometic AC unit installed in your RV means you are investing in comfort, convenience, and energy savings. These units are specifically engineered to handle the challenges of RV living, where space is limited, and energy efficiency is a priority. Additionally, many models come with various cooling capacities and features, such as energy-saving modes and quiet operation, making them the perfect choice for mobile living.
In this guide, we will walk you through the process of installing a Dometic RV air conditioner, from preparation to testing, ensuring you have a seamless installation process. Whether you’re replacing an old unit or installing a new one, our detailed steps will help you ensure your Dometic air conditioner works optimally for the long-term comfort of your RV adventures.
2. Step-by-Step Guide: Preparing for Installation
Before installing your Dometic RV air conditioner, proper preparation is key to ensuring a smooth and successful installation process. By taking the time to gather all necessary tools, check your RV’s power supply, and confirm proper ventilation, you’ll avoid costly mistakes and ensure your air conditioner runs efficiently.
1. Gather Necessary Tools and Equipment
Having the right tools at hand is essential to avoid delays and errors during the installation. Here is a list of the most common tools required for installing a Dometic RV air conditioner:
- Power Drill: Used for drilling holes for mounting brackets.
- Screwdrivers (Phillips and flathead): To tighten and secure screws and bolts.
- Wrenches: For securing nuts and bolts around the mounting system.
- Measuring Tape: To ensure proper placement and measurements for fitting the unit.
- Sealant or Caulk: Used for sealing any gaps around the air conditioner to prevent leaks and ensure insulation.
- Electrical Wire Strippers: Necessary if you need to wire the AC unit to your RV’s electrical system.
- Safety Glasses and Gloves: Protect your eyes and hands while handling tools and equipment.
Tip: Before starting, check the manufacturer’s installation manual to see if any specialized tools are required for your specific Dometic RV air conditioner model.

2. Ensure Proper Power Supply
A crucial step in the preparation process is making sure that your RV has the right power supply for the air conditioner. Dometic RV air conditioners typically require a 120V AC power source, and it’s important to verify that your RV’s electrical system can handle the added load.
- Check the Circuit Breaker: Ensure your RV’s circuit breaker is compatible with the power demands of the air conditioner. It is recommended to have a dedicated breaker just for the AC unit to prevent overloading.
- Verify the Amp Rating: Most Dometic RV air conditioners require 15-20 amps. Double-check the specifications on your model to ensure your RV’s power supply is adequate.
- Generator Compatibility: If you are using a generator to power the RV, make sure it has enough wattage to support both the air conditioner and other appliances. A generator with a minimum of 2,000 watts is recommended.
Tip: If you’re uncertain about your RV’s power supply, consider consulting an electrician to verify that your electrical system is up to code and ready for the new AC unit.
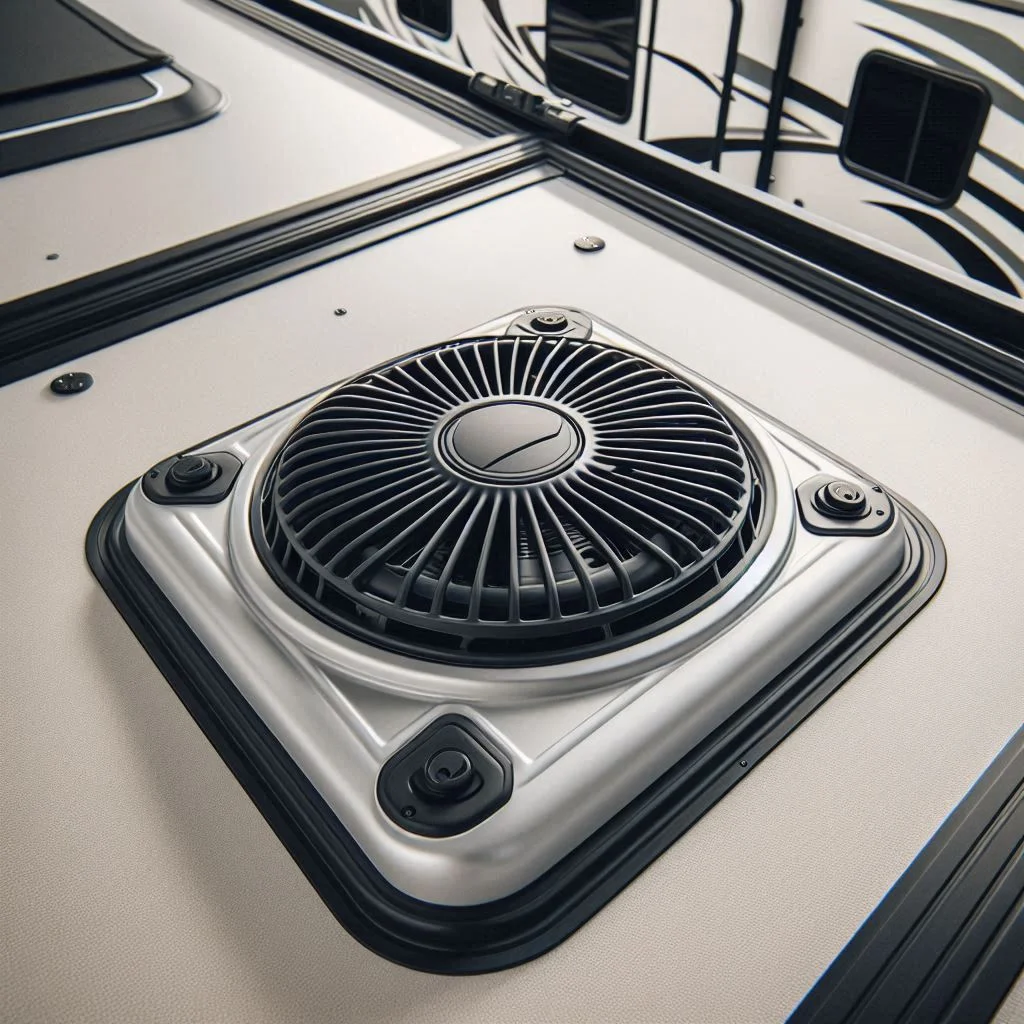
3. Check Ventilation and Airflow
Proper ventilation is crucial for ensuring the efficient operation of your Dometic RV air conditioner. The AC unit needs adequate airflow to effectively cool the space inside the RV, so it’s important to ensure that both the intake and exhaust areas are clear.
- Check the Roof Vent: Make sure there is a clear, unobstructed path for the intake and exhaust venting on the roof where the air conditioner will be mounted.
- Clean the Area: Clean the mounting location on the RV roof to remove debris, dust, or any old seals that could interfere with the installation.
- Consider Additional Ventilation Needs: If you have a small RV or your cooling requirements are higher, you may want to consider installing additional roof vents to improve airflow and reduce strain on the air conditioner.
Tip: Before beginning installation, verify that the ceiling inside the RV is free from obstructions and that the air conditioner’s intake and exhaust systems are aligned properly.
4. Assess the Mounting Location
The placement of the air conditioner is essential for optimal airflow and cooling performance. Typically, RV air conditioners are mounted on the roof, but it’s important to ensure that the chosen location meets all installation requirements.
- Flat Roof Surface: Ensure the area where the air conditioner will be installed is flat and solid. This will help ensure a secure fit and prevent any shifting or damage.
- Positioning for Even Cooling: The unit should be placed in a location that allows for even distribution of cool air throughout the RV. Avoid placing it too close to walls or other obstructions that could block airflow.
5. Double-Check the Installation Manual
Before proceeding with the installation, it’s crucial to read the Dometic RV air conditioner’s installation manual. The manual will provide important details such as the dimensions of the unit, wiring instructions, and specific installation requirements.
3. How to Remove the Old RV Air Conditioner (If Applicable)
Before installing your new Dometic RV air conditioner, it’s important to safely remove the old unit if one is already installed. This process requires careful handling to avoid damaging the roof or electrical connections and to ensure that your new air conditioner can be installed properly.
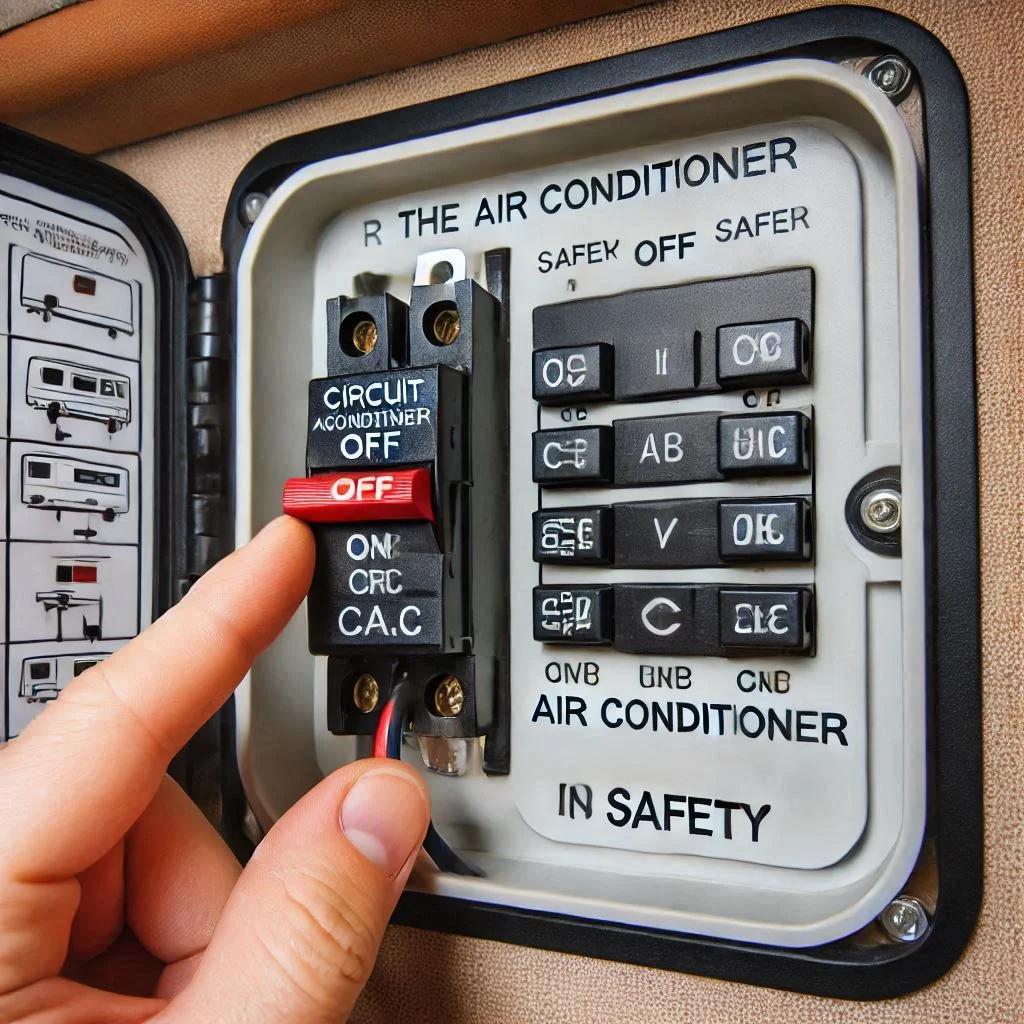
1. Turn Off the Power Supply
The first and most critical step in removing an old RV air conditioner is to disconnect the power. This will prevent any electrical accidents while you are working with the unit.
- Switch off the RV’s main power: Locate the main electrical panel of your RV and switch off the power to the air conditioner by flipping the circuit breaker to the off position.
- Disconnect the air conditioner from the power source: If the air conditioner is hardwired into the RV’s electrical system, disconnect the wires carefully. Make sure you are wearing safety gloves and using insulated tools to handle the wiring.
Tip: Always double-check that there is no power running to the air conditioner before proceeding.
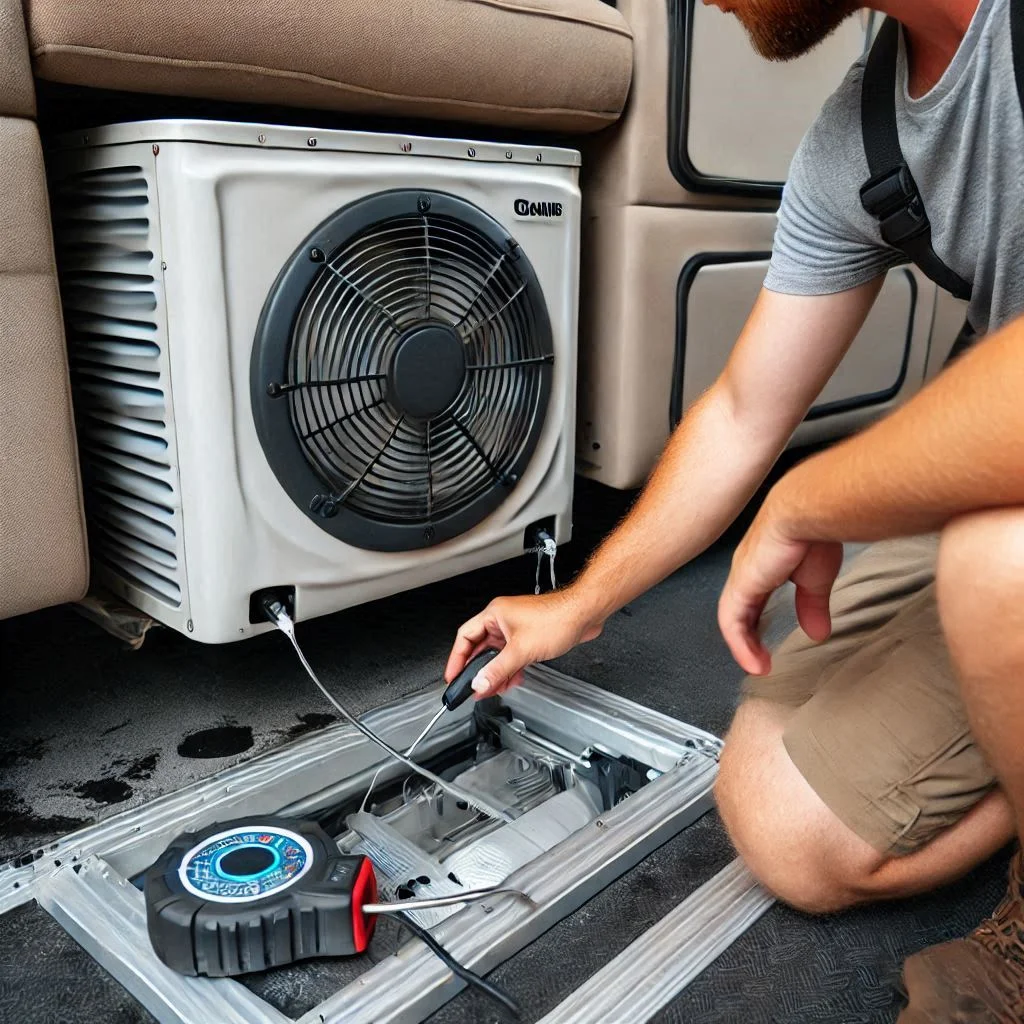
2. Remove the Interior Air Handler Unit
In most RVs, the air conditioner consists of two main components: the exterior rooftop unit and the interior air handler (the unit inside the RV that blows cool air). The interior unit is typically attached to the ceiling, and you will need to remove it first.
- Locate the mounting screws: Use a screwdriver to remove the screws securing the interior air handler to the ceiling of the RV.
- Gently detach the unit: Once the screws are removed, carefully pull the interior unit down. If there is any difficulty, check for any remaining connections or clips that may still be holding the unit in place.
- Disconnect the wiring: If the interior unit is connected to any electrical system, make sure to disconnect the wiring by gently loosening the wire nuts or connectors.
3. Detach the Rooftop Unit
Once the interior unit is removed, you can move on to the rooftop unit. This can be more challenging, as the rooftop unit is heavy and must be handled carefully to avoid damaging the roof or other components.
- Remove the mounting screws: The rooftop unit is typically held in place by a series of mounting screws. Use a power drill or screwdriver to remove these screws, ensuring they are all taken out before proceeding.
- Lift the unit off: After removing the screws, it’s time to lift the unit off the roof. This can be tricky, as the unit is often heavy. It’s recommended to have at least one other person assist with this step.
- Check for remaining connections: Some rooftop air conditioners may have additional components, such as ducts or hoses, that need to be detached. Make sure all connections are properly removed before lifting the unit entirely off the roof.
Tip: If you are unsure about lifting the rooftop unit, consider using a ladder lift or a hoist system designed for RV air conditioners.
4. Seal and Clean the Roof Area
After removing the old air conditioner, it’s essential to clean the area and ensure it is ready for the new unit.
- Remove any old sealant: Use a putty knife or scraper to remove any old sealant or caulk around the mounting area. Make sure the surface is smooth and clean.
- Inspect the roof: Check for any damage to the RV roof that may have occurred during the removal process. If you notice any cracks or holes, repair them before installing the new air conditioner.
- Clean the area: Use a cleaning solution to remove dust, dirt, and debris from the roof. This will ensure that your new air conditioner has a secure and clean installation surface.
5. Dispose of the Old Air Conditioner Properly
Once the old air conditioner is removed, it’s important to dispose of it responsibly. Many old air conditioners contain refrigerants and other materials that can be harmful to the environment if not disposed of properly.
- Check for local disposal guidelines: Contact your local waste management or recycling facility to learn the proper way to dispose of the old air conditioning unit.
- Consider donating or recycling: If the unit is still functional, you may want to donate it or recycle it at a proper facility.

4. How to Install the Dometic RV Air Conditioner: Mounting and Wiring
Installing a Dometic RV air conditioner involves precise steps for mounting the unit securely, running the necessary electrical wiring, and ensuring that the air conditioner is fully functional. Proper installation will not only extend the life of your air conditioner but also optimize its cooling efficiency. In this section, we will break down the detailed steps for mounting the air conditioner and running the necessary wiring to ensure a smooth installation process.
1. Prepare the Roof for Installation
Before mounting the Dometic RV air conditioner, ensure that the roof area is properly prepared.
- Check the Mounting Area: Ensure the roof is flat and clear of any obstructions. Double-check that the location where you plan to install the air conditioner is free from debris and damage. Use a cleaning solution to remove any dirt or grime from the roof to ensure a smooth surface.
- Install the Mounting Brackets: Dometic air conditioners typically come with mounting brackets that need to be fixed onto the roof. Position the mounting brackets in the spots indicated by the manufacturer’s guidelines. Mark the screw holes using a pencil or marker.
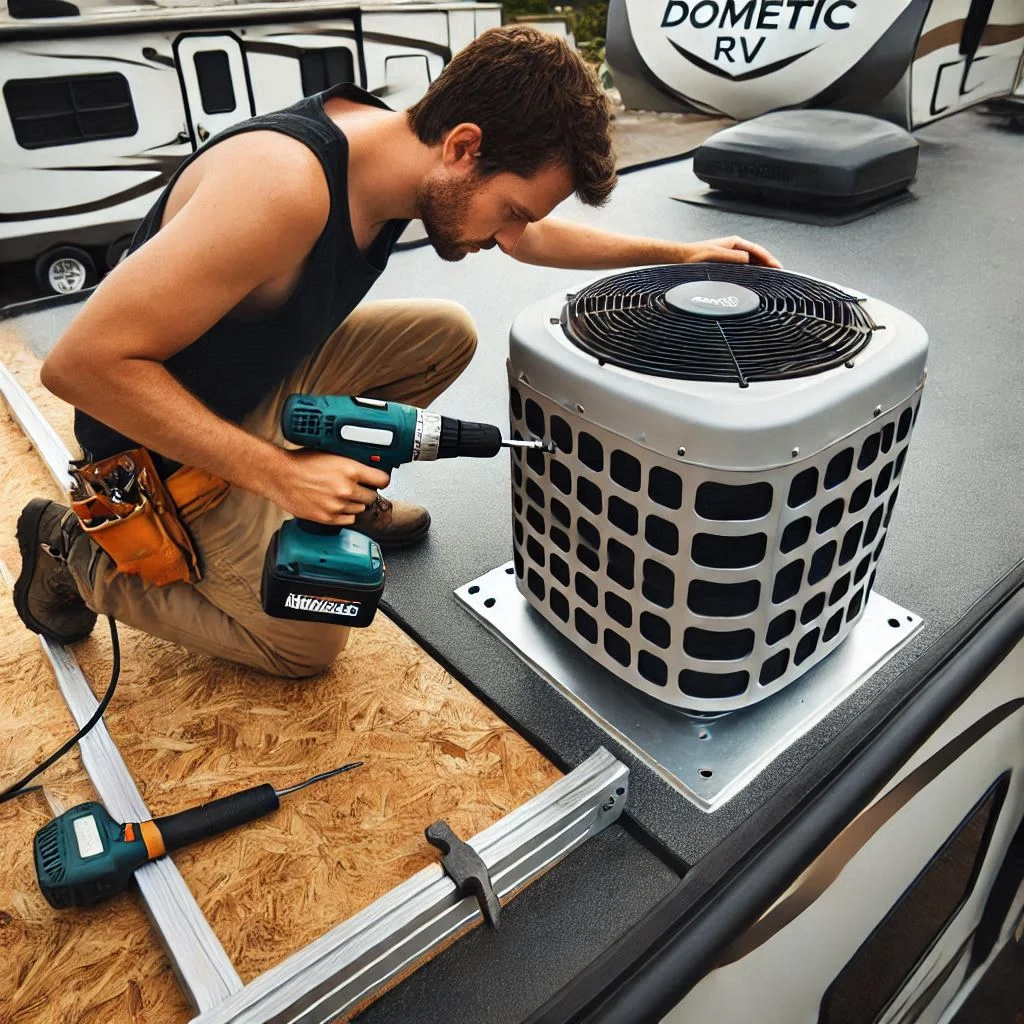
2. Mount the Dometic Air Conditioner on the Roof
Once the mounting brackets are in place, it’s time to secure the air conditioner unit itself.
- Lift the Air Conditioner onto the Roof: With the help of a second person, carefully lift the Dometic RV air conditioner onto the roof. It is essential to lift the unit gently and avoid damaging the roof or the unit itself.
- Align the Unit with the Brackets: Position the air conditioner over the mounting brackets. Make sure the unit is aligned correctly with the mounting holes and ensure that the intake and exhaust vents are properly positioned for optimal airflow.
- Secure the Unit: Using screws or bolts (as specified by the manufacturer), attach the air conditioner to the mounting brackets. Tighten each screw securely to prevent any movement. Check that the unit is firmly secured to avoid vibration or shifting while the RV is in motion.
Tip: Use a level tool to make sure the unit is aligned correctly on the roof. This will help with drainage and air distribution.

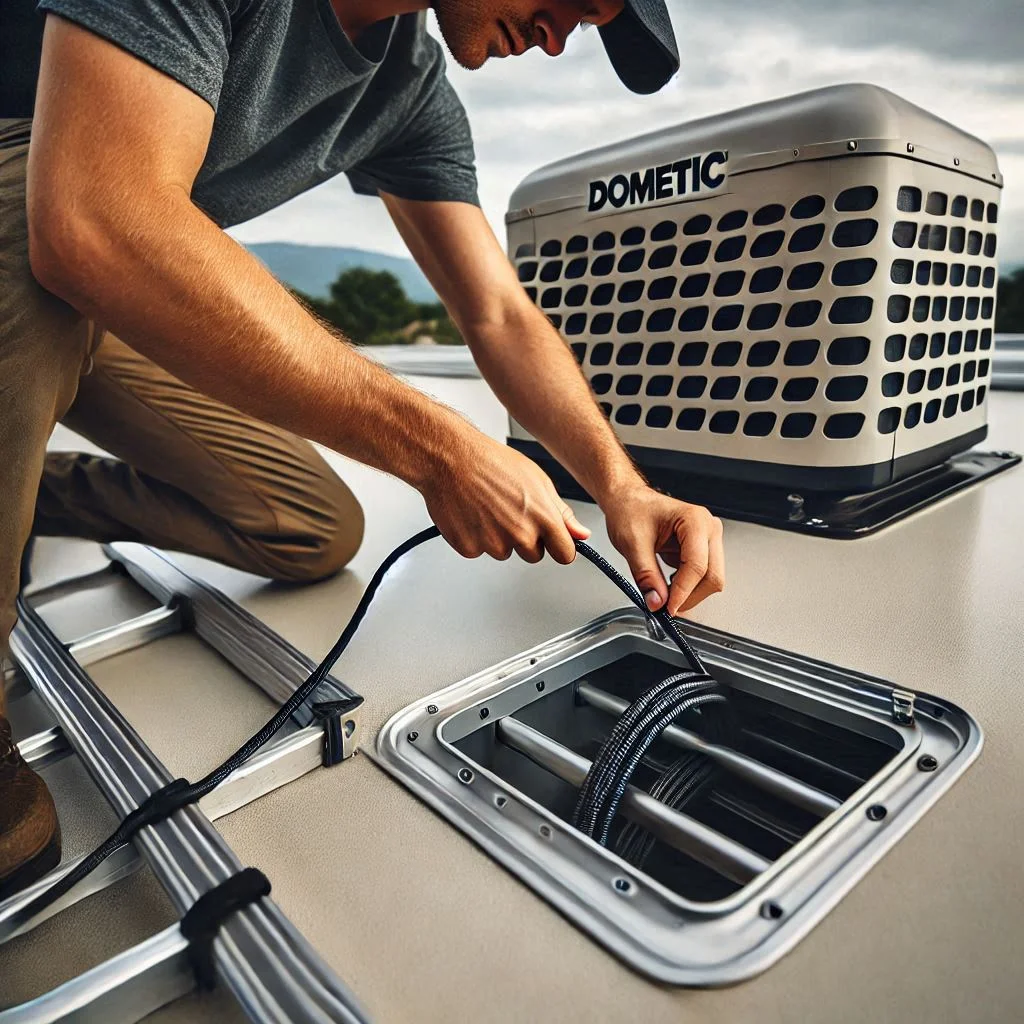
3. Connect the Air Conditioner’s Wiring
Once the unit is mounted, the next step is to connect the electrical wiring. Proper wiring is essential for the air conditioner to work efficiently and safely.
- Run the Electrical Wiring: Locate the wiring compartment on the Dometic air conditioner unit and feed the wiring through the designated opening on the roof. The wires should be long enough to reach the electrical panel inside the RV without being stretched or over-extended.
- Connect the Wires to the RV’s Electrical System: Open the electrical panel inside the RV, and connect the wires from the air conditioner to the corresponding terminals. Typically, the air conditioner will require a 120V power connection and may have a ground wire.
- Black Wire: Connect this to the power source.
- White Wire: Connect this to the neutral terminal.
- Green Wire (Ground): Secure this to the ground terminal.
- Tighten the Connections: Use wire nuts or terminal blocks to secure the wires in place. Ensure that all connections are tight and there are no exposed wires that could lead to electrical shorts.
Tip: If you’re unsure about wiring, it is always a good idea to consult a licensed electrician to ensure proper and safe connections.
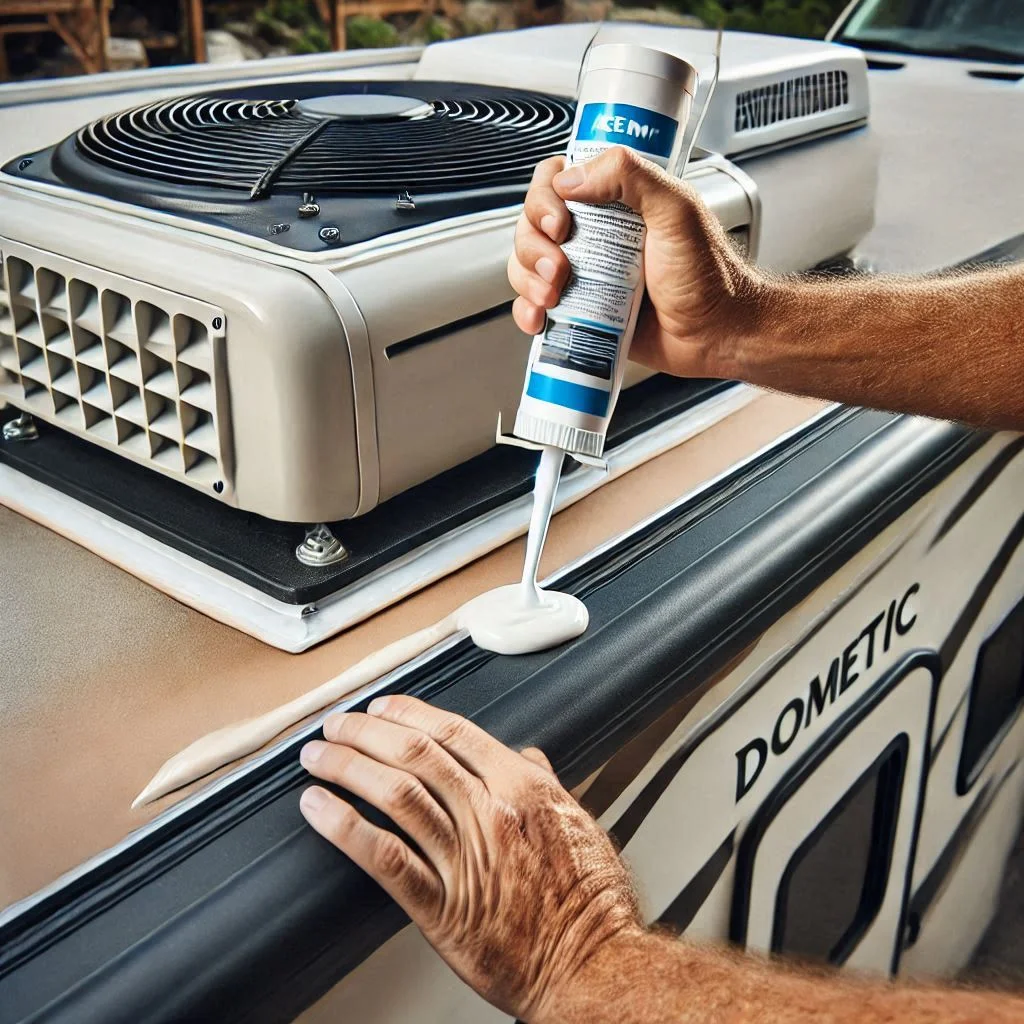
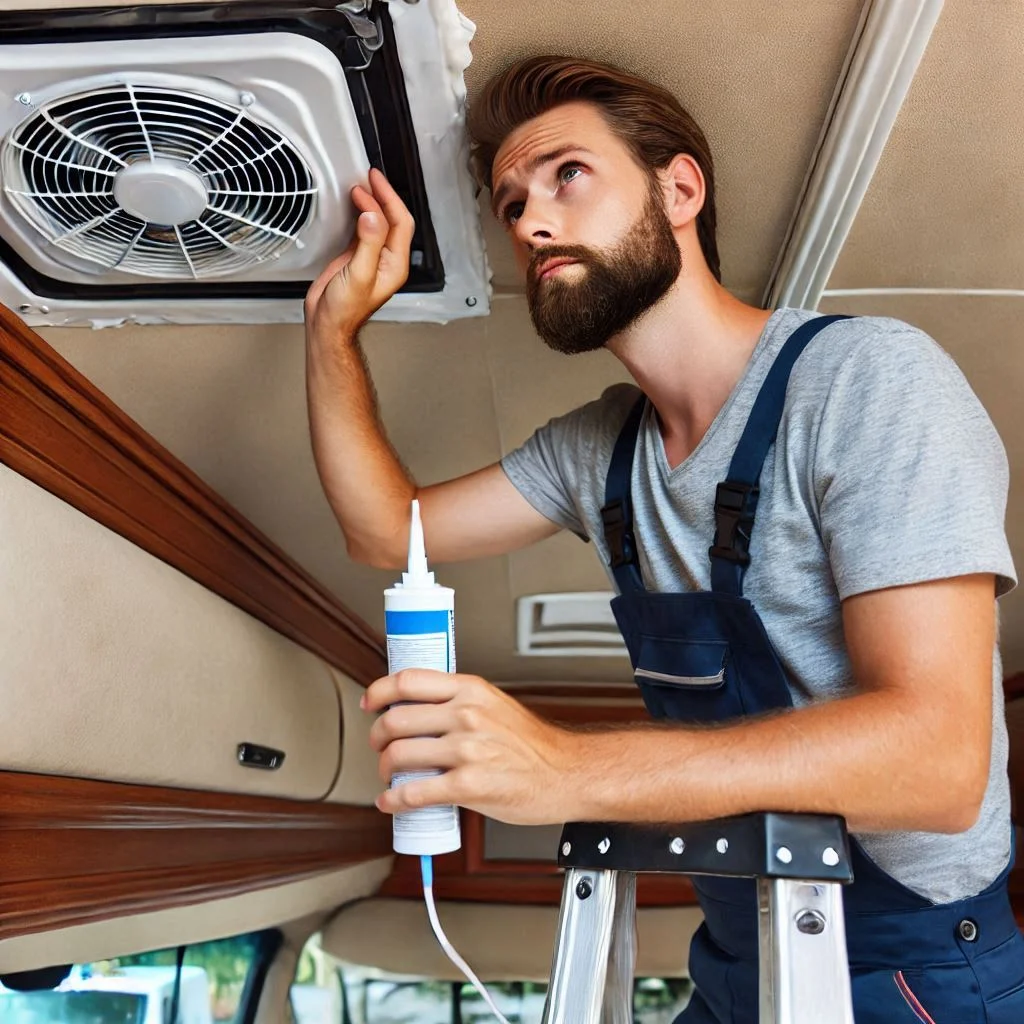
4. Seal and Insulate Around the Unit
Once the air conditioner is securely mounted and wired, it is important to seal and insulate around the unit to prevent leaks and improve efficiency.
- Apply Sealant: Apply a high-quality, RV-friendly sealant around the edges of the air conditioner where it meets the roof. This will prevent water from leaking into the RV. Be sure to use a sealant designed for use with RV roofs and air conditioners, as it will resist weather and UV damage.
- Insulate the Wiring: If there are any exposed wires or gaps, use electrical tape or wire covers to insulate them properly. This will prevent short circuits and ensure the wiring remains safe.
5. Test the Dometic RV Air Conditioner
Before finishing the installation, it’s crucial to test the air conditioner to make sure everything is working correctly.
- Turn On the Power: Flip the circuit breaker to turn on the power to the RV. Switch on the air conditioner and check that it powers up.
- Check the Cooling Performance: Set the thermostat to a desired temperature and let the unit run for a few minutes. Make sure it is cooling the air effectively. Listen for any unusual sounds that could indicate a problem with the installation.
- Inspect for Leaks: Check around the mounting area and inside the RV to ensure there are no leaks. If you notice any, apply additional sealant to the affected areas.
5. Connecting the Air Conditioner to the Power Supply
Connecting your Dometic RV air conditioner to the RV’s electrical system is a crucial step in ensuring it operates efficiently and safely. Properly wiring the air conditioner helps to prevent electrical malfunctions and ensures the air conditioning system will provide optimal cooling. Follow these steps carefully to complete the electrical connection between the air conditioner and your RV’s power supply.
1. Ensure Proper Electrical Safety
Before starting any wiring work, safety is the top priority.
- Turn Off the Power Supply: Switch off the main circuit breaker in your RV’s electrical panel to avoid any risk of electrocution or electrical shorts while working with the power connections.
- Verify the Power Supply Requirements: Confirm that your RV’s electrical system supports the power requirements of the Dometic RV air conditioner. Most Dometic units typically require 120V AC, so make sure your RV is equipped with a suitable power supply. Check the manufacturer’s specifications for exact voltage requirements.
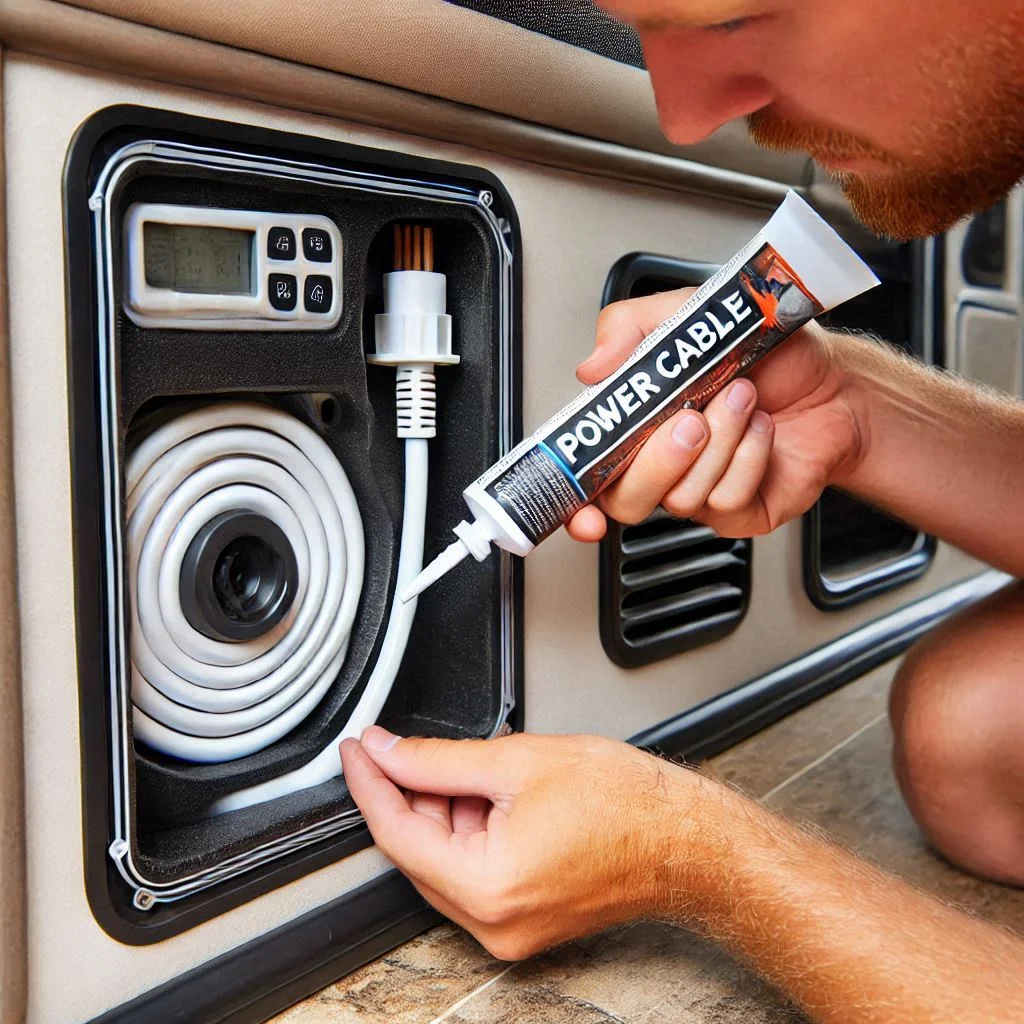
2. Position the Air Conditioner for Easy Wiring Access
Once the air conditioner is mounted on the roof and secured, you’ll need to bring the power wires down into the RV’s interior to connect them to the electrical panel.
- Run the Power Cable from the Air Conditioner: From the air conditioner, feed the electrical cable down through the opening in the roof and into the RV. Make sure the cable is long enough to reach the RV’s electrical panel.
- Secure the Cable to Prevent Damage: Ensure the cable is properly secured along the roof or any other surfaces, so it doesn’t get pinched or damaged when the RV is in motion. Use cable clips or cable ties to secure the wiring, making sure it’s safe and out of the way of moving parts.
3. Connect the Wiring to the Electrical Panel
Now that the power cable is in place, you’ll need to make the electrical connections inside the RV’s electrical panel. Properly connecting the wires to the correct terminals ensures the air conditioner receives adequate power.
- Identify the Power Terminals: In the electrical panel, locate the terminals where the air conditioner will be connected. Usually, the air conditioner will have three primary wires: the live (black) wire, neutral (white) wire, and ground (green) wire.
- Connect the Wires:
- Black (Live) Wire: Connect the black wire from the air conditioner to the live terminal in the electrical panel. This wire is responsible for supplying the power to the unit.
- White (Neutral) Wire: Connect the white wire from the air conditioner to the neutral terminal. This completes the circuit.
- Green (Ground) Wire: Connect the green wire to the ground terminal in the panel to ensure safety. This prevents electrical shocks and provides a safe path for any stray electrical current.
4. Double-Check the Connections
After connecting the wires, it’s critical to double-check each connection to make sure they are secure and correctly installed.
- Tighten the Terminal Screws: Using a screwdriver, tighten the screws on the terminals to ensure the wires are securely attached. Loose connections can lead to overheating and other electrical issues.
- Check for Exposed Wires: Ensure that no wires are exposed or frayed. If necessary, cover the connections with electrical tape or use wire nuts to cover any exposed ends.
Tip: If the wires are too short, use an appropriate extension cord designed for RV electrical systems to ensure a safe connection. Never try to stretch wires as this could lead to dangerous malfunctions.
5. Test the Electrical Connection
Once all wiring is properly connected and secured, it’s time to test the air conditioner to ensure it works as expected.
- Restore Power to the RV: Turn the RV’s main circuit breaker back on and switch the air conditioner on. The unit should power up and begin cooling within a few minutes.
- Test the Thermostat and Functionality: Set the thermostat to a desired temperature and allow the air conditioner to run. Ensure that cold air is blowing out and that the unit is functioning smoothly.
- Check for Any Electrical Issues: Listen for any unusual sounds, such as buzzing or popping, which could indicate a problem with the electrical connections. If you notice anything out of the ordinary, turn off the power immediately and inspect the connections.
6. Seal and Insulate the Wiring
Once the electrical connection is complete, it’s important to seal the area around the wiring to prevent moisture from entering and causing electrical problems.
- Apply Sealant Around the Wiring Entry Point: Use high-quality RV-specific sealant around the point where the wiring enters the RV. This will prevent water from leaking inside, which could cause electrical shorts or damage the interior components.
- Insulate Any Exposed Wiring: If any wiring is exposed, especially near the roof or walls, cover it with electrical tape or plastic conduit to prevent damage and ensure long-lasting protection.
6. Testing and Troubleshooting Your Dometic RV Air Conditioner
After completing the installation of your Dometic RV air conditioner, it’s essential to perform a series of tests to ensure that the unit is working properly and efficiently. Additionally, troubleshooting common issues early on can prevent more severe problems down the road. This section will guide you through the process of testing your Dometic RV air conditioner and provide troubleshooting tips for any issues you may encounter.
1. Power On the Air Conditioner
Before you begin testing the air conditioner, make sure the power supply is restored, and all connections are secure.
- Check the Power Source: Ensure that the RV’s electrical system is turned on and that the air conditioner is receiving power. Check for any tripped circuit breakers or blown fuses in the RV’s electrical panel. Reset the circuit breaker if needed.
- Turn On the Air Conditioner: Power on the air conditioner using the thermostat or remote control. Set the thermostat to a desired temperature and select the cooling mode. The unit should begin to blow cold air after a few moments.
Tip: If the unit does not power on, double-check the wiring connections and ensure there are no loose or exposed wires.
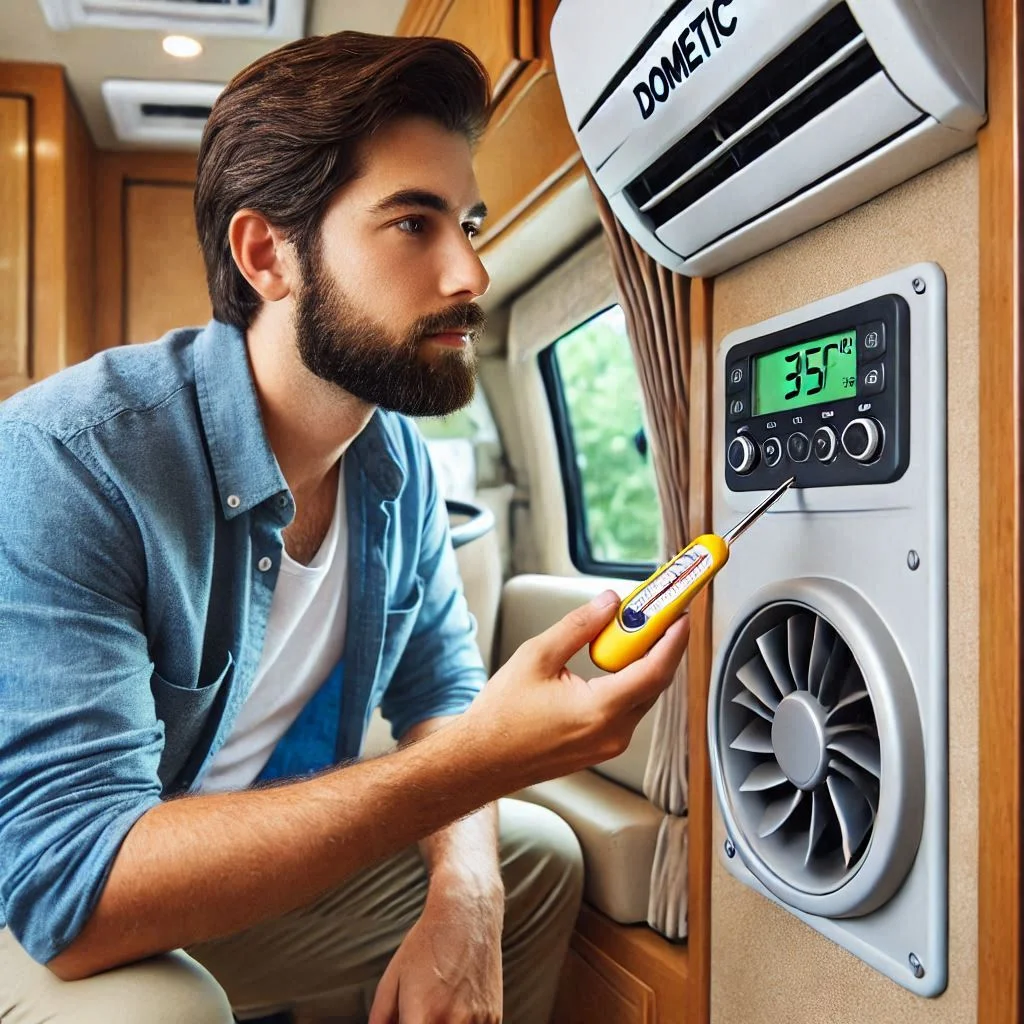
2. Test the Cooling Efficiency
Once the air conditioner is powered on, it’s time to check its performance and cooling efficiency.
- Check the Airflow: Stand near the air conditioner’s output vents and check for a consistent flow of cold air. The air should be cool, not lukewarm or warm. If the airflow feels weak, there may be an issue with the air filter, ductwork, or the unit itself.
- Monitor the Temperature: Set the thermostat to a low temperature (e.g., 65°F or 18°C) and give the unit some time to cool the interior of the RV. Use a thermometer to measure the air temperature coming out of the vents. It should be significantly cooler than the ambient room temperature.
Tip: If the unit is not cooling efficiently, clean or replace the air filters, check the refrigerant levels, or inspect for any blockages in the airflow.
3. Listen for Unusual Noises
While the air conditioner runs, listen for any unusual noises that may indicate potential issues.
- Normal Sounds: A properly functioning air conditioner should make a consistent hum when running. You may also hear a slight noise from the fan as it circulates air.
- Unusual Sounds: If you hear rattling, grinding, or squealing sounds, there may be an issue with the fan blades, the compressor, or loose components inside the unit. Turn off the unit immediately to avoid further damage and inspect the parts.
Tip: If the sound persists after checking and securing all components, consider consulting a technician.

4. Check for Leaks and Moisture
Leaking or excess moisture around the air conditioner can indicate a problem with the unit’s drainage or installation.
- Inspect the Seals: Check around the base of the air conditioner for any visible water leaks. If you notice any water dripping inside the RV, this could indicate a failed seal or a clogged drainage system.
- Check the Drainage System: Ensure the drainage tube or system is properly connected and clear of any blockages. Water should drain freely from the unit without spilling into the RV’s interior.
Tip: If there is moisture buildup around the ceiling or walls, apply additional sealant to the unit’s edges or check the drainage system for clogs.
5. Troubleshooting Common Air Conditioner Issues
Here are a few common issues you might encounter with your Dometic RV air conditioner and how to troubleshoot them.
- No Power to the Unit:
- Possible Cause: The circuit breaker is tripped or there is a blown fuse.
- Solution: Reset the circuit breaker or replace the fuse. Check the power connections and ensure they are secure.
- Air Conditioner Not Cooling Properly:
- Possible Cause: The air filter is clogged, the refrigerant level is low, or the ducts are blocked.
- Solution: Clean or replace the air filter. Check the refrigerant levels and top it off if needed. Ensure the ducts are clear of obstructions.
- Unusual Noises:
- Possible Cause: Loose or damaged components such as fan blades or the compressor.
- Solution: Turn off the unit and inspect the components. Tighten any loose screws or replace damaged parts if necessary.
- Water Leaks Inside the RV:
- Possible Cause: A failed seal or clogged drainage system.
- Solution: Inspect the seals around the air conditioner and reapply sealant if needed. Clear the drainage system of any blockages.
- Air Conditioner Blowing Warm Air:
- Possible Cause: The thermostat is set incorrectly, or the refrigerant is low.
- Solution: Adjust the thermostat settings and allow the unit time to cool the air. If the issue persists, check the refrigerant levels.
6. Regular Maintenance and Preventative Measures
To ensure your Dometic RV air conditioner continues to perform optimally, follow these maintenance tips.
- Clean the Air Filters Regularly: Clean or replace the air filters every few months to maintain optimal airflow and cooling efficiency.
- Check the Seals and Insulation: Inspect the seals around the unit periodically to prevent air leaks. Ensure that insulation is intact to maintain energy efficiency.
- Schedule Professional Maintenance: Consider scheduling professional maintenance annually to inspect the refrigerant levels, clean the coils, and check for any underlying issues.
FAQs: Common Questions About Installing a Dometic RV Air Conditioner
When installing a Dometic RV air conditioner, there are several common questions RV owners might have. This section answers some of the most frequently asked questions about the installation process, compatibility, and post-installation maintenance. These answers will help you make informed decisions and ensure your installation goes smoothly.
Q1: How long does it take to install a Dometic RV air conditioner?
The time it takes to install a Dometic RV air conditioner depends on the complexity of the installation and whether you’re replacing an existing unit or installing a new one from scratch. On average, the installation process can take anywhere from 4 to 6 hours for an experienced DIYer.
Factors that affect installation time include:
- Removal of the Old Unit: If you’re replacing an old air conditioner, the removal process could add additional time.
- Wiring and Mounting: Proper wiring and securing the air conditioner to the roof of the RV will also take time, especially if you’re working on a new installation.
- Troubleshooting: If you encounter issues such as wiring complications or power supply mismatches, troubleshooting may require additional time.
Tip: For quicker and more efficient installation, ensure you have all the necessary tools and equipment on hand before you begin.
Q2: Can I install a Dometic RV air conditioner myself, or do I need a professional?
Yes, you can install a Dometic RV air conditioner yourself, provided you have some basic knowledge of electrical work and RV systems. Many RV owners opt for a DIY installation to save money, and with the right tools and instructions, the installation process is manageable.
However, consider the following:
- DIY Installation: If you’re comfortable with electrical work and basic RV maintenance, you can follow the manufacturer’s guidelines for self-installation.
- Professional Help: If you’re unsure about your electrical skills, or if your RV requires a custom installation, it’s recommended to hire a professional. An expert will ensure that the unit is properly wired and securely mounted.
Tip: Always prioritize safety when dealing with electrical systems. If in doubt, consult a professional technician.
Q3: What tools do I need to install a Dometic RV air conditioner?
The tools required for installing a Dometic RV air conditioner vary depending on the complexity of the installation, but here’s a general list of the essentials:
- Power Drill and Drill Bits: To create holes for mounting the air conditioner to the RV roof.
- Screwdriver Set: To secure the air conditioner and components in place.
- Wrenches and Pliers: For tightening bolts and securing wires.
- Electrical Tester: To check for proper voltage and ensure safe wiring connections.
- Utility Knife: For cutting any sealant or insulation material.
- Sealant or Caulk Gun: To seal the air conditioner around the roofline to prevent water leakage.
- Measuring Tape: To ensure accurate positioning for the air conditioner unit.
Having all the necessary tools in advance will speed up the process and ensure a smooth installation.

Q4: How do I know if my RV is compatible with a Dometic air conditioner?
Before purchasing a Dometic RV air conditioner, you need to check if your RV is compatible with the unit. Several factors play a role in compatibility, including the size of the air conditioner, the RV’s power supply, and the roof’s structure.
Check these compatibility factors:
- Size and Weight of the Unit: Dometic RV air conditioners come in different sizes. Ensure that the unit you choose fits the roof space and does not exceed the weight limit your RV’s roof can handle.
- Power Requirements: Verify that your RV’s electrical system can support the air conditioner’s power requirements. Most Dometic units run on a 120V power supply, but you may need to upgrade your electrical system if you plan to install a larger unit.
- Roof Type and Space: Ensure there’s enough space on the roof for mounting the unit and that the roof can support the weight of the air conditioner.
Tip: Check the manufacturer’s guidelines or consult with a professional to confirm compatibility before purchasing.
Q5: What are some tips to ensure the air conditioner works efficiently after installation?
Proper maintenance and careful setup are key to ensuring your Dometic RV air conditioner works efficiently after installation. Here are some tips to keep your unit running smoothly:
- Clean the Air Filters Regularly: Clogged air filters can reduce the efficiency of the air conditioner. Clean or replace the filters every 1-3 months depending on usage.
- Check the Seals: Inspect the seals around the air conditioner to ensure there are no gaps or leaks that could allow warm air to enter. Reapply sealant as needed.
- Ensure Proper Insulation: Adequate insulation around the unit helps maintain temperature control inside the RV. Make sure the insulation around ducts and vents is intact and secure.
- Keep Vents and Ducts Clear: Blocked vents or ducts can reduce airflow and decrease cooling efficiency. Regularly check to ensure they are unobstructed.
- Run the Air Conditioner Regularly: Running the air conditioner periodically, even during cooler months, ensures it remains in good working condition and prevents any mechanical issues from developing.
By following these tips, you can extend the life of your Dometic RV air conditioner and keep it working at peak performance.
Conclusion
Installing a Dometic RV air conditioner can significantly enhance your comfort while traveling, ensuring that your RV remains cool and pleasant, even during the hottest months. By following the detailed steps provided in this guide—from preparation and installation to troubleshooting and maintenance—you can ensure a smooth and efficient installation process. Whether you choose to install the unit yourself or hire a professional, keeping your air conditioner well-maintained and ensuring compatibility with your RV will guarantee long-lasting performance. If you encounter any issues along the way, the troubleshooting tips will help you address common problems and keep your unit running at its best. With the right tools, preparation, and care, your Dometic RV air conditioner will provide reliable cooling for countless road trips ahead.