
Preparing to Clean Your RV Air Conditioner
Proper preparation is crucial for effectively cleaning your RV air conditioner while ensuring safety and optimal performance. Follow these detailed steps to prepare like a pro.
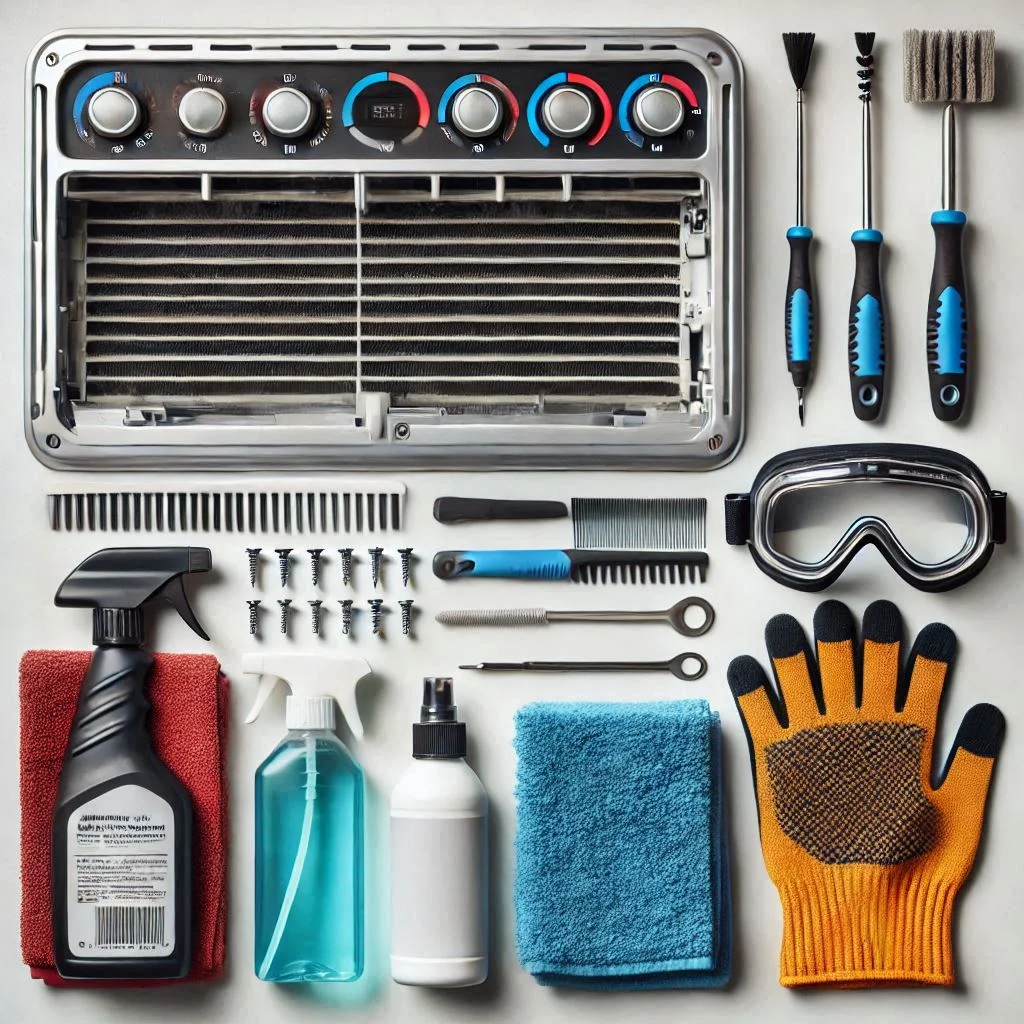
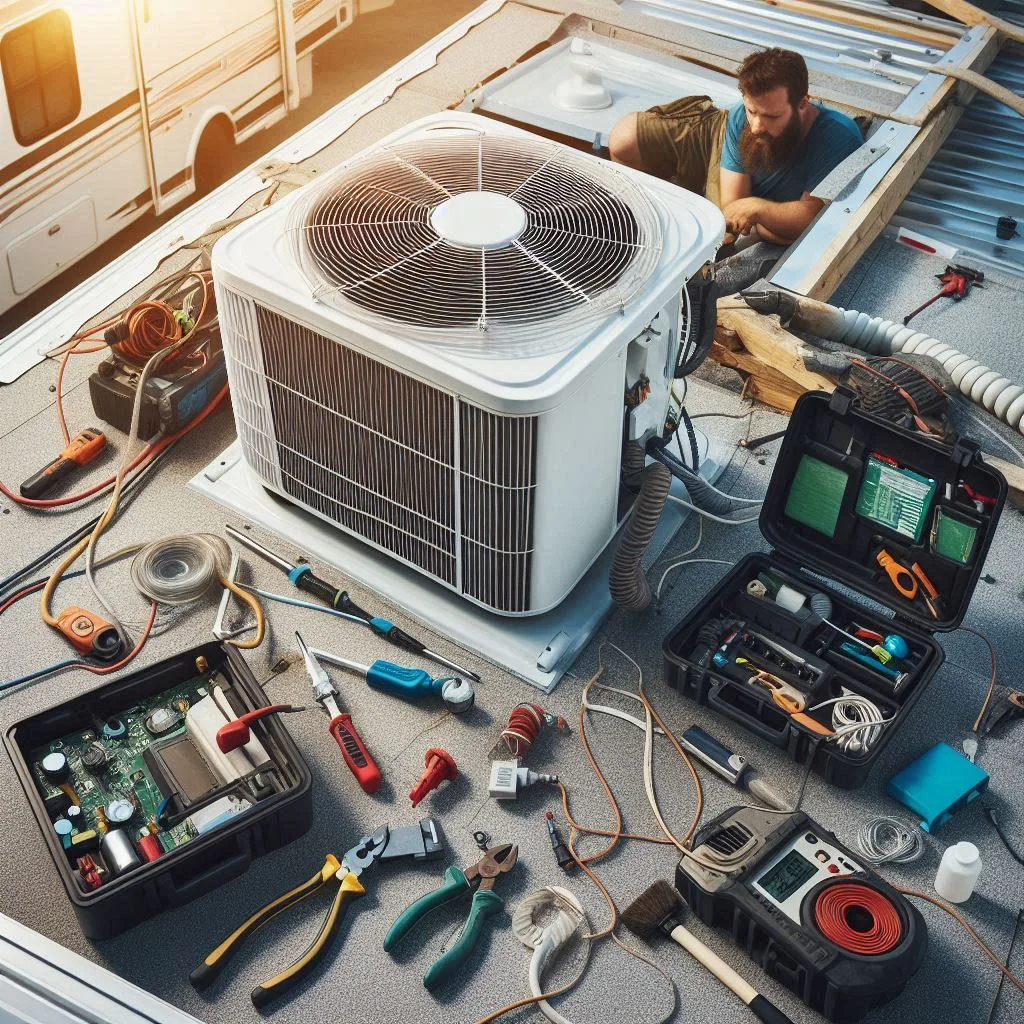
Gather Necessary Tools and Safety Gear
Cleaning an RV air conditioner requires specific tools and equipment to ensure efficiency and safety. Here’s a checklist:
- Tools Required:
- A soft brush or vacuum cleaner with a brush attachment (for removing dust).
- Screwdrivers (for accessing interior components).
- Mild detergent and water solution (for cleaning).
- Fin comb (to straighten bent fins).
- Microfiber cloths (to wipe surfaces).
- Safety Gear:
- Insulated gloves (to prevent electrical shock).
- Safety goggles (to protect eyes from debris).
- Dust mask (to avoid inhaling fine particles).
Pro Tip: Organize your tools before starting to minimize interruptions during the cleaning process.
Turn Off Power to the Unit and Ensure It’s Completely Unplugged
Safety is paramount when working with electrical appliances. Before cleaning your RV air conditioner:
- Switch Off Power: Turn off the main power supply to your RV and ensure the air conditioner is not running.
- Unplug the Unit: Locate the power cord for the air conditioner and disconnect it from the outlet to eliminate the risk of electric shock.
- Test for Power: Confirm the unit is not receiving power by attempting to turn it on.
Pro Tip: Use a voltage tester to double-check that there is no residual current.

Inspect the Unit for Visible Dirt, Debris, or Damage
Before diving into cleaning, perform a thorough inspection of your air conditioner.
- Exterior Check: Look for dirt, leaves, or debris on the shroud or exterior surfaces.
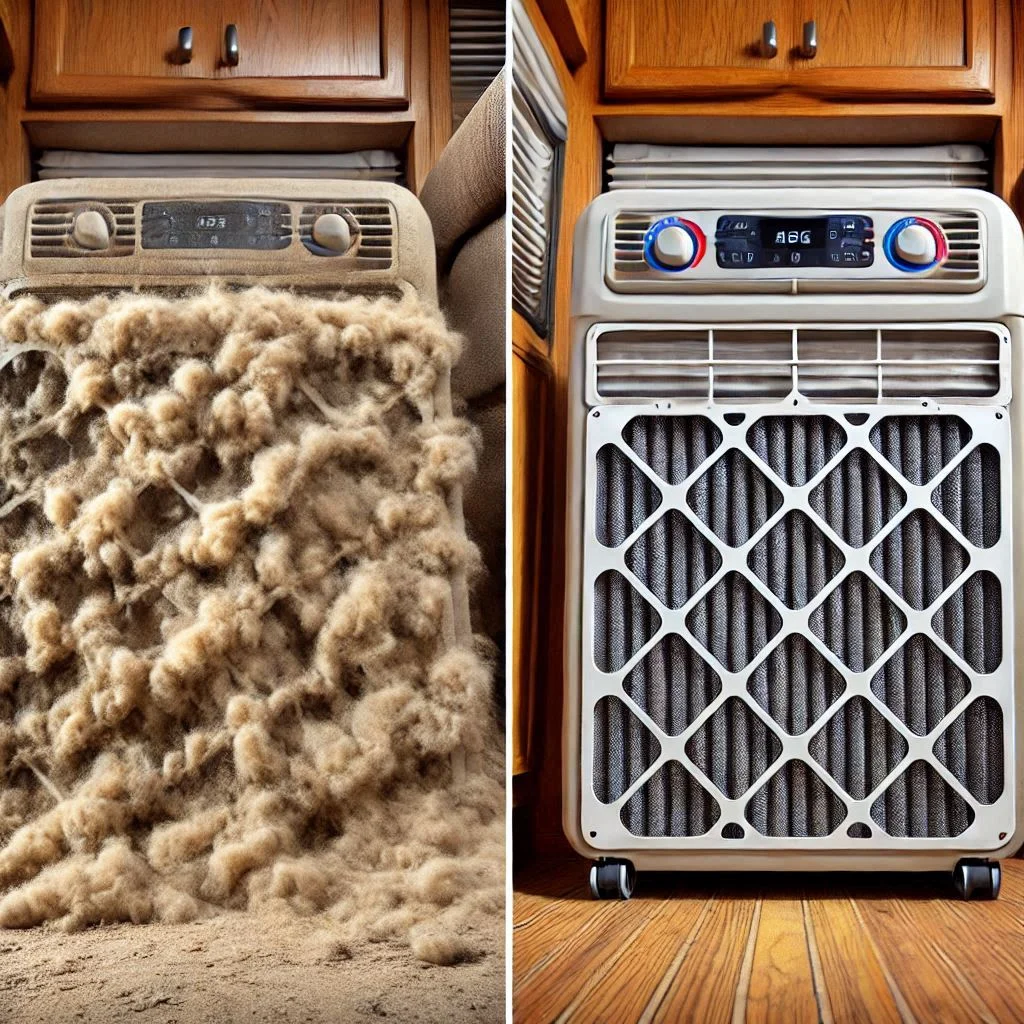
- Filter Check: Remove the air filter and examine it for excessive dust or clogging.
- Coil Inspection: Check the evaporator and condenser coils for dirt or bent fins.
- Seal Inspection: Ensure the exterior seal of the unit is intact and free of cracks or gaps.
Address any visible issues before proceeding to the cleaning phase to avoid further complications.
Pro Tip: If you notice damage to any component, consider replacing it before using the air conditioner again.
The Correct Way to Clean Your RV Air Conditioner
Keeping your RV air conditioner clean ensures efficient performance and extends its lifespan. Follow these detailed steps for cleaning it effectively.
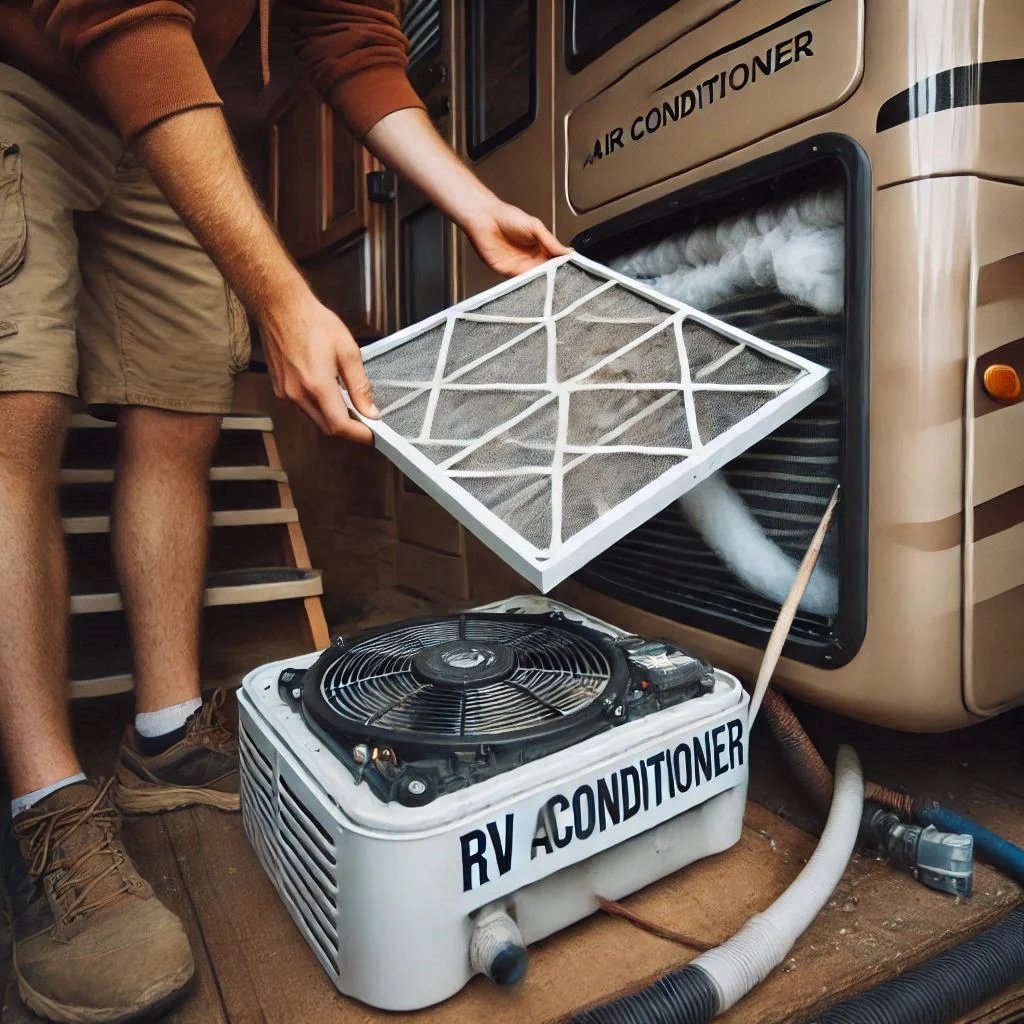
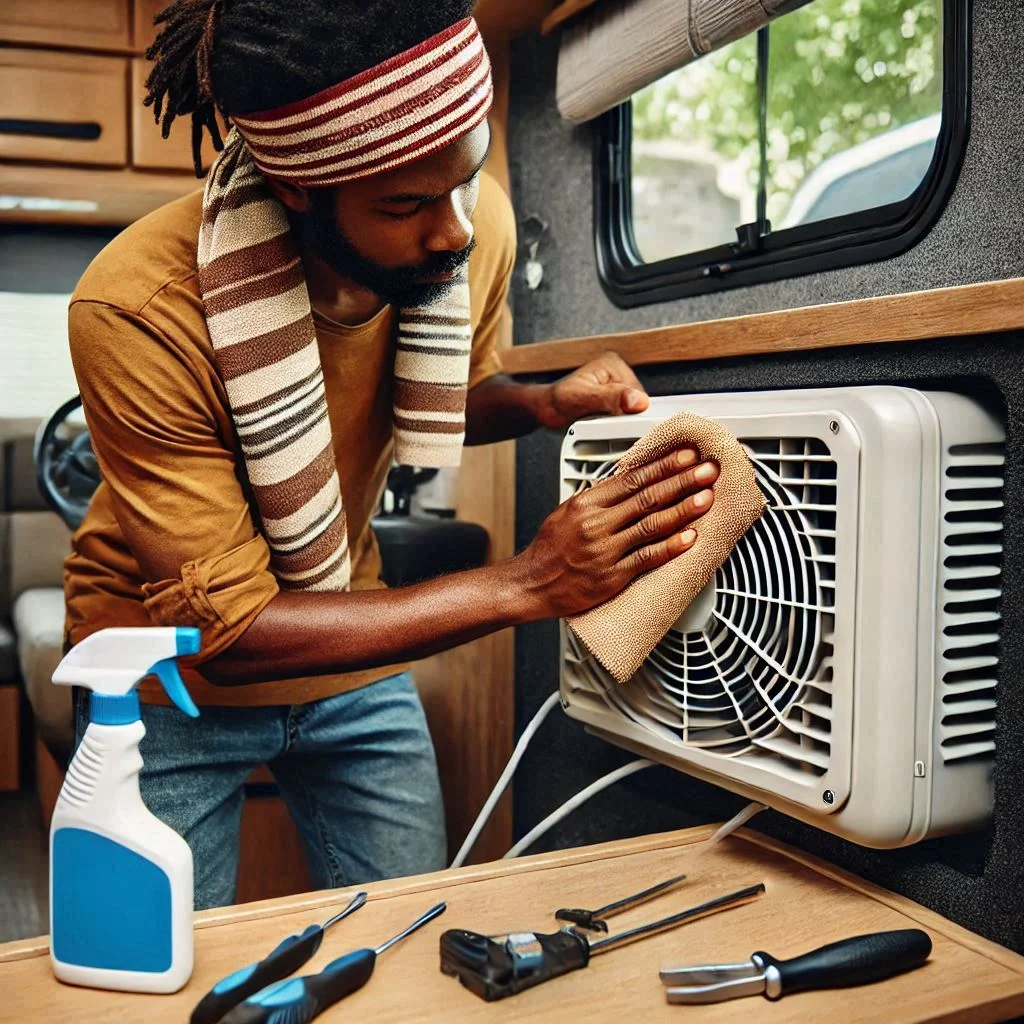
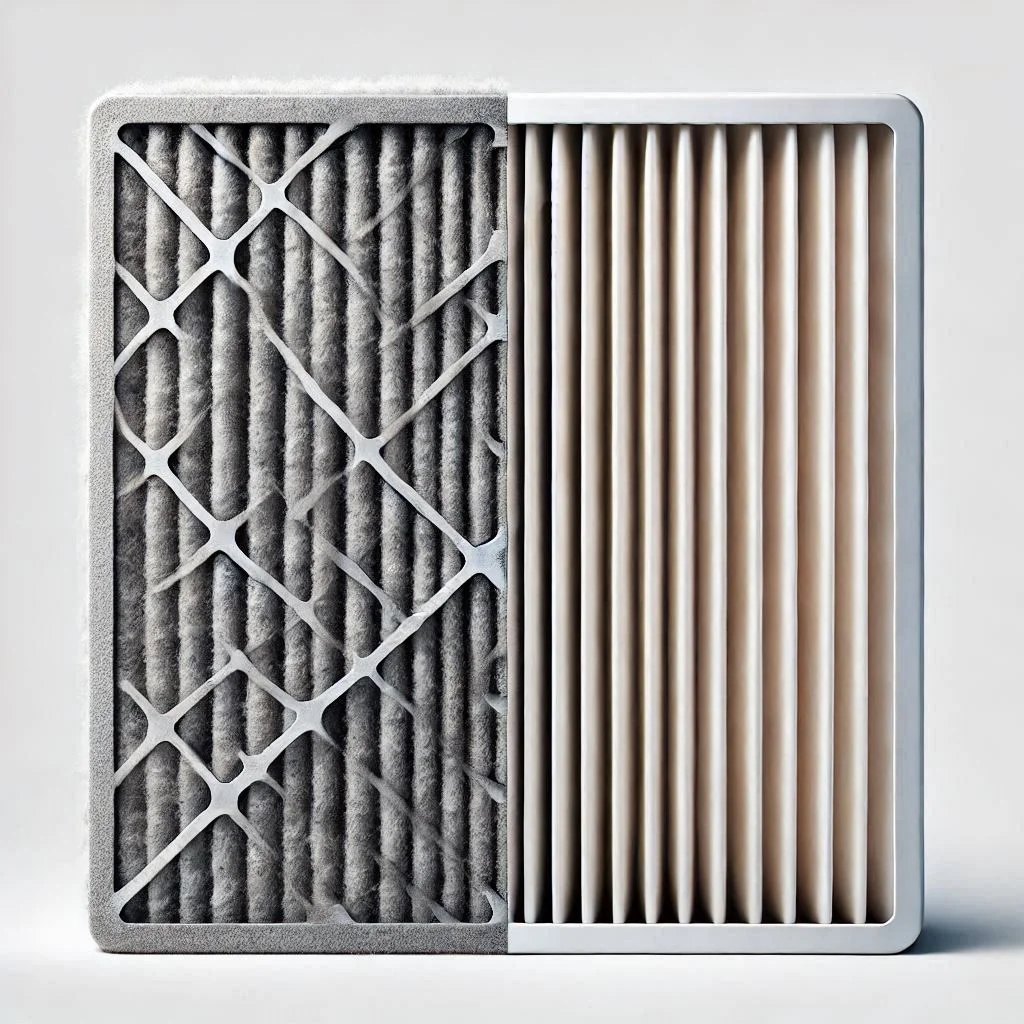
Remove and Clean the Air Filter Properly
The air filter is the first line of defense against dust and debris. Cleaning it regularly enhances airflow and cooling efficiency.
- Locate and Remove the Filter:
- Open the front panel of the air conditioner to access the filter.
- Carefully slide or lift the filter out to avoid tearing it.
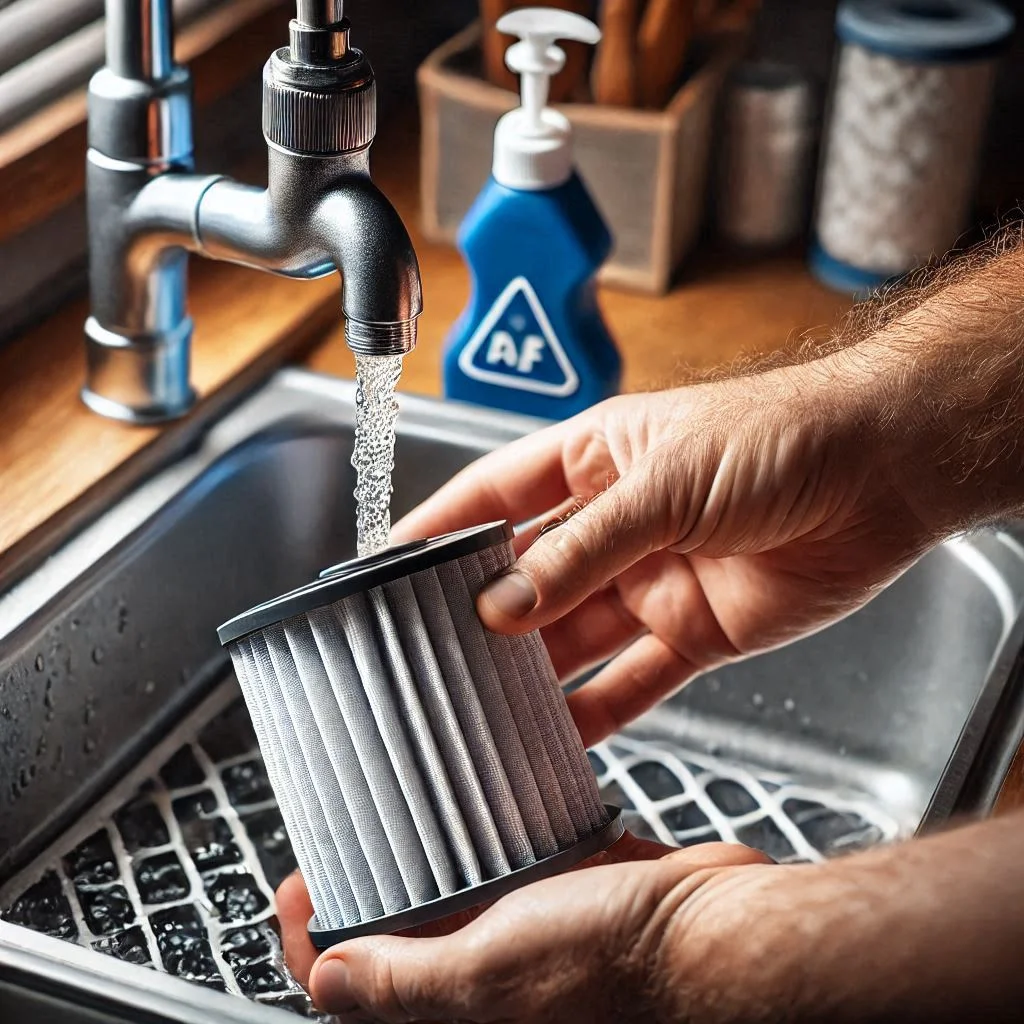
- Clean the Filter:
- Rinse the filter under running lukewarm water to remove dirt.
- For stubborn grime, use a mild detergent and a soft brush to gently scrub.
- Allow the filter to air dry completely before reinserting it.
Pro Tip: Replace the filter every 3-6 months if it’s damaged or excessively clogged.
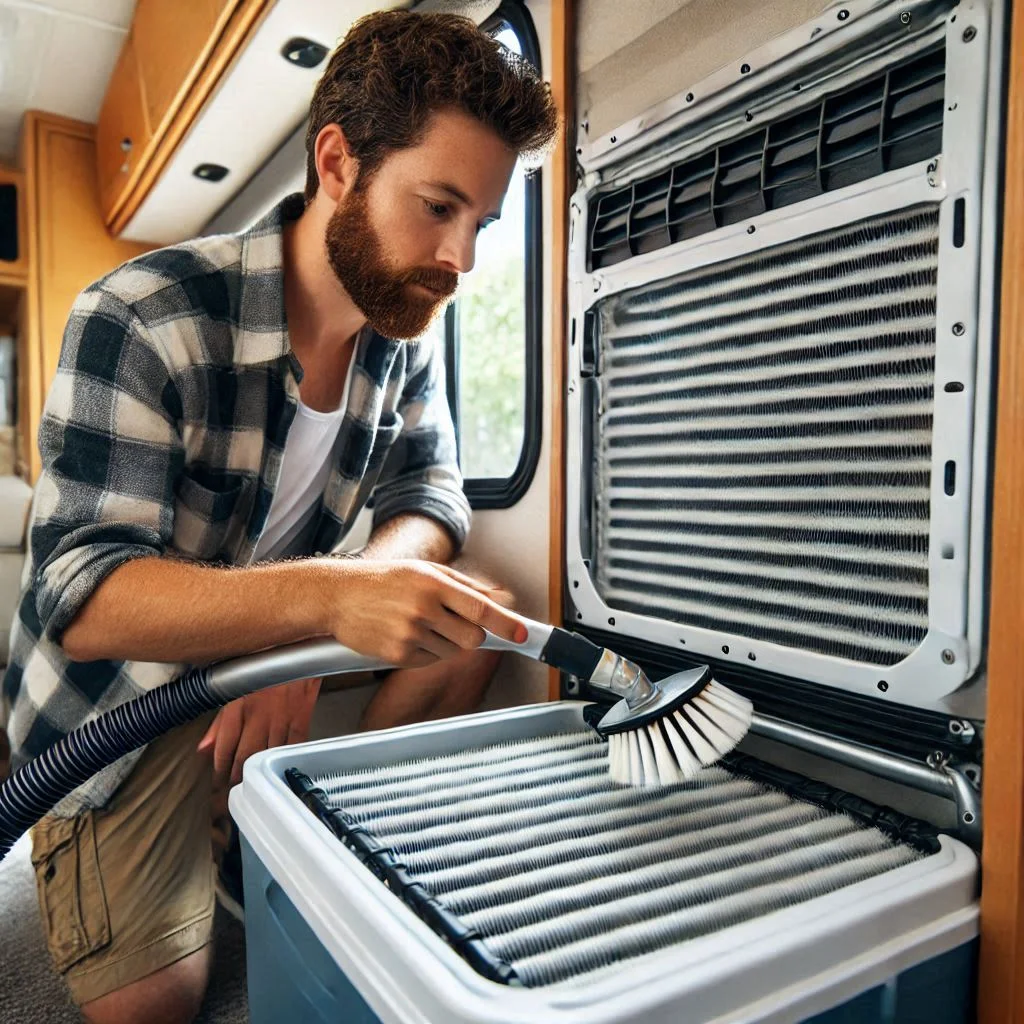
Inspect and Clean the Evaporator and Condenser Coils
Dirty coils reduce cooling efficiency and can lead to higher energy consumption. Cleaning them regularly is essential.
- Access the Coils:
- Remove the shroud or cover of the air conditioner using a screwdriver.
- Locate the evaporator (inside) and condenser (outside) coils.
- Clean the Coils:
- Use a vacuum cleaner with a soft brush attachment to remove dust and debris.
- For stuck dirt, spray a coil cleaner or a mix of water and mild detergent.
- Gently wipe the coils with a microfiber cloth or use a fin comb to straighten bent fins.
Pro Tip: Avoid using excessive water or harsh chemicals to prevent damage.
Safely Clean the Shroud and Exterior Components
The shroud protects the internal components of your air conditioner and needs regular cleaning to prevent dirt buildup.
- Remove the Shroud:
- Unscrew and lift the shroud carefully, keeping an eye on any attached wires or parts.
- Clean the Shroud:
- Wipe it down with a damp cloth or a non-abrasive cleaner.
- For heavier grime, scrub gently with a soft sponge.
- Inspect for Damage:
- Check for cracks, holes, or loose components on the shroud. Replace if necessary.
Pro Tip: Regularly cleaning the shroud can prevent dirt from reaching the internal parts.
Check and Clean the Fan Blades and Surrounding Areas
Dust and debris on the fan blades can affect the airflow and make the air conditioner noisier.
- Inspect the Fan Blades:
- Check for dirt accumulation, bent blades, or other visible damage.
- Clean the Blades:
- Use a damp cloth or a small brush to remove dirt gently.
- Avoid applying too much pressure to prevent bending the blades.
- Clean the Surrounding Area:
- Vacuum or wipe the area around the fan to remove any remaining debris.
Pro Tip: If you notice unusual noises from the fan, inspect it for alignment issues and tighten screws as needed.
Common Mistakes to Avoid When Cleaning Your RV Air Conditioner
Cleaning your RV air conditioner is essential for maintaining its performance, but common mistakes can lead to damage or reduced efficiency. Here’s how to avoid them.
Skipping Regular Cleaning Schedules
Neglecting regular maintenance is one of the biggest mistakes RV owners make.
- Impact of Skipping Cleaning:
- Dust and debris accumulate in the filter and coils, reducing airflow and cooling efficiency.
- Over time, this buildup forces the unit to work harder, increasing energy consumption and wear.
- Recommended Cleaning Frequency:
- Clean the air filter every 2-4 weeks, depending on usage and environment.
- Schedule a comprehensive cleaning for the coils, fan, and shroud every season.
Pro Tip: Set reminders to ensure consistent cleaning and maintenance.
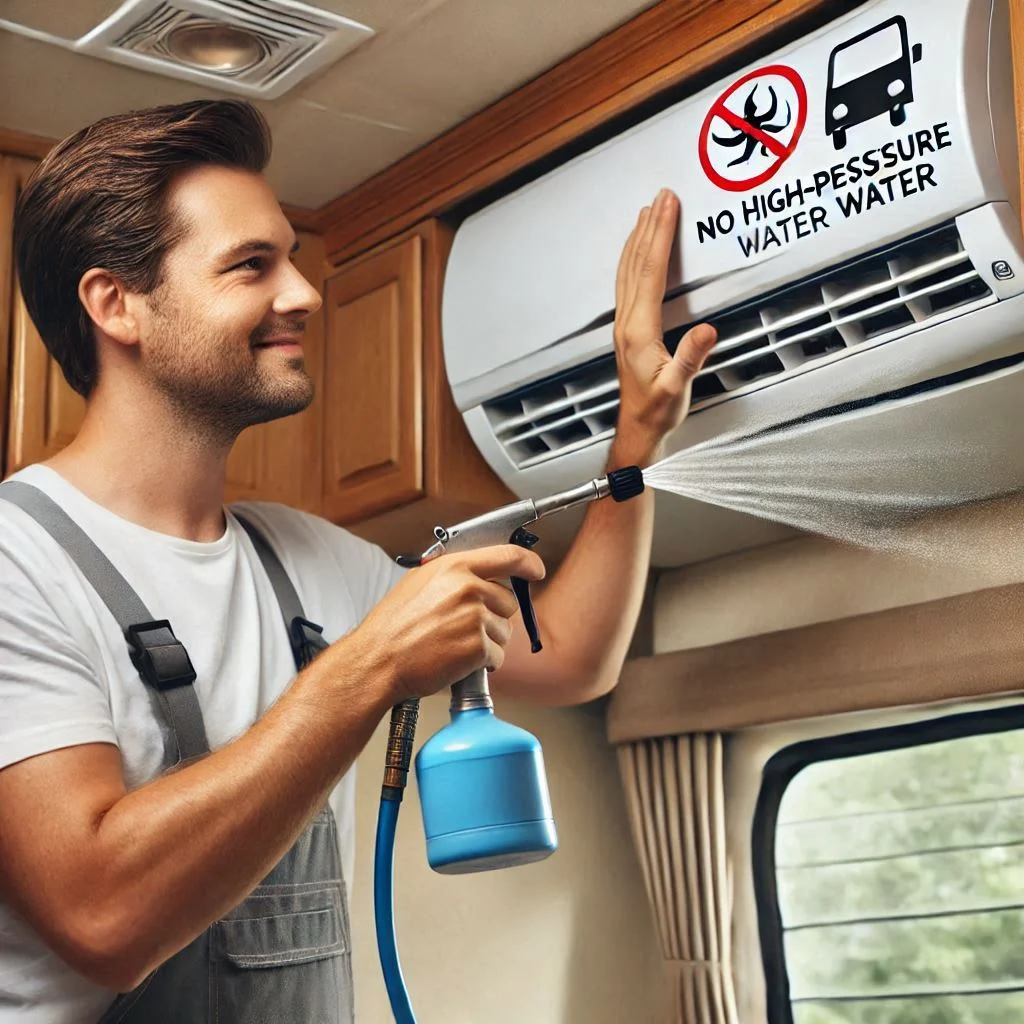
Using Harsh Chemicals or High-Pressure Water
Improper cleaning techniques can do more harm than good.
- Why Harsh Chemicals are Harmful:
- Strong chemicals can corrode delicate components like the coils and fan blades.
- Residue from these chemicals may affect air quality inside the RV.
- Dangers of High-Pressure Water:
- High-pressure water can bend the condenser fins and damage the internal electronics.
- It may also lead to water seeping into the unit, causing electrical issues.
- Safe Cleaning Alternatives:
- Use a mild detergent mixed with water and a soft brush for cleaning.
- Opt for low-pressure or handheld sprayers for rinsing the coils and shroud.
Pro Tip: Always read the cleaning product labels to ensure compatibility with your air conditioner.
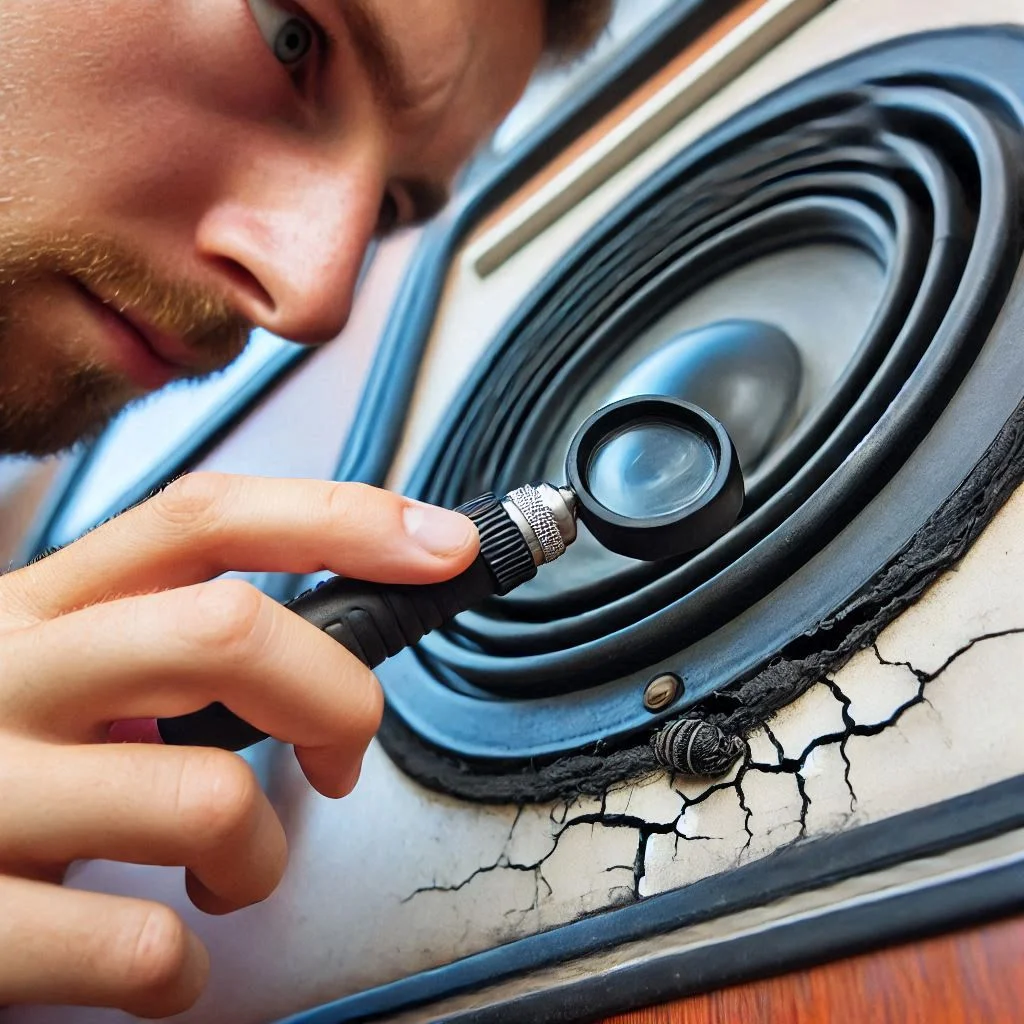
Failing to Inspect the Seal on the Unit’s Exterior
The exterior seal of your air conditioner plays a crucial role in preventing leaks and maintaining efficiency.
- Why Seal Inspection Matters:
- Cracked or damaged seals can allow water or debris to enter the unit, leading to rust and reduced performance.
- A compromised seal can also affect the insulation, reducing the unit’s cooling capacity.
- How to Inspect and Maintain the Seal:
- Check for cracks, gaps, or wear on the rubber gasket around the unit.
- Clean the seal using a damp cloth and apply a silicone-based lubricant to keep it flexible.
- Replace the seal if you notice significant damage or degradation.
Pro Tip: Include seal inspection in your routine cleaning schedule to avoid costly repairs.
Maintaining Your RV Air Conditioner for Long-Term Use
Proper maintenance is essential to keep your RV air conditioner running efficiently and extend its lifespan. Follow these detailed guidelines for long-term care.
Regularly Inspect and Replace the Air Filter
The air filter is the first barrier against dust and debris, and its condition significantly impacts the performance of your air conditioner.
- Why Regular Inspection is Crucial:
- A clogged air filter restricts airflow, causing the unit to work harder and consume more energy.
- Dirty filters can also reduce indoor air quality, potentially leading to health issues.
- How to Inspect the Air Filter:
- Open the front panel of the air conditioner to access the filter.
- Check for visible dirt, dust, or damage.
- When to Replace the Filter:
- Replace disposable filters every 3-6 months, or sooner if heavily used.
- For reusable filters, clean them every 2-4 weeks and replace them if they show signs of wear.
Pro Tip: Always keep a spare air filter on hand for emergencies.
Monitor and Clean the Shroud to Prevent Dirt Buildup
The shroud protects the internal components of your air conditioner and ensures proper airflow. Keeping it clean is vital for maintaining efficiency.
- Inspecting the Shroud:
- Check for accumulated dirt, leaves, or debris on the exterior.
- Look for cracks or other signs of damage that may compromise its effectiveness.
- How to Clean the Shroud:
- Remove the shroud by unscrewing it carefully.
- Wash it with a mild detergent and a soft sponge to remove dirt.
- Rinse thoroughly and let it air dry before reattaching.
- Preventing Dirt Buildup:
- Cover the unit when not in use to protect it from debris.
- Inspect and clean the shroud before starting the air conditioner after long periods of inactivity.
Pro Tip: Regularly clean the shroud during seasonal maintenance to avoid excessive dirt buildup.

Ensure the Unit’s Exterior Seal is Intact to Avoid Leaks
A well-maintained exterior seal prevents water and dirt from entering the unit, protecting its internal components.
- Why the Seal Matters:
- A damaged seal can lead to leaks, rust, and reduced cooling efficiency.
- It also affects the insulation, making the unit less effective.
- How to Check the Seal:
- Inspect the rubber gasket around the unit for cracks, gaps, or wear.
- Test for air leaks by feeling for drafts around the seal while the unit is running.
- Maintaining the Seal:
- Clean the seal with a damp cloth and apply a silicone-based conditioner to keep it flexible.
- Replace the seal if it shows significant damage or aging.
Pro Tip: Include seal inspection as part of your seasonal maintenance routine to prevent costly repairs.

Safety Tips and Upgrades for RV Air Conditioners
Ensuring the safety and efficiency of your RV air conditioner involves following best practices when handling electrical components and upgrading your unit for better performance. Here’s a detailed guide to help you.
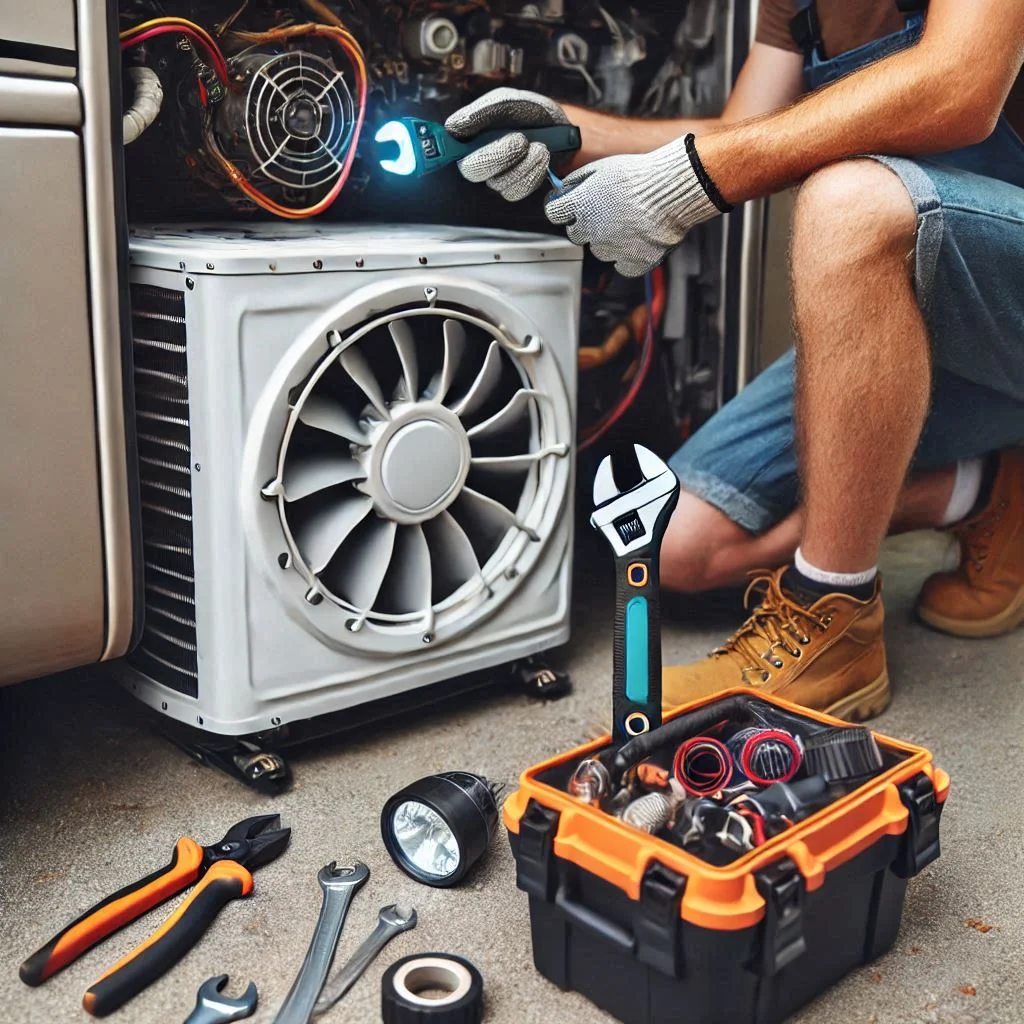
Follow Safety Precautions When Handling Electrical Components
Working with electrical systems in your RV air conditioner requires caution to prevent accidents or damage.
- Power Off Before Maintenance:
- Always turn off the air conditioner and unplug it from the power source before starting any work.
- Use a voltage tester to confirm that no electrical current is flowing.
- Wear Protective Gear:
- Use insulated gloves and non-slip shoes when working with electrical components.
- Keep a first aid kit nearby in case of minor injuries.
- Inspect Wires and Connections:
- Check for frayed wires, loose connections, or signs of corrosion.
- Replace any damaged parts immediately to avoid short circuits or malfunctions.
Pro Tip: If you’re unsure about handling electrical components, consult a professional technician.

Troubleshoot Common Issues Before Starting the Cleaning Process
Identifying and resolving potential issues beforehand saves time and prevents further damage.
- Check for Unusual Noises:
- Listen for grinding, squealing, or rattling sounds, which may indicate a problem with the fan or motor.
- Inspect for Leaks:
- Look for water dripping from the unit, a sign of clogged drainage or damaged seals.
- Test Cooling Efficiency:
- Turn on the unit and measure the air temperature before and after cleaning.
- Reduced cooling may indicate dirty coils or a refrigerant issue.
- Resolve Minor Problems:
- Tighten loose screws, clean clogged drains, and adjust bent fan blades as needed.
Pro Tip: Document any recurring issues to share with a professional if further repair is required.
Steps to Upgrade Your RV Air Conditioner for Better Efficiency
Upgrading your RV air conditioner can enhance its cooling capacity, energy efficiency, and overall reliability.
- Consider an Energy-Efficient Model:
- Look for units with high EER (Energy Efficiency Ratio) ratings and features like programmable thermostats.
- Opt for models designed for quieter operation and lower power consumption.
- Add Smart Features:
- Install a smart thermostat for remote control and better temperature regulation.
- Use apps to monitor energy usage and optimize cooling performance.
- Improve Insulation:
- Enhance your RV’s insulation to reduce heat transfer and ease the workload on the air conditioner.
- Use reflective window covers or insulated shades to block external heat.
- Upgrade Ventilation:
- Add or replace roof vents for improved airflow inside the RV.
- Install vent fans to assist in evenly distributing cooled air.
Pro Tip: Compare different models and upgrades to find a solution that fits your budget and cooling needs.

Frequently Asked Questions About RV Air Conditioners
Addressing common questions about RV air conditioners can help users troubleshoot issues, make informed decisions, and maximize the efficiency of their units. Below are detailed responses to key questions.
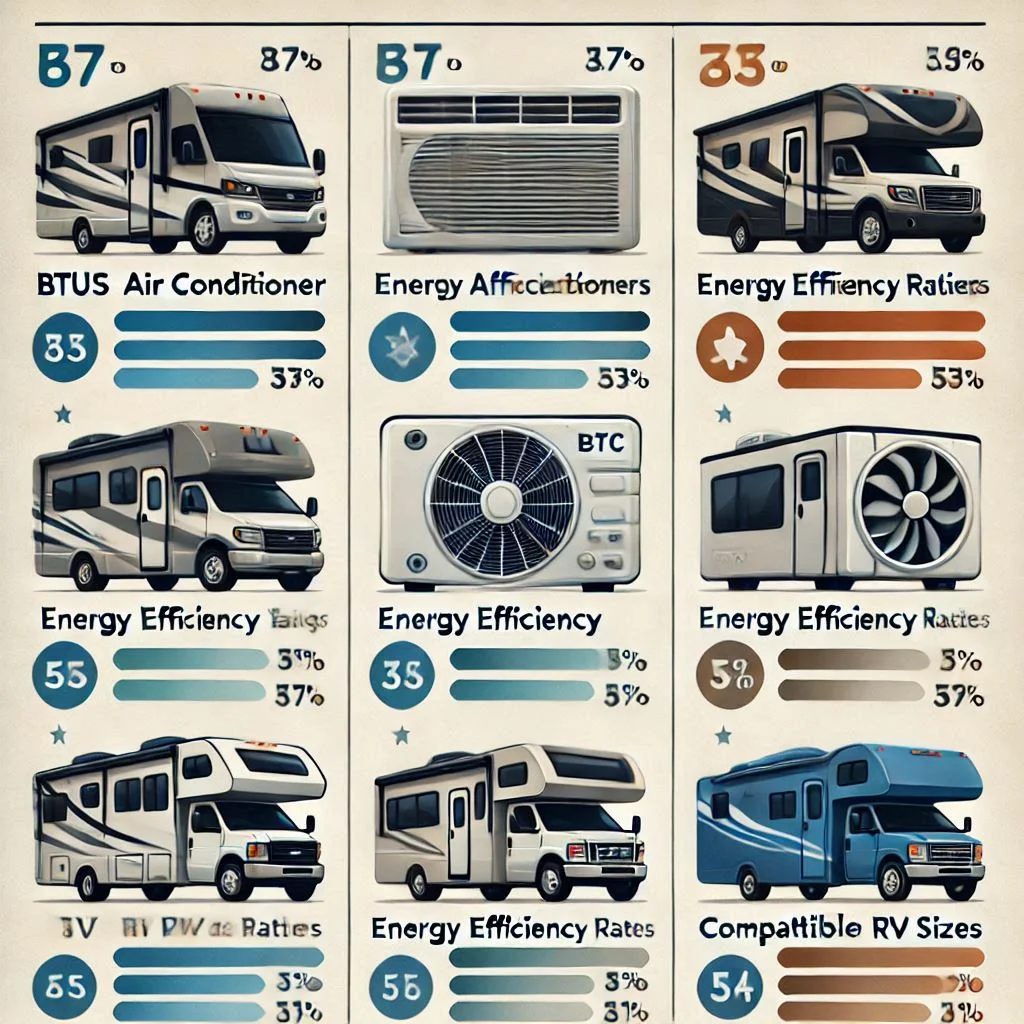
1. How Do I Select the Right RV Air Conditioner?
Choosing the right air conditioner depends on factors like RV size, climate, and energy needs.
- Consider Your RV Size:
- Measure your RV’s interior space to determine the required cooling capacity (BTUs).
- A smaller RV might need a 5,000-8,000 BTU unit, while larger RVs may require 13,500-15,000 BTUs.
- Evaluate Energy Efficiency:
- Look for units with a high Energy Efficiency Ratio (EER) to save on energy costs.
- Models with Energy Star ratings are ideal for eco-conscious users.
- Check Compatibility:
- Ensure the unit fits the available roof space and works with your RV’s power system.
- Some units are specifically designed for ducted or ductless setups.
Pro Tip: Portable RV air conditioners are a good choice for temporary or flexible cooling needs.
2. How Can I Troubleshoot Common RV Air Conditioner Issues?
Troubleshooting minor issues can prevent unnecessary repair costs and downtime.
- Unit Not Cooling Properly:
- Solution: Check and clean the air filter and coils. Low refrigerant levels may also be a cause; consult a technician for recharging.
- Unusual Noises:
- Solution: Inspect the fan blades for obstructions or damage. Tighten any loose screws or components.
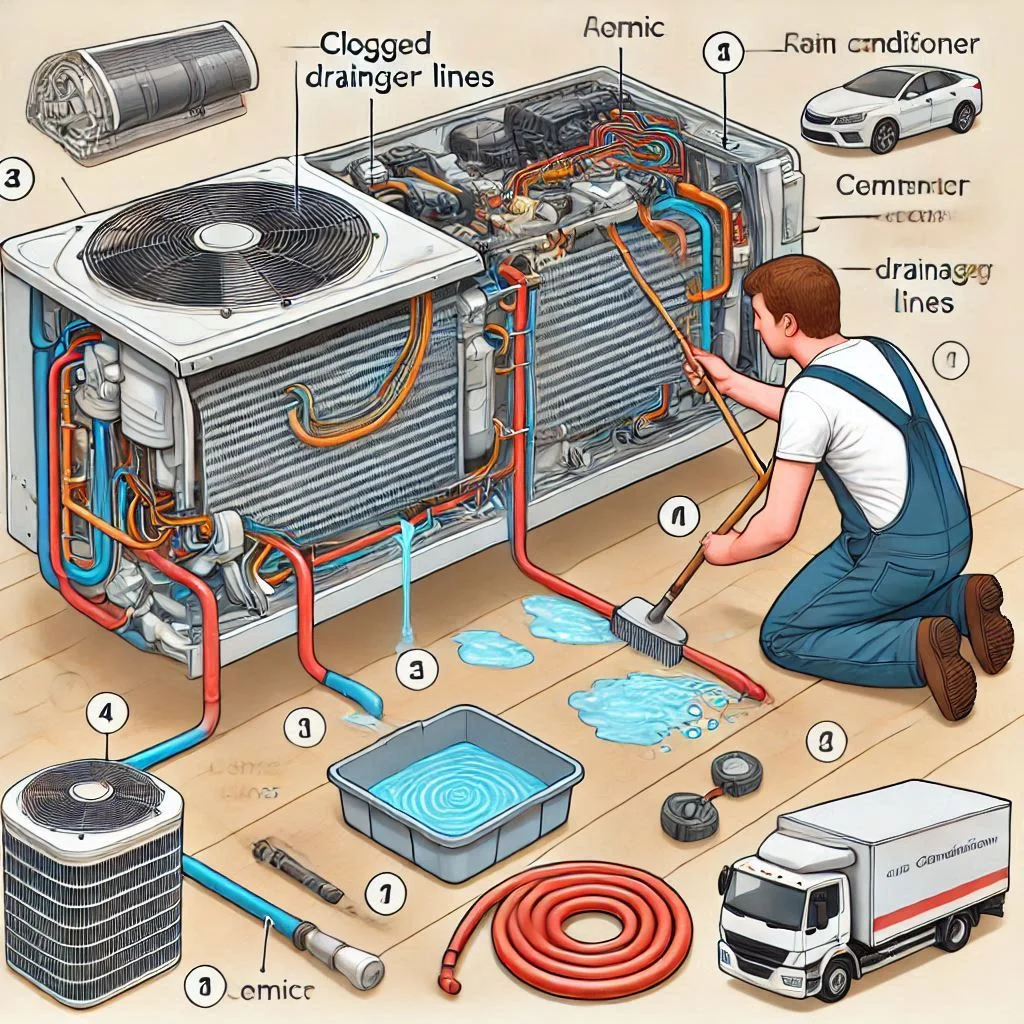
- Water Leaks:
- Solution: Clear clogged drainage lines and inspect the seal for wear or cracks.
- Unit Won’t Turn On:
- Solution: Verify that the power source is functional and check for tripped circuit breakers.
Pro Tip: Keep a troubleshooting log to track recurring problems and their solutions.
3. What Are the Steps for Upgrading an RV Air Conditioner?
Upgrading enhances performance, reduces energy consumption, and adds modern features.
- Choose an Energy-Efficient Model:
- Opt for a unit with advanced features like inverter technology and smart thermostats.
- Plan Installation:
- Remove the old unit carefully and ensure the new one fits securely in the existing space.
- Upgrade Electrical Components:
- Check if the current power system supports the upgraded unit’s requirements. Install additional breakers or converters if needed.
Pro Tip: Professional installation is recommended for complex upgrades.
4. What Are the Safety Considerations When Working With RV Air Conditioners?
Safety is paramount when handling electrical or mechanical components.
- Turn Off Power:
- Always disconnect the unit from the power supply before starting maintenance or repairs.
- Use Appropriate Tools:
- Utilize insulated tools and wear protective gear, such as gloves and safety glasses.
- Avoid Wet Conditions:
- Never perform maintenance in damp or rainy weather to prevent electrical shocks.
- Read the Manual:
- Follow the manufacturer’s guidelines to avoid voiding the warranty or causing damage.
Pro Tip: Store your RV air conditioner’s manual for easy reference during maintenance.
5. What Are the Common Problems With RV Air Conditioners?
Understanding common problems can help in timely diagnosis and repairs.
- Frequent Cycling On and Off:
- May indicate thermostat issues or a dirty air filter.
- Foul Odors:
- Usually caused by mold or bacteria buildup in the unit. Clean the coils and filters to resolve this.
- Low Airflow:
- Clogged filters or obstructed ducts can restrict airflow, requiring cleaning or replacement.
- Freezing Coils:
- Check for restricted airflow or low refrigerant levels, which can lead to ice buildup.
Pro Tip: Schedule routine maintenance to prevent these problems and maintain optimal performance.
Conclusion
Maintaining your RV air conditioner is essential for ensuring a comfortable and efficient travel experience. From selecting the right unit to following proper cleaning techniques, regular inspections, and timely upgrades, these steps are key to prolonging the life of your system and enhancing its performance. By avoiding common mistakes, adhering to safety precautions, and addressing minor issues early, you can prevent costly repairs and enjoy a hassle-free journey. Remember, a well-maintained air conditioner not only keeps you cool on the road but also saves energy and reduces operational costs. Apply these tips and make your RV adventures truly enjoyable and worry-free. Safe travels!