
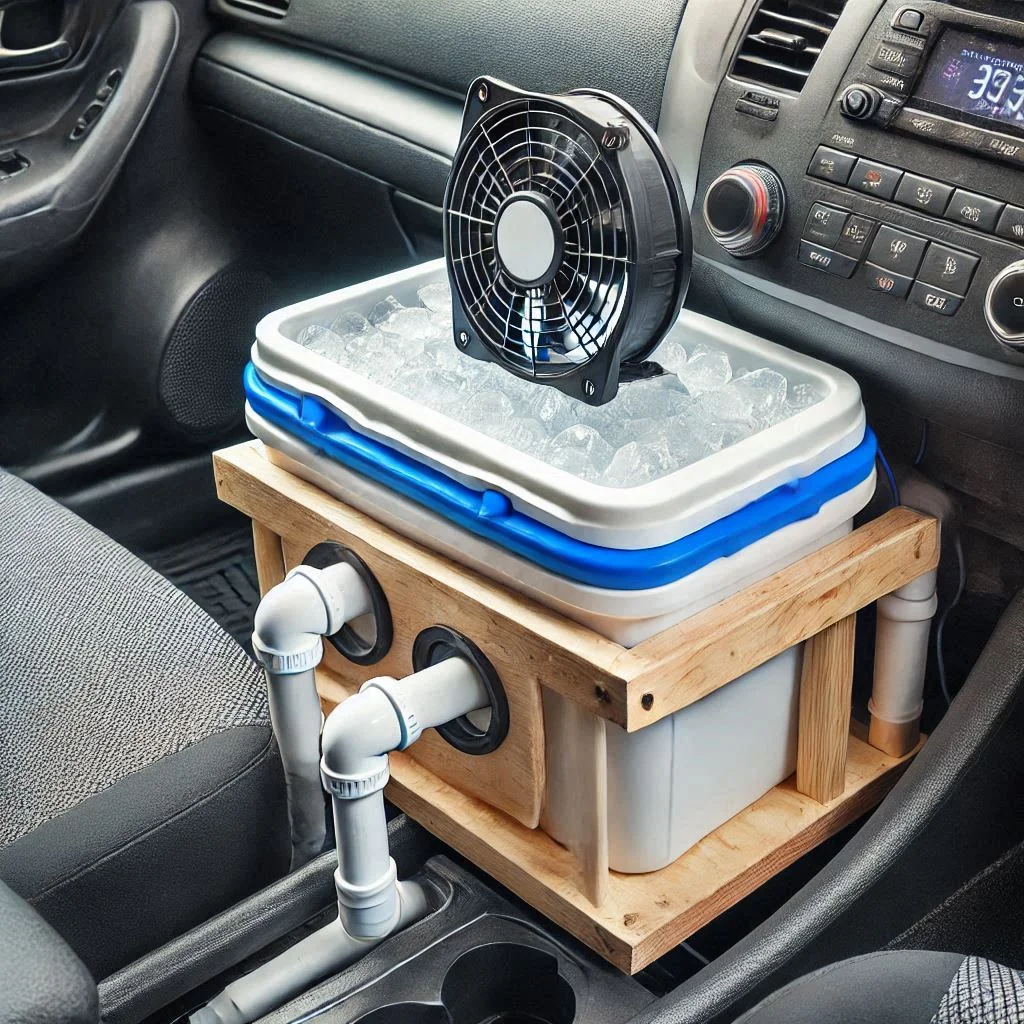
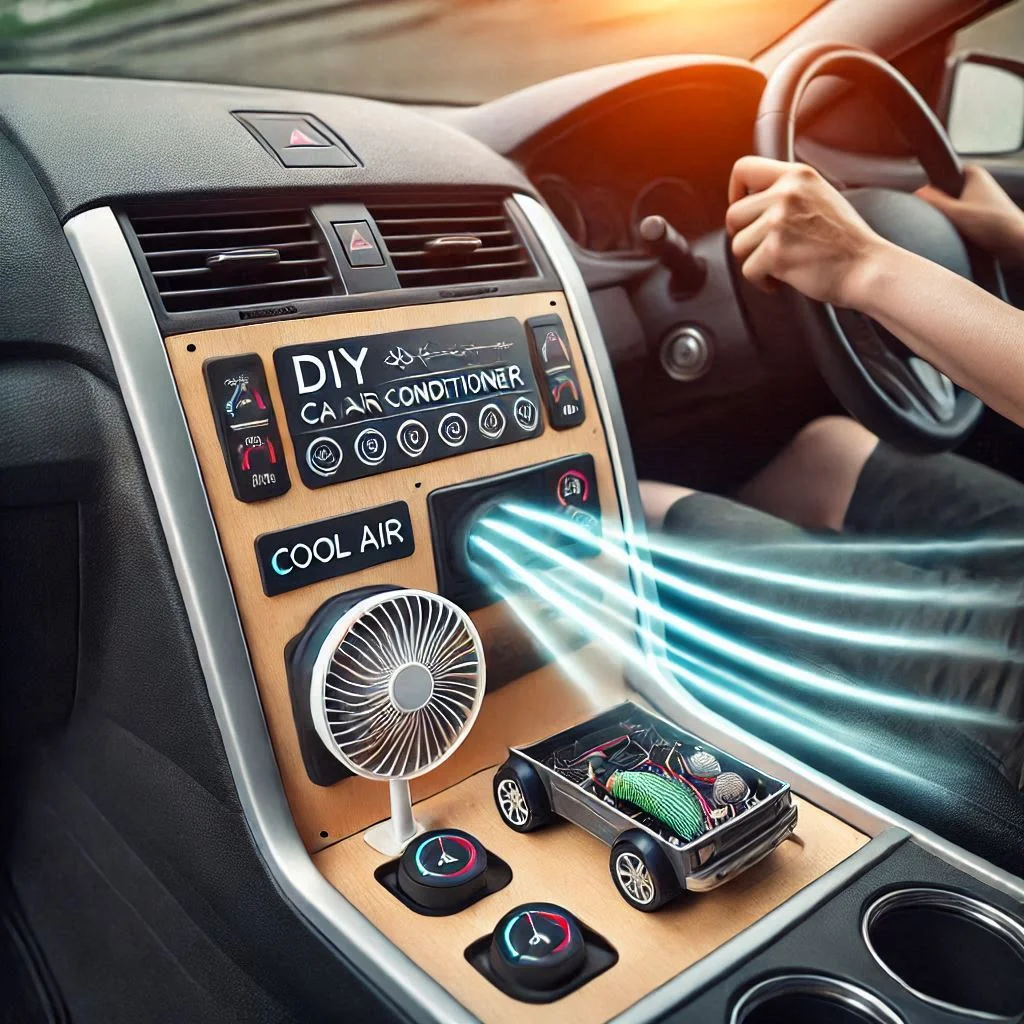
What is a DIY Car Air Conditioner?
A DIY car air conditioner is a homemade cooling system designed to provide relief during hot weather by using basic materials such as an ice chest, a fan, and PVC pipes. This simple innovation serves as an alternative to traditional car AC systems, delivering cool air to the vehicle’s interior without the need for complex installation or high energy consumption.
Benefits of a DIY Car Air Conditioner
- Cost-Effective Cooling Solution
One of the standout benefits of a DIY car air conditioner is its affordability. Traditional car AC repairs or installations can be expensive, but a DIY solution can be created with minimal investment, often using items already available at home. - Energy Efficiency
A DIY car AC relies on ice and a small fan powered by a rechargeable battery or a car’s USB port. This setup consumes significantly less energy than a factory-installed AC system, reducing the strain on your car’s engine and improving fuel efficiency. - Portability and Flexibility
Unlike built-in air conditioning systems, a DIY car AC can be easily moved, modified, or replaced. This flexibility makes it an excellent option for older vehicles or as a temporary cooling solution during emergencies. - Environmentally Friendly
Traditional air conditioning systems use refrigerants, which can be harmful to the environment. A DIY car AC eliminates the need for these chemicals, relying instead on natural cooling methods like ice or water.
Why Consider Making a DIY Car Air Conditioner for Your Car?
- Combat Extreme Heat
Summers can be unbearable, especially during long car rides or traffic jams. A DIY car air conditioner offers immediate relief, ensuring a more comfortable driving experience. - Avoid Expensive Repairs
For vehicles with malfunctioning AC systems, repairing or replacing the unit can be costly. A DIY solution allows you to bypass these expenses while still enjoying cool air. - Perfect for Older Vehicles
Older cars often lack advanced cooling systems. A DIY air conditioner bridges this gap, offering an affordable alternative for owners of vintage or budget-friendly vehicles. - Fun and Engaging Project
Building a DIY car AC is a rewarding activity for DIY enthusiasts. It’s an opportunity to unleash creativity, learn new skills, and customize a cooling solution tailored to your specific needs.
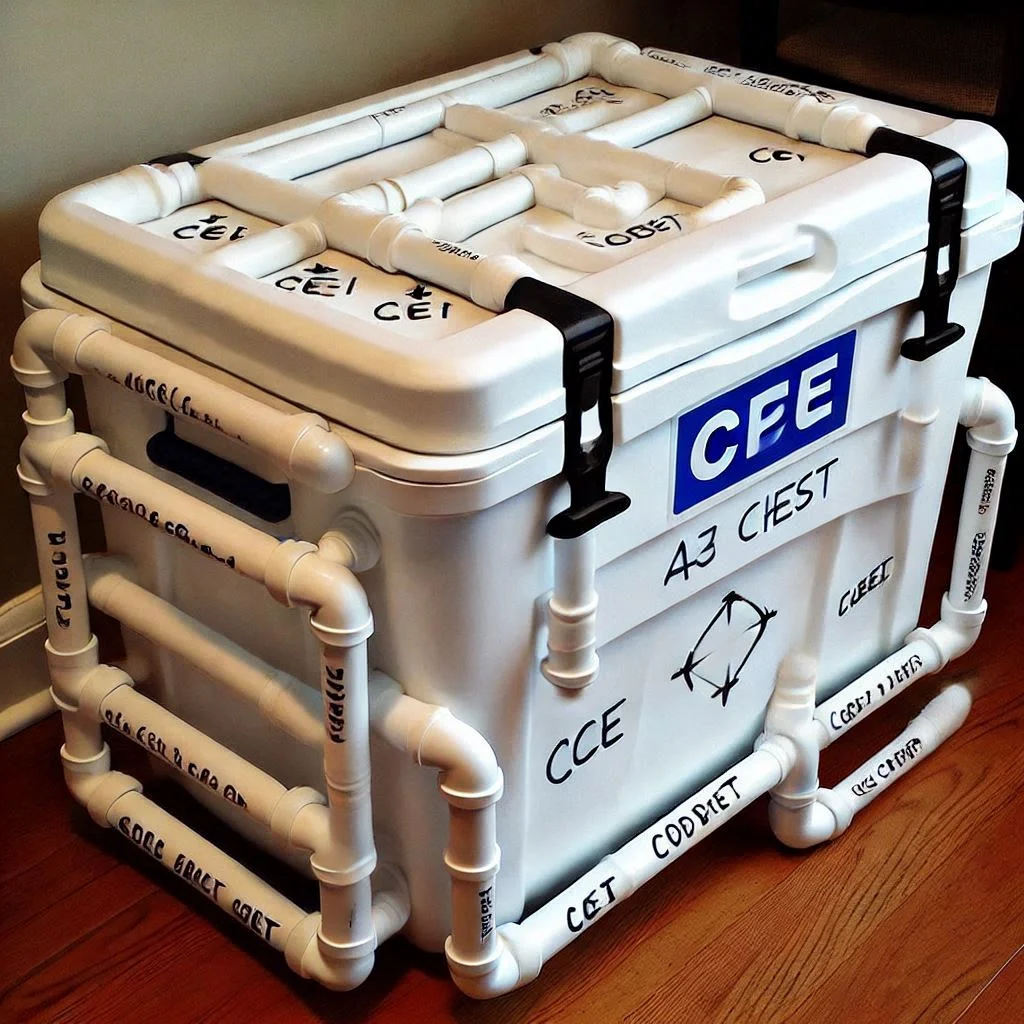
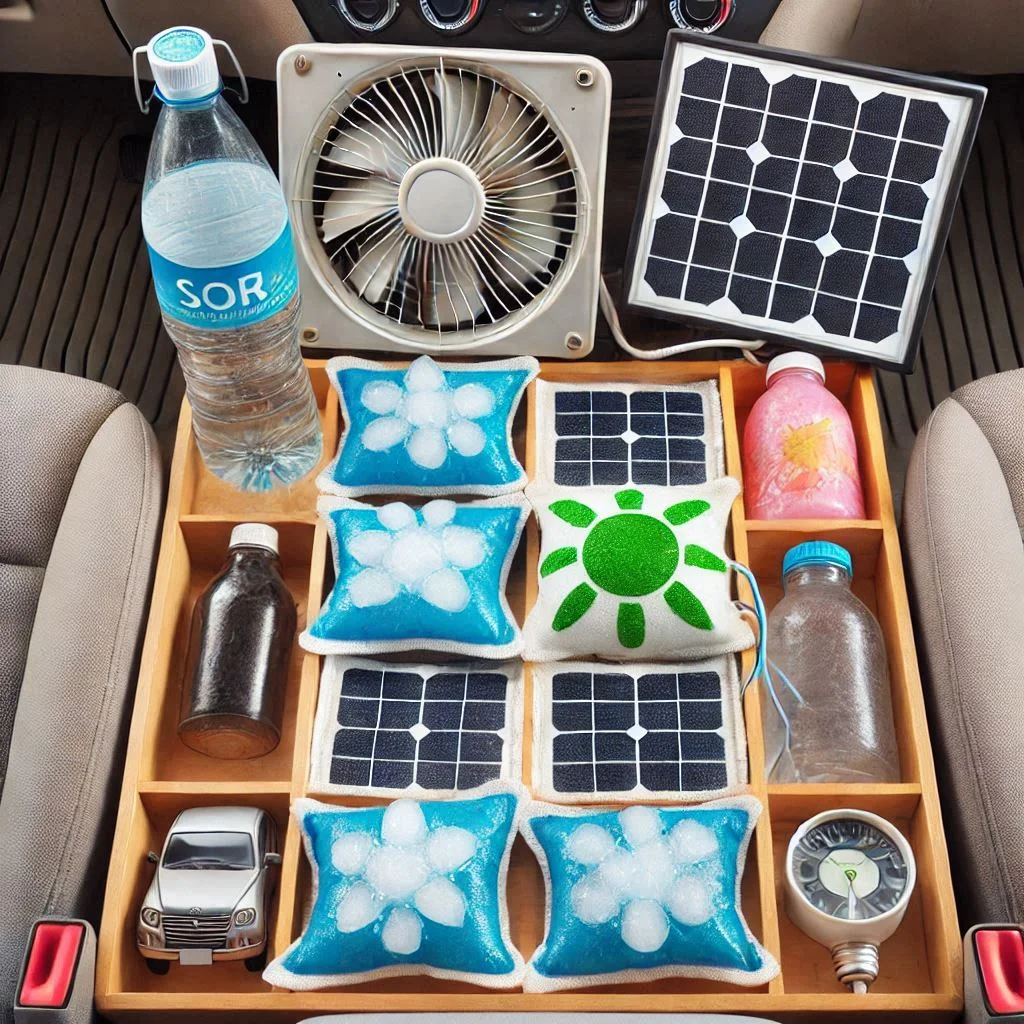
Materials Needed for Your DIY Car Air Conditioner
Creating a DIY car air conditioner is a straightforward project that requires only a few materials. Here’s a comprehensive list of everything you’ll need, along with insights into how to source these materials affordably.
List of Materials Required
-
- Features to Look For: Compact size, strong insulation, and a tight-fitting lid to minimize heat exchange.
- Best Options: Portable coolers or styrofoam ice boxes available at hardware stores or online.
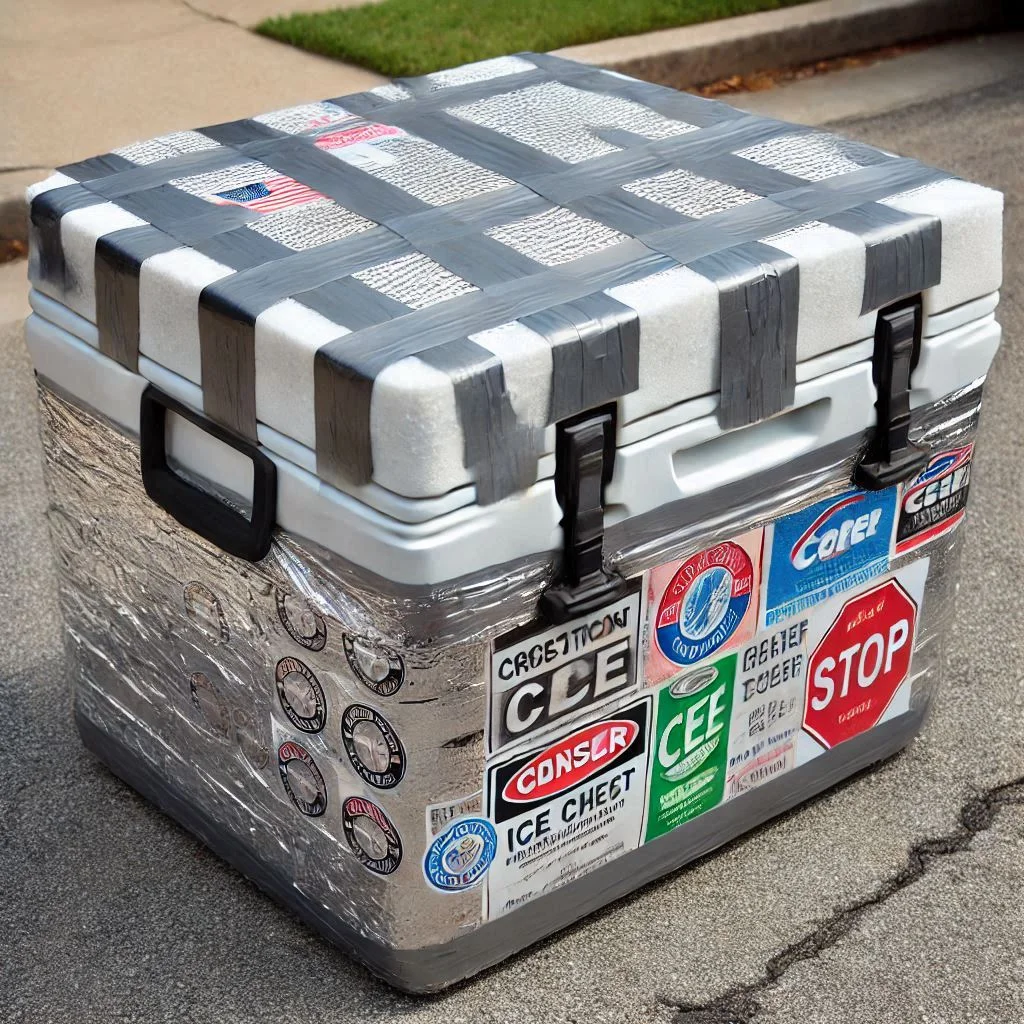
- Pro Tip: Repurpose an old cooler if available to save costs.Ice Chest or Cooler
The ice chest or cooler serves as the primary body of the DIY air conditioner. It acts as an insulated container to store ice, preventing rapid melting and ensuring longer cooling durations.

-
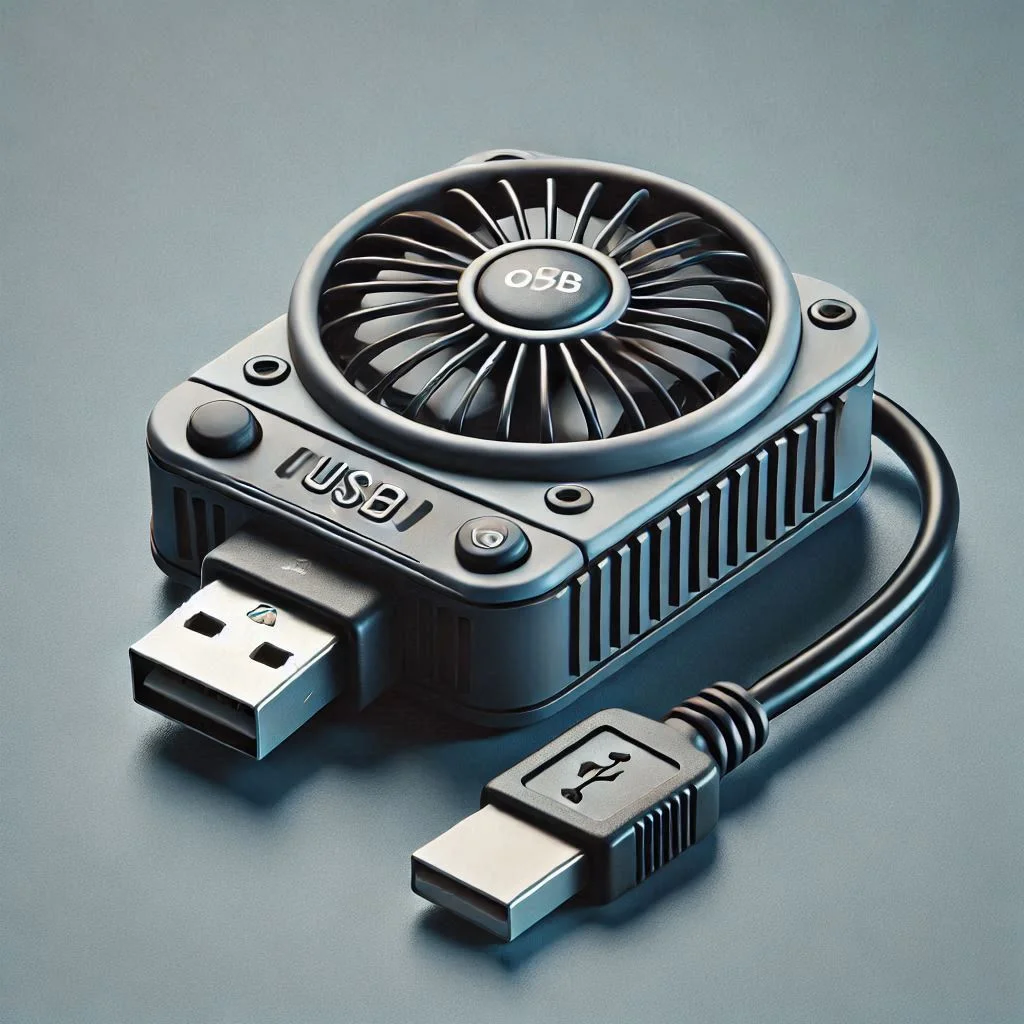
- Types of Fans: USB-powered fans, battery-operated fans, or 12-volt car fans.
- Key Features: Compact design, energy efficiency, and sufficient airflow output.
- Where to Buy: Electronics stores, online marketplaces like Amazon, or local dollar stores.Small Fan
The fan is essential for drawing cool air from inside the ice chest and directing it into the car.
-
- Specifications: Choose lightweight and flexible pipes with a diameter of around 2–3 inches for optimal airflow.
- Customizable Design: Cut the pipes to desired lengths and angles to fit your car setup.
- Where to Buy: Hardware stores or home improvement retailers like Home Depot.PVC Pipes
PVC pipes act as air ducts, channeling the cool air from inside the cooler to the car’s interior.

- Rechargeable Battery or Power Source
Powering the fan is crucial, and a reliable energy source ensures consistent cooling.- Options:
- Rechargeable battery packs (ideal for portability).
- USB power banks (if using a USB fan).
- A car’s cigarette lighter adapter (if a 12-volt fan is used).
- Considerations: Look for devices with higher mAh ratings for longer operation times.
Pro Tip: Many USB power banks come with built-in solar charging, making them an eco-friendly option.
- Options:
Budget-Friendly Options and Where to Buy Them
- Online Marketplaces: Amazon, eBay, and Walmart offer a wide range of options at competitive prices.
- Local Thrift Stores: Check for second-hand ice chests, fans, and other materials.
- Discount Retailers: Stores like Dollar Tree often stock affordable tools and materials suitable for DIY projects.
- DIY Alternatives: Instead of buying, consider upcycling household items. For example, use a sturdy plastic container in place of a cooler.
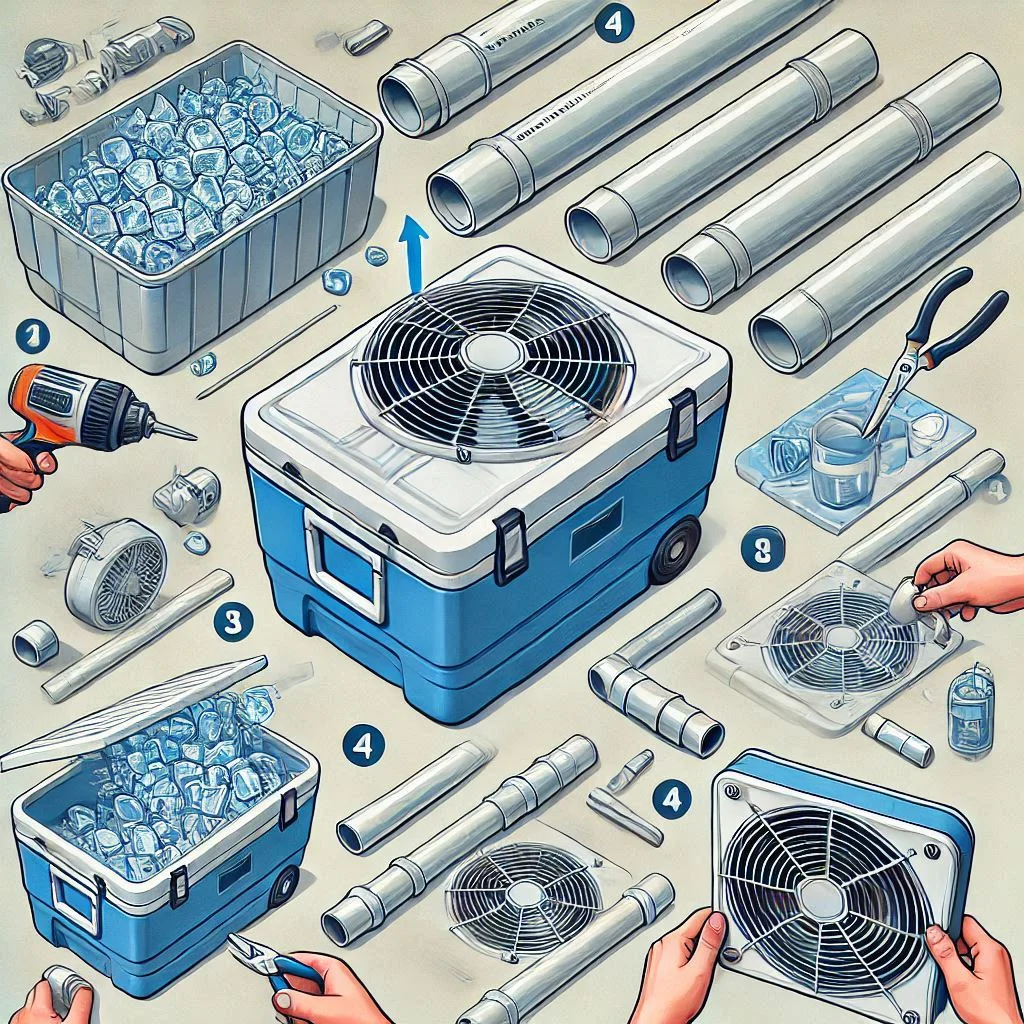
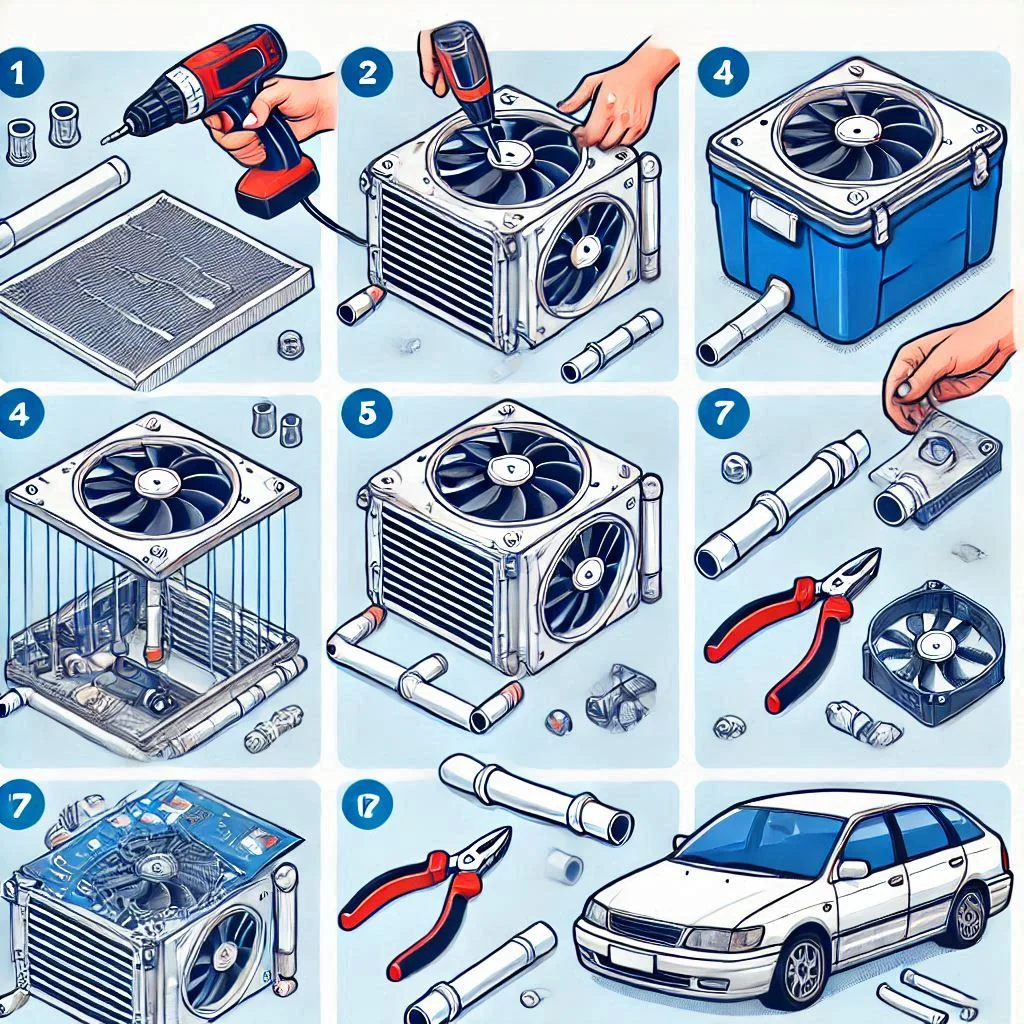
Step-by-Step Guide to Build a DIY Car Air Conditioner
Building a DIY car air conditioner is a fun and cost-effective project. Follow this detailed step-by-step guide to ensure your DIY AC is efficient and functional.
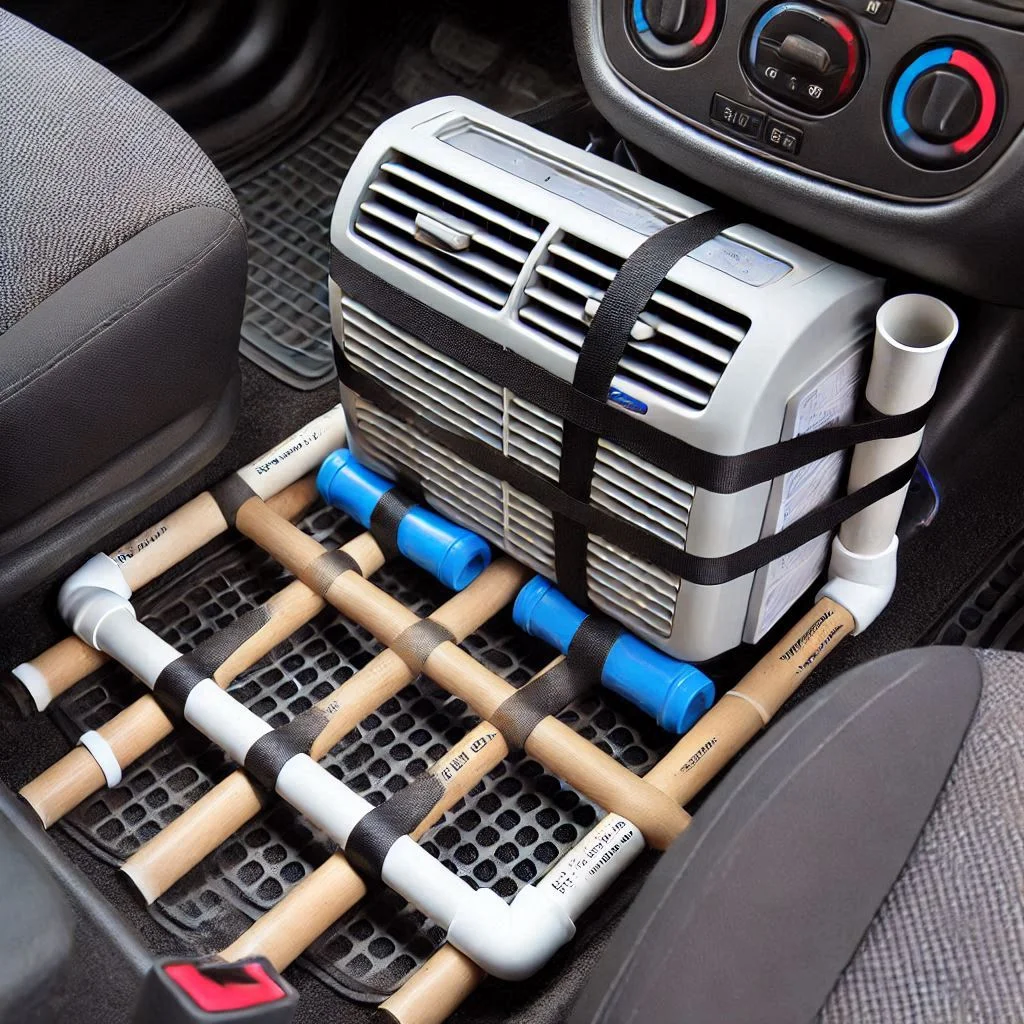
Step 1: Preparing the Ice Chest and Drilling Holes
- Select the Ice Chest
Choose a compact and well-insulated ice chest. Ensure the lid fits tightly to minimize heat exchange. - Mark the Drilling Points
- Use a marker to outline the spots where the fan and PVC pipes will be installed.
- Position the fan on the lid for optimal airflow and the PVC pipes on the side or top to channel cool air.
- Drill the Holes
- Use a hole saw or drill to create openings. Ensure the holes match the fan’s diameter and the PVC pipes for a snug fit.
- Smooth the edges with sandpaper to prevent damage or leaks.

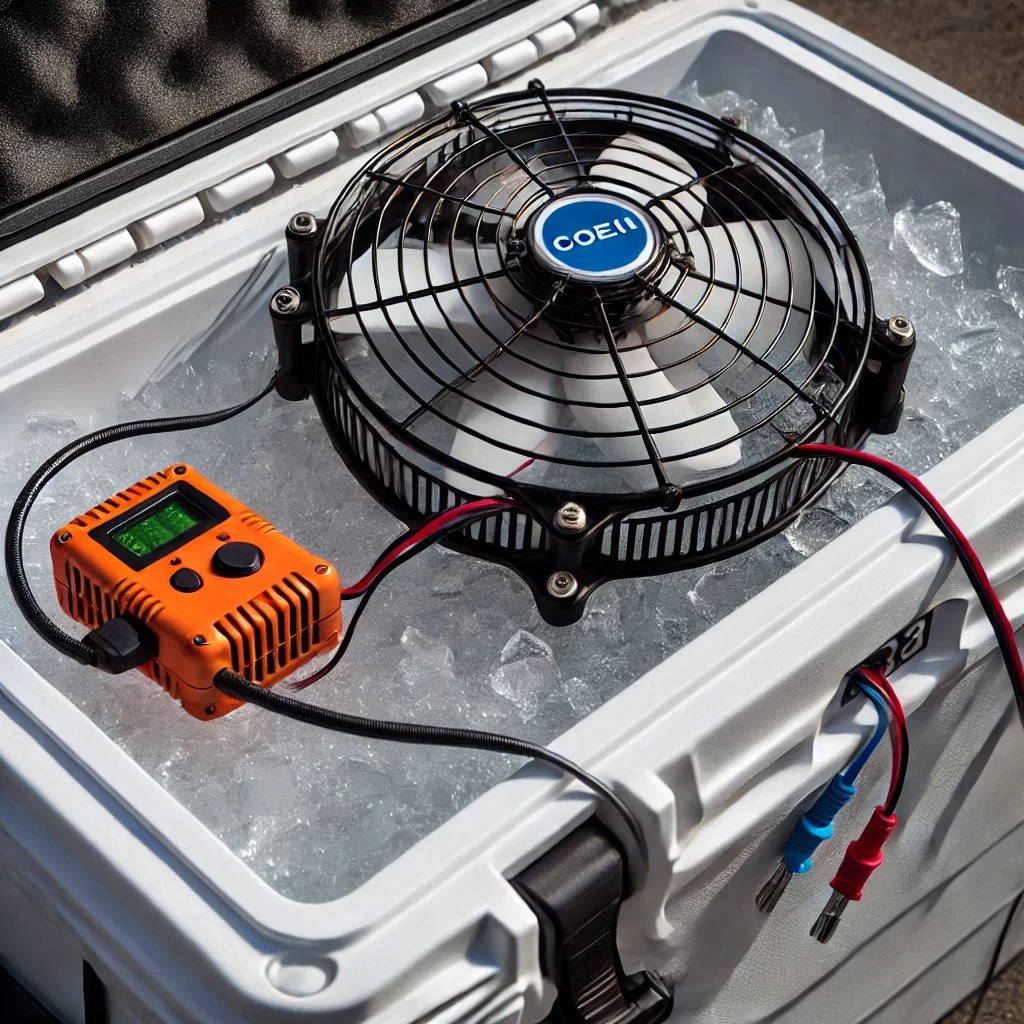
Step 2: Installing the Fan and Connecting it to the Power Source
- Position the Fan
- Place the fan over the drilled hole in the lid, ensuring it fits securely.
- Use screws or strong adhesive to attach the fan firmly to the lid.
- Connect the Power Source
- If using a USB fan, connect it to a power bank or USB port.
- For 12-volt fans, use a car cigarette lighter adapter.
- Ensure all wires are secure to avoid loose connections during operation.
Pro Tip: Test the fan before moving on to ensure proper functionality.
Step 3: Attaching the PVC Pipes for Air Circulation
- Fit the PVC Pipes
- Insert the PVC pipes into the holes drilled on the sides or top of the chest.
- Use sealant or tape to ensure an airtight fit and prevent air leaks.
- Adjust the Length and Angles
- Customize the PVC pipes’ length to channel air effectively to the desired areas of the car.
- Use elbow connectors if necessary to direct airflow more precisely.
Pro Tip: Add foam or insulation around the pipes to reduce condensation and maintain cooler air.
Step 4: Testing and Troubleshooting Your DIY AC
- Add Ice to the Chest
- Fill the ice chest with ice or frozen gel packs, leaving enough room for proper air circulation.
- Turn On the Fan
- Power up the fan and check if it pulls air from the cooler and pushes it through the PVC pipes.
- Check for Issues
- If airflow seems weak, inspect the fan and PVC pipes for blockages or loose fittings.
- Ensure the ice chest is properly insulated to maximize cooling efficiency.
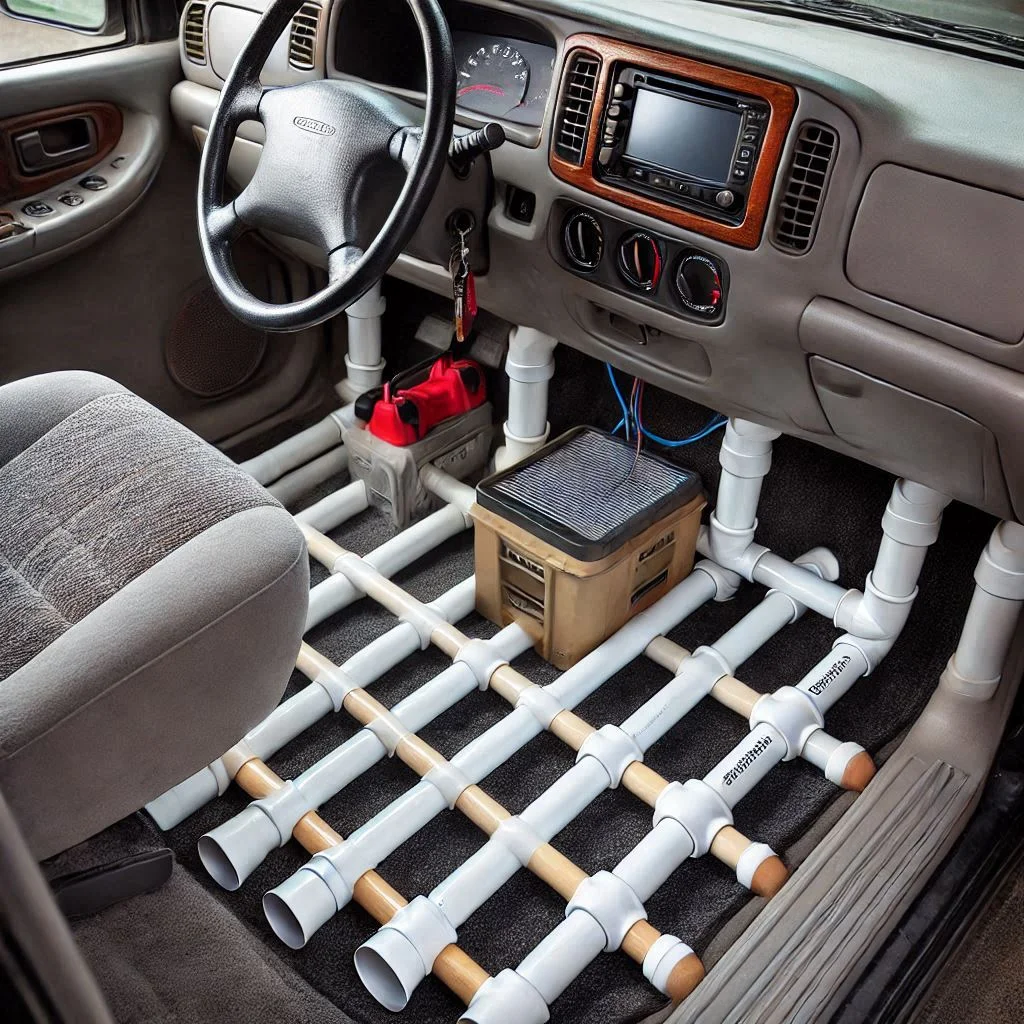
- Optimize Placement in the Car
- Position the DIY AC unit where it can distribute cool air effectively, such as on the floor near the front seats.
Pro Tip: Use additional ice packs for extended cooling on long trips.
Tips to Maximize the Efficiency of Your DIY Car Air Conditioner
To get the most out of your DIY car air conditioner, you need to focus on a few critical aspects such as ice selection, insulation, placement, and maintenance. Follow these tips to ensure optimal performance and a longer lifespan for your homemade cooling system.
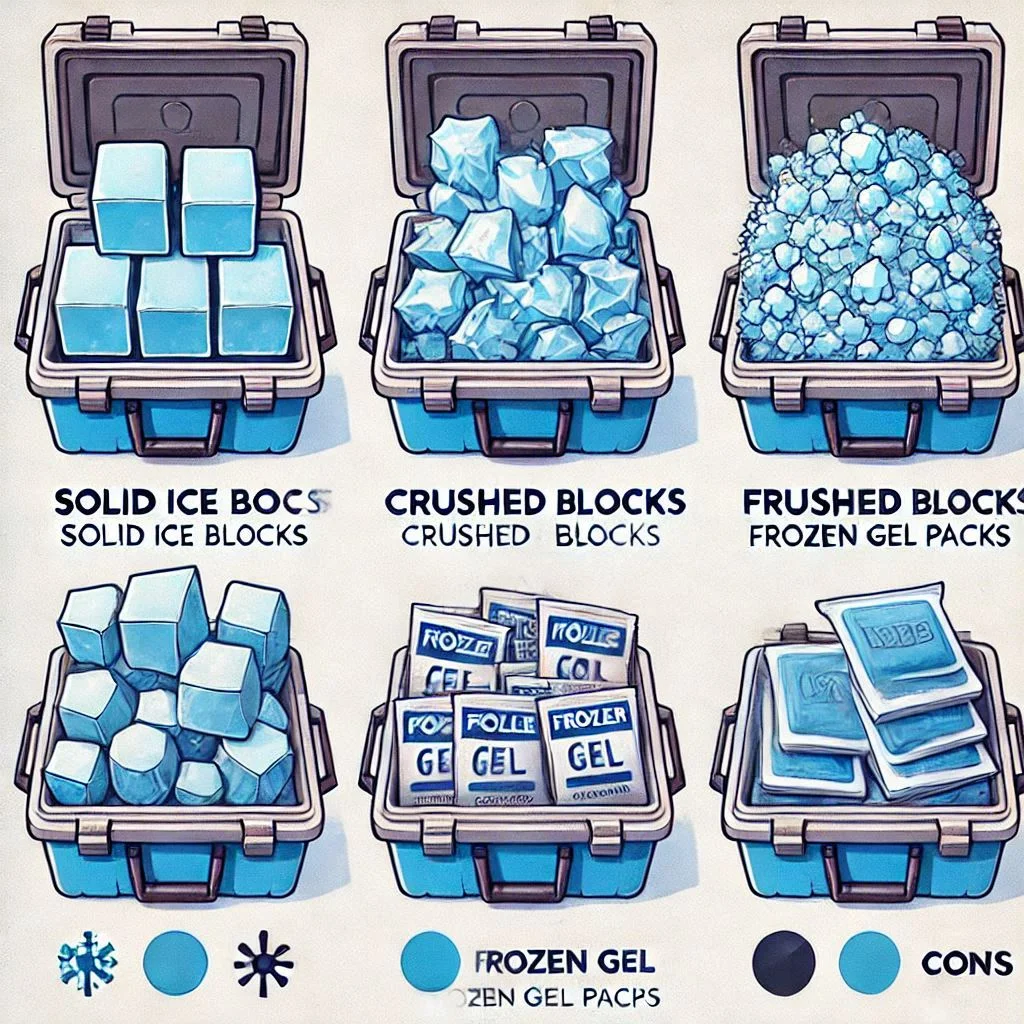
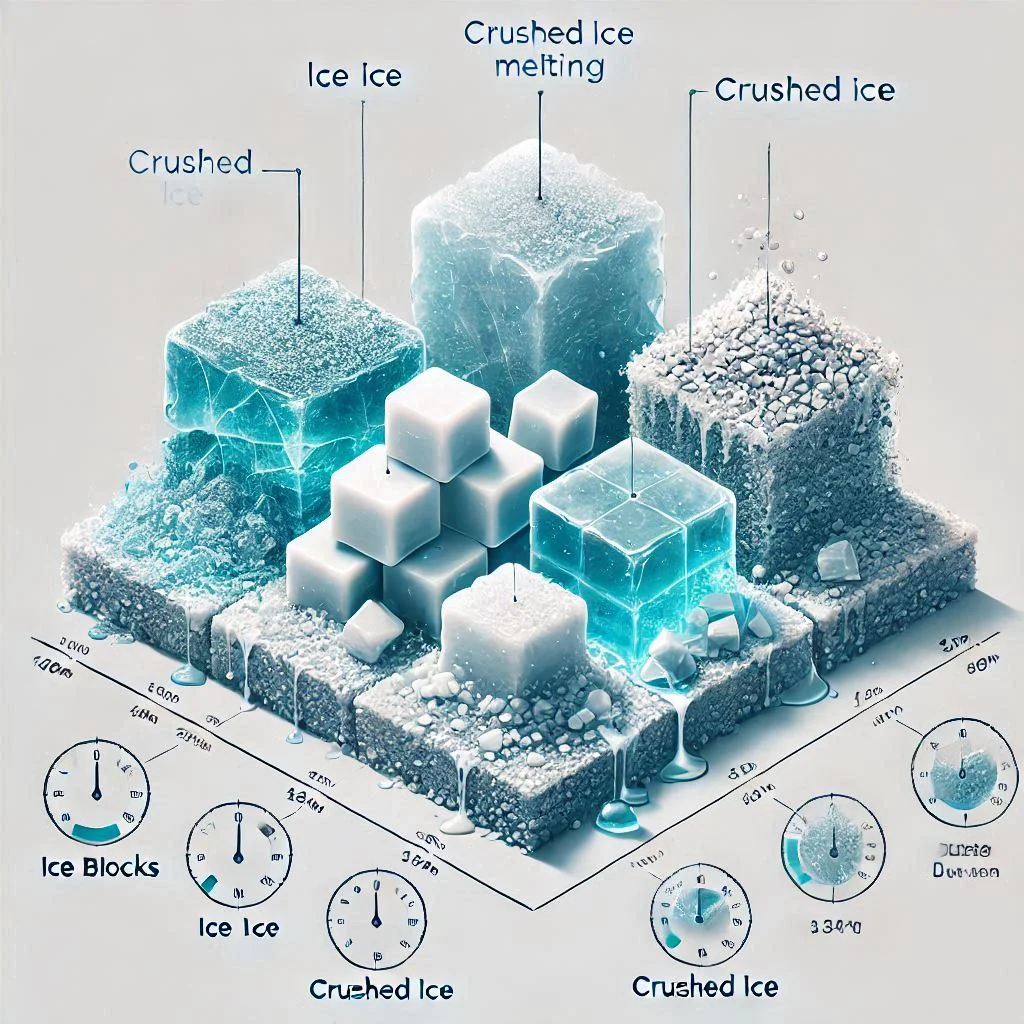
1. Choosing the Right Type of Ice and Cooling Elements
The type of ice or cooling element you use directly impacts how long the unit can provide cool air.
- Solid Ice Blocks vs. Crushed Ice:
- Ice Blocks: Melt slower and provide consistent cooling for longer durations.
- Crushed Ice: Cools faster but melts more quickly, requiring frequent refills.
- Alternative Cooling Elements:
- Frozen gel packs or reusable ice packs are excellent options. They last longer than regular ice and minimize water leakage inside the cooler.
- Pro Tip: Use saltwater ice for even slower melting as salt lowers the freezing point, keeping the ice colder for a longer time.
2. Ensuring Proper Insulation of the Ice Chest
Effective insulation minimizes heat transfer, keeping the ice cooler for extended periods.
- Check for Air Leaks:
- Inspect the lid and seams of the ice chest for gaps. Seal any leaks using weatherproof tape or silicone sealant.
- Add Extra Insulation:
- Line the inner walls of the cooler with reflective foil or foam sheets to improve thermal efficiency.
- Use a cooler with thick walls designed for high-performance insulation.
- Avoid Frequent Openings:
- Open the lid only when necessary to prevent warm air from entering and accelerating ice melting.
3. Placement Tips for Optimal Airflow in Your Car
Where you place your DIY air conditioner in the car significantly affects its cooling efficiency.
- Front Seat Floor Area:
- Position the unit on the floor near the front seats to ensure even distribution of cool air throughout the cabin.
- Direct the Airflow:
- Use angled PVC pipes to aim cool air toward passengers or specific areas, such as the driver’s seat.
- Secure the Unit:
- Ensure the cooler is stable and does not move during sharp turns or sudden braking. Use non-slip mats or straps for added security.
Pro Tip: Place the cooler in shaded areas of the car to prevent it from heating up under direct sunlight.
4. Maintenance and Cleaning for Longevity
Regular maintenance ensures your DIY car air conditioner remains effective and hygienic.
- Drain Water Frequently:
- Empty melted ice regularly to prevent water buildup, which can reduce airflow and create an unpleasant odor.
- Clean the Fan and Pipes:
- Wipe down the fan blades and PVC pipes to remove dust and debris that could block airflow.
- Disinfect the Cooler:
- Use a mild disinfectant or vinegar solution to clean the interior of the ice chest, preventing mold and bacteria growth.
- Inspect for Wear and Tear:
- Periodically check for cracks in the cooler or loose fittings on the fan and pipes, and repair them promptly.
Pro Tip: Store the unit in a dry, cool place when not in use to prevent damage.
Advantages and Limitations of a DIY Car Air Conditioner
Understanding the benefits and constraints of a DIY car air conditioner will help you decide whether this innovative solution meets your cooling needs. Let’s explore the advantages and limitations in detail.
Advantages of a DIY Car Air Conditioner
- Low Cost
- A DIY car air conditioner is an affordable alternative to traditional vehicle air conditioning systems.
- The materials, such as an ice chest, fan, and PVC pipes, are inexpensive and easily accessible.
- Cost Comparison: While traditional AC repairs or installations can cost hundreds of dollars, you can build a DIY unit for under $50.
Pro Tip: Upcycling household items like old coolers or fans can make the project even cheaper.
- Easy to Make and Maintain
- The design is simple, requiring basic tools like a drill and minimal technical skills.
- Once built, the unit is easy to clean, refill with ice, and maintain without specialized knowledge.
- Time-Saving Build: Most DIY car air conditioners can be constructed in under an hour.
Pro Tip: Clear instructions and reusable materials make it a perfect weekend project for beginners.
Limitations of a DIY Car Air Conditioner
- Dependent on Ice Replenishment
- The cooling power of a DIY air conditioner relies entirely on ice.
- Frequent Refills Needed: On hot days, ice can melt quickly, requiring regular replenishment to maintain cooling performance.
- Practicality Issue: It may not be ideal for long trips without access to additional ice.
Pro Tip: Use larger ice blocks or saltwater ice to slow melting and extend cooling time.
- Cooling Capacity Compared to Traditional ACs
- A DIY air conditioner can cool small spaces like the interior of a car but lacks the power and efficiency of a traditional AC system.
- Limited Temperature Drop: The cooling effect is moderate and dependent on external temperatures and the amount of ice used.
- Not a Substitute for Extreme Heat: In very high temperatures, the cooling might not be sufficient for extended comfort.
Pro Tip: Use the DIY unit as a supplementary cooling source alongside traditional AC in milder weather.
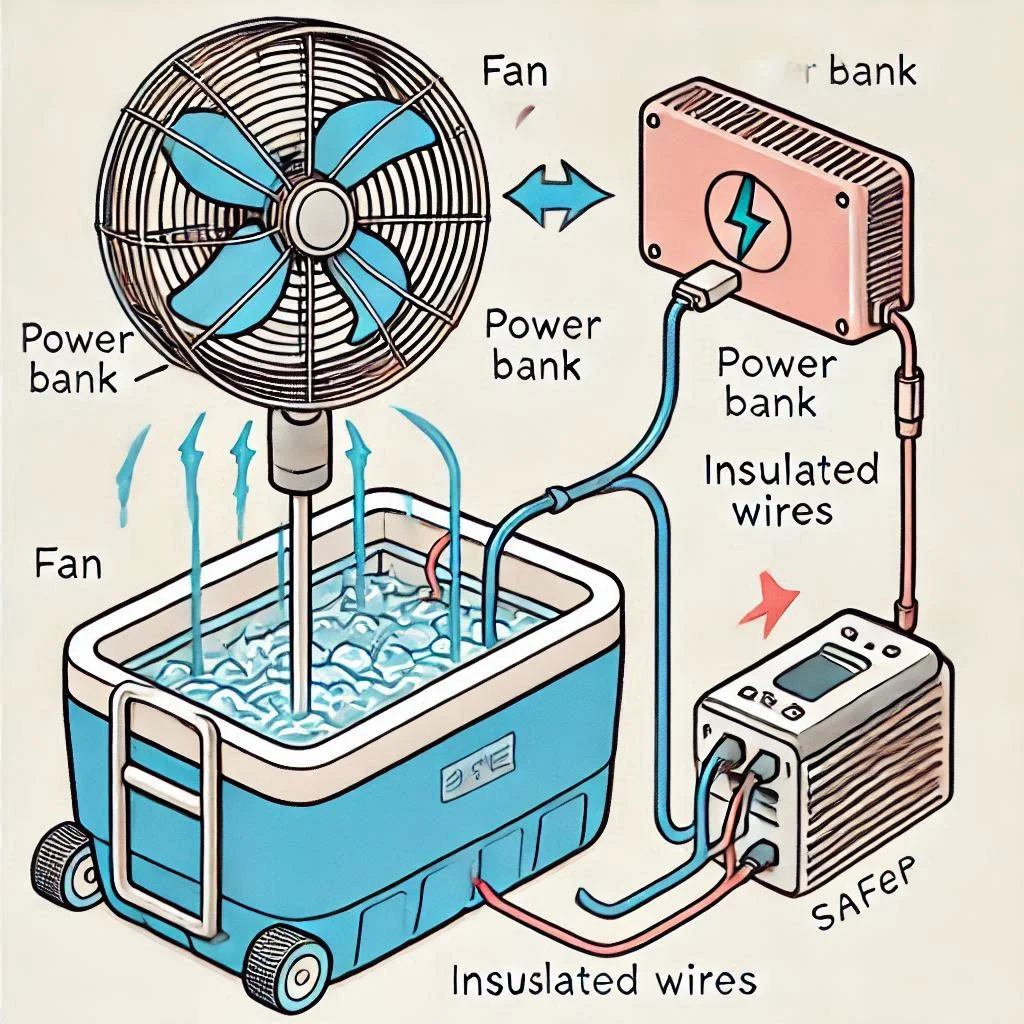
Safety Precautions and Environmental Considerations
Building and using a DIY car air conditioner can be an exciting project, but it’s crucial to prioritize safety and sustainability. Here’s a detailed guide to ensure your unit operates safely while being environmentally friendly.
Avoiding Electrical Hazards with the Power Source
When dealing with electrical components like fans and power sources, taking precautions can prevent accidents.
- Use Compatible Power Sources
- Ensure the fan’s voltage matches the power source (e.g., USB fans for power banks or 12V fans for car adapters).
- Avoid overloading circuits by using devices designed for your chosen power supply.
- Protect Wiring and Connections
- Use insulated wires to prevent electrical shorts or overheating.
- Secure connections with electrical tape or heat shrink tubing to reduce the risk of loose or exposed wires.
- Waterproof Measures
- Keep electrical components away from water or melting ice.
- Elevate the fan and wiring above the water line inside the cooler and use a water-resistant casing if possible.
Pro Tip: Install a circuit breaker or fuse to protect against power surges.
Ensuring Secure Placement of the DIY AC in the Car
Proper placement of the unit inside the car ensures both safety and efficiency.
- Stabilize the Unit
- Use non-slip mats or straps to secure the cooler on the car floor, preventing it from moving during sudden stops or sharp turns.
- Avoid Obstructions
- Place the unit where it won’t block pedals, gear shifts, or passenger movement.
- Ensure the PVC pipes are positioned to direct airflow effectively without interfering with driving visibility or comfort.
- Ventilation Considerations
- Ensure the fan’s exhaust has ample space for air circulation, avoiding overheating or blocked airflow.
Pro Tip: Regularly check the unit’s placement and stability during long trips.
Eco-Friendly Alternatives for Cooling Agents
While traditional ice works well, exploring eco-friendly options can reduce environmental impact.
- Reusable Ice Packs
- Opt for gel-based or reusable ice packs, which last longer and reduce water waste.
- Sustainable Insulation Materials
- Use natural or recycled materials, like wool or cork sheets, for extra insulation inside the cooler.
- Energy Efficiency
- Select low-power fans to minimize energy consumption. Solar-powered fans are a sustainable alternative for daytime use.
- Eco-Conscious Choices
- Avoid disposable plastic liners or components that contribute to waste. Invest in durable, long-lasting materials for your DIY AC.
Pro Tip: Incorporate biodegradable or reusable components to align with environmental responsibility.
FAQs: DIY Car Air Conditioner
DIY car air conditioners are innovative and cost-effective, but they come with some limitations and considerations. Here’s a detailed FAQ section addressing common questions, complete with actionable insights and pro tips.
1. Can a DIY Car Air Conditioner Cool the Entire Car?
A DIY car air conditioner can cool small areas effectively but may not provide sufficient cooling for the entire car, especially on very hot days.
- Limitations:
- Its cooling capacity depends on the amount of ice and airflow generated by the fan.
- Ideal for cooling the immediate vicinity, such as the driver’s seat or passenger areas.
- Best-Use Scenarios:
- Use it for short trips or when driving alone.
- Place the unit strategically, such as on the floor near the front seat, to maximize airflow to the desired area.
Pro Tip: Combine your DIY unit with open windows or sunshades to enhance overall cooling.
2. How Long Does the Ice Last in a DIY Car Air Conditioner?
The longevity of the ice depends on several factors, such as the type of ice used, ambient temperature, and insulation quality.
- Factors Affecting Ice Duration:
- Type of Ice: Large ice blocks melt slower than crushed ice.
- Insulation: Coolers with thick walls and additional insulation retain ice longer.
- Ambient Temperature: High temperatures will cause ice to melt faster.
- Tips to Extend Ice Life:
- Use saltwater ice for a slower melt rate.
- Line the cooler with reflective foil or foam sheets to improve insulation.
Pro Tip: Freeze water bottles or gel packs as they last longer and reduce water mess.

3. Is a DIY Car Air Conditioner Safe for Long Drives?
Yes, but certain precautions are essential to ensure safety during extended usage.
- Electrical Safety:
- Ensure the fan and power source are properly insulated to avoid electrical hazards.
- Use a reliable power bank or car adapter that matches the fan’s voltage requirements.
- Secure Placement:
- Stabilize the unit with non-slip mats or straps to prevent it from moving during turns or sudden stops.
- Monitor Ice Levels:
- Check and refill the ice periodically to maintain consistent cooling without flooding the cooler.
Pro Tip: For long drives, carry extra ice or reusable ice packs to replace melted ice efficiently.
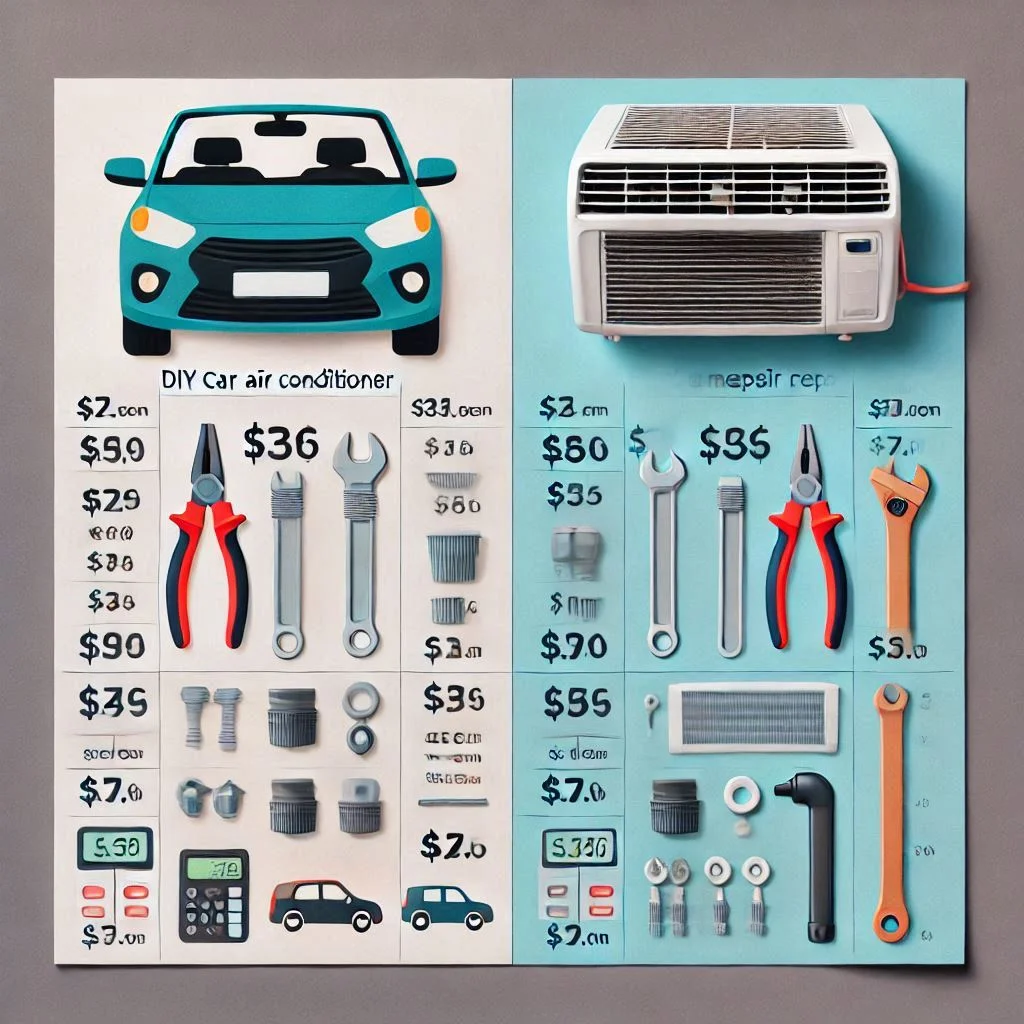
4. How Much Does It Cost to Build a DIY Car Air Conditioner?
DIY car air conditioners are highly affordable compared to traditional AC systems.
- Cost Breakdown:
- Ice Chest or Cooler: $10–$30
- Small Fan: $10–$15
- PVC Pipes: $5–$10
- Power Source (Rechargeable Battery or Adapter): $10–$20
- Comparison with Traditional AC Systems:
- A professional AC repair or installation can cost $200–$1,000, making the DIY option significantly more budget-friendly.
Pro Tip: Repurpose items like old coolers and fans to cut costs even further.
5. Can I Use Alternative Cooling Methods Instead of Ice?
Yes, there are several eco-friendly and efficient alternatives to ice that you can consider.
- Frozen Gel Packs:
- Reusable and last longer than regular ice.
- Evaporative Cooling Pads:
- Work by absorbing water and using airflow to create a cooling effect.
- Ideal for areas with low humidity.
- Other Alternatives:
- Freeze water bottles or make saltwater ice for a longer-lasting cooling source.
Pro Tip: Experiment with different options to find what works best for your cooling needs and environmental conditions.
Conclusion
A DIY car air conditioner is a cost-effective, easy-to-build solution for staying cool during your drives, especially in hot weather. While it may not rival the power of a traditional AC system, its simplicity, affordability, and portability make it a valuable addition for short trips or as a temporary cooling option. By following the step-by-step guide, taking necessary safety precautions, and exploring eco-friendly alternatives, you can create a customized cooling system tailored to your needs. Whether you’re looking to save money, embrace sustainability, or enjoy a fun DIY project, a homemade car air conditioner offers practical benefits and a satisfying sense of accomplishment. Start building yours today and beat the heat in style!