
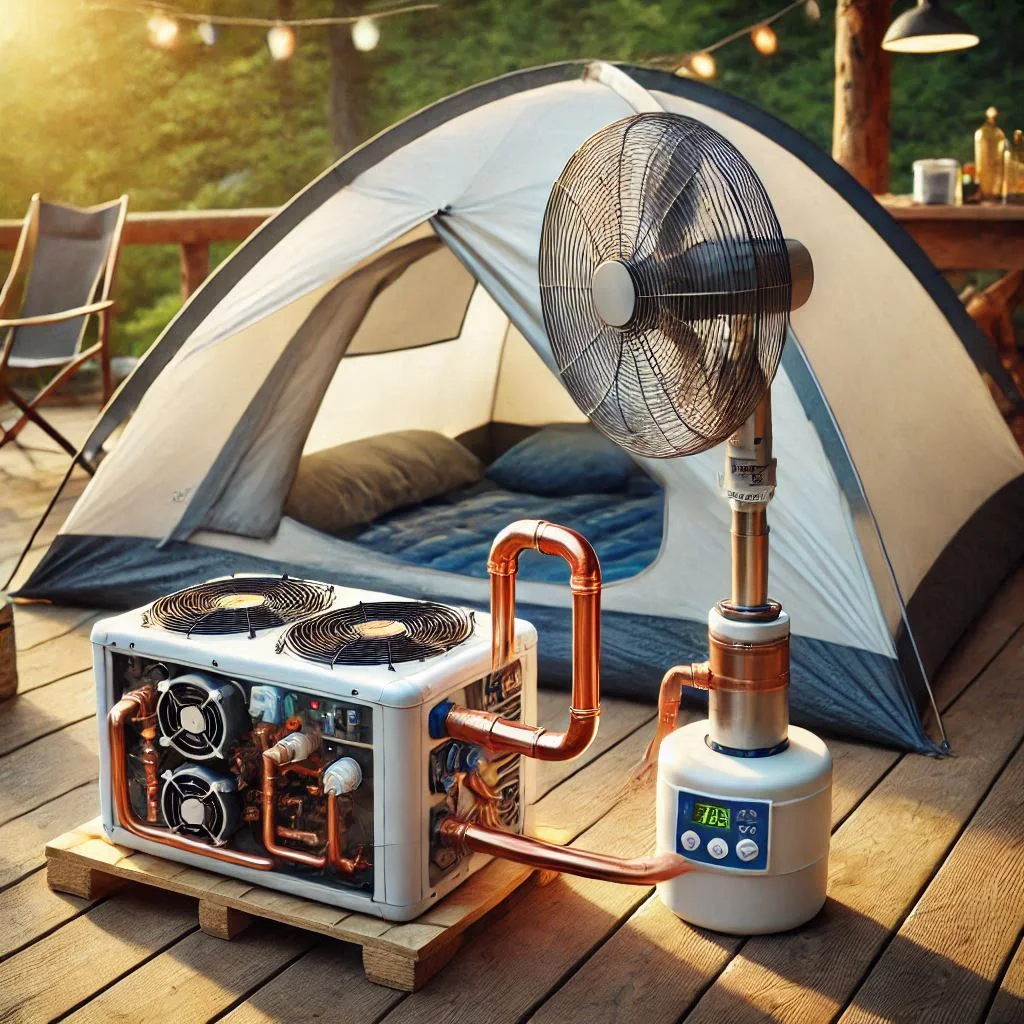
Introduction: Why You Need a DIY Camping Air Conditioner
When it comes to camping, staying cool and comfortable in hot weather can be challenging. Whether you’re tent camping in the wild or RV camping, high temperatures can make your experience uncomfortable and even dangerous. This is where a DIY camping air conditioner comes in handy. While traditional portable air conditioners can be expensive and heavy to carry, creating a custom air cooling solution for your camping needs offers several benefits.
Why You Need a DIY Camping Air Conditioner:
- Cost-Effectiveness: One of the most significant advantages of a DIY camping air conditioner is the cost savings. A pre-built portable air conditioner can be costly, especially when you’re looking for something compact and energy-efficient for a camping environment. However, by using simple, accessible materials like fans, water pumps, and copper tubing, you can create an air conditioner for a fraction of the cost.Additionally, many of the materials required for a DIY air conditioner can be found at home or purchased for a low cost from local hardware stores. This allows you to enjoy the cooling benefits of air conditioning without the hefty price tag.
- Portability: A DIY camping air conditioner is specifically designed for mobility. Unlike traditional AC units, which can be bulky and heavy, a DIY system can be customized to be lightweight and easy to transport. Whether you’re traveling by car, RV, or hiking, a homemade air conditioner can easily fit into your camping gear, providing convenience and flexibility wherever you go.The portability of a DIY air conditioner makes it perfect for those who enjoy exploring remote areas or are looking for a solution for their summer camping trips.
- Ease of Use: Building a DIY camping air conditioner is easier than you might think, even for those with minimal technical experience. The process involves attaching basic components like a fan, copper tubing, a water pump, and a water container. With clear instructions, you can assemble a functional cooling system within a few hours.Once assembled, using your DIY air conditioner is simple. Simply fill the water container, turn on the fan, and adjust the pump to circulate cool water. The cooling effect from the evaporative process will help reduce temperatures inside your tent or camping space, creating a comfortable environment without complex maintenance.
How a DIY Camping Air Conditioner Enhances Your Camping Experience:
Creating your own DIY air conditioner also provides you with a sense of accomplishment and empowerment. Instead of relying on expensive commercial solutions, you can use your creativity and resourcefulness to craft a custom solution suited to your specific camping needs. Plus, knowing you made the air conditioner yourself adds to the satisfaction of your outdoor experience.
Additionally, the cooling effect not only makes sleeping more comfortable during hot nights but also protects you from heat-related issues such as dehydration, heatstroke, or exhaustion. A well-cooled camping space enhances your overall enjoyment, allowing you to focus on the adventure and relaxation.
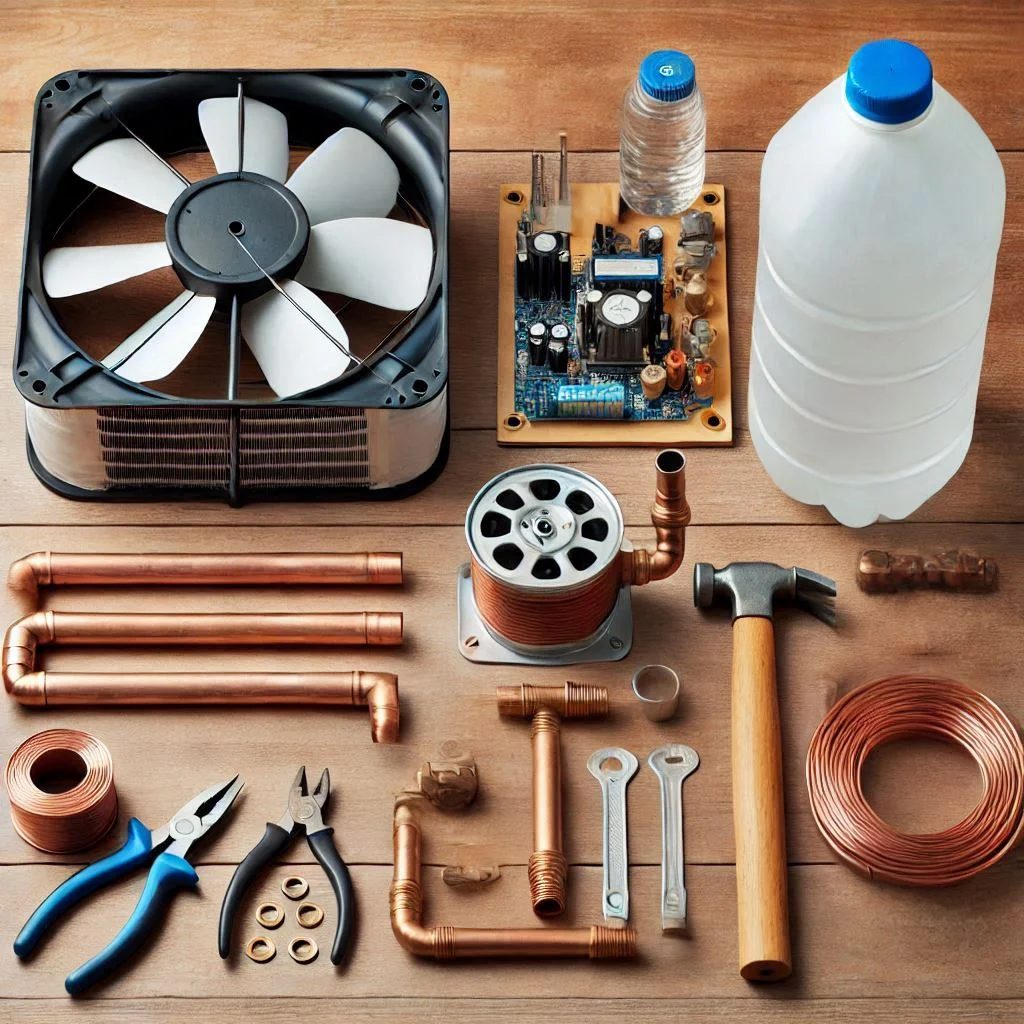
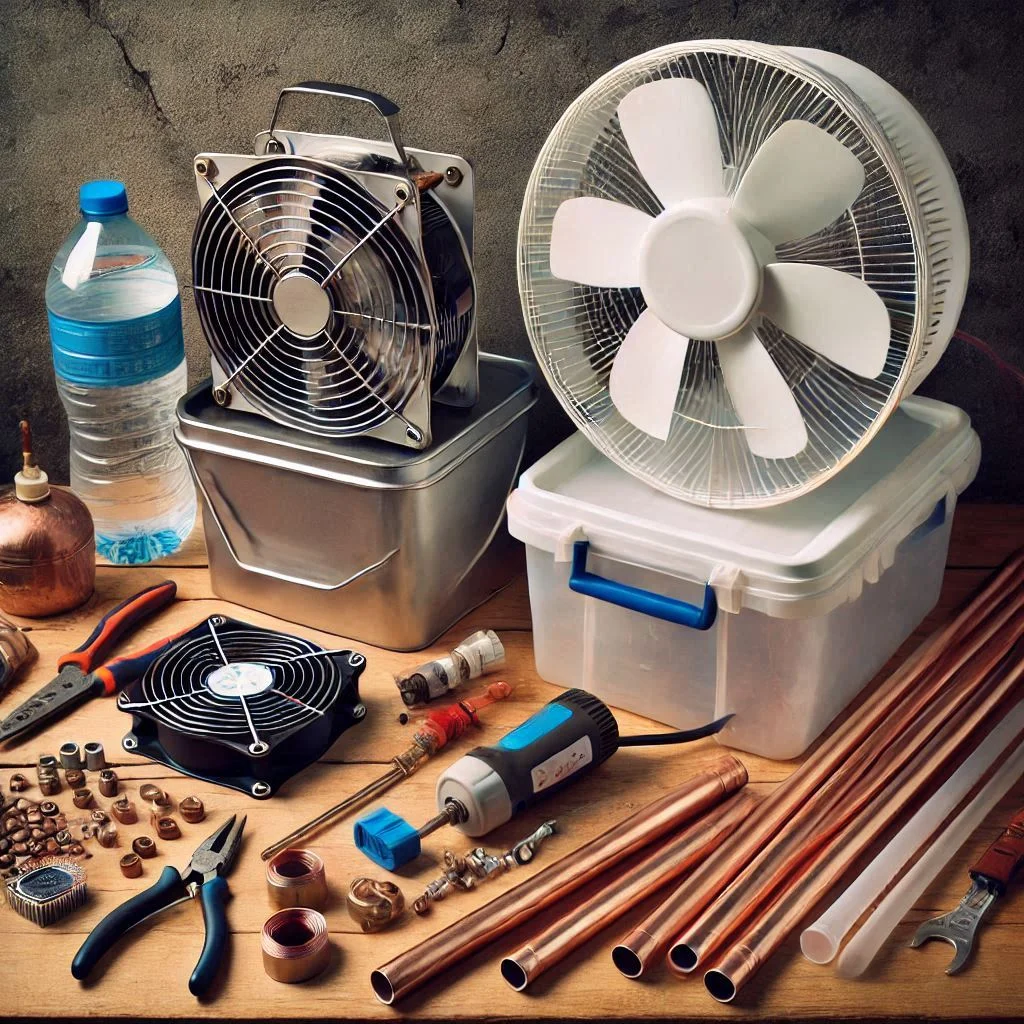
Step 1: Materials Needed for Your DIY Camping Air Conditioner
To build a functional and efficient DIY camping air conditioner, gathering the right materials is crucial. In this section, we will break down the essential components required for building your homemade air conditioner and offer helpful tips on sourcing these materials from local stores or online. By gathering the proper tools and materials, you’ll be well on your way to creating a custom air cooling system that will enhance your camping experience.
Essential Materials for Your DIY Camping Air Conditioner:
- Fan: The fan is the heart of the DIY air conditioner. It helps circulate the cool air generated by the system. A high-quality fan with adjustable speed settings is ideal, as it allows you to control the airflow and cooling intensity.
- Recommendation: Look for fans with a portable, compact design, such as clip-on or desk fans. These types are ideal for camping since they are small and easy to transport.
- Tip: Ensure the fan has a power source that aligns with your camping environment (e.g., battery-operated fans for remote camping or plug-in fans for RV camping).
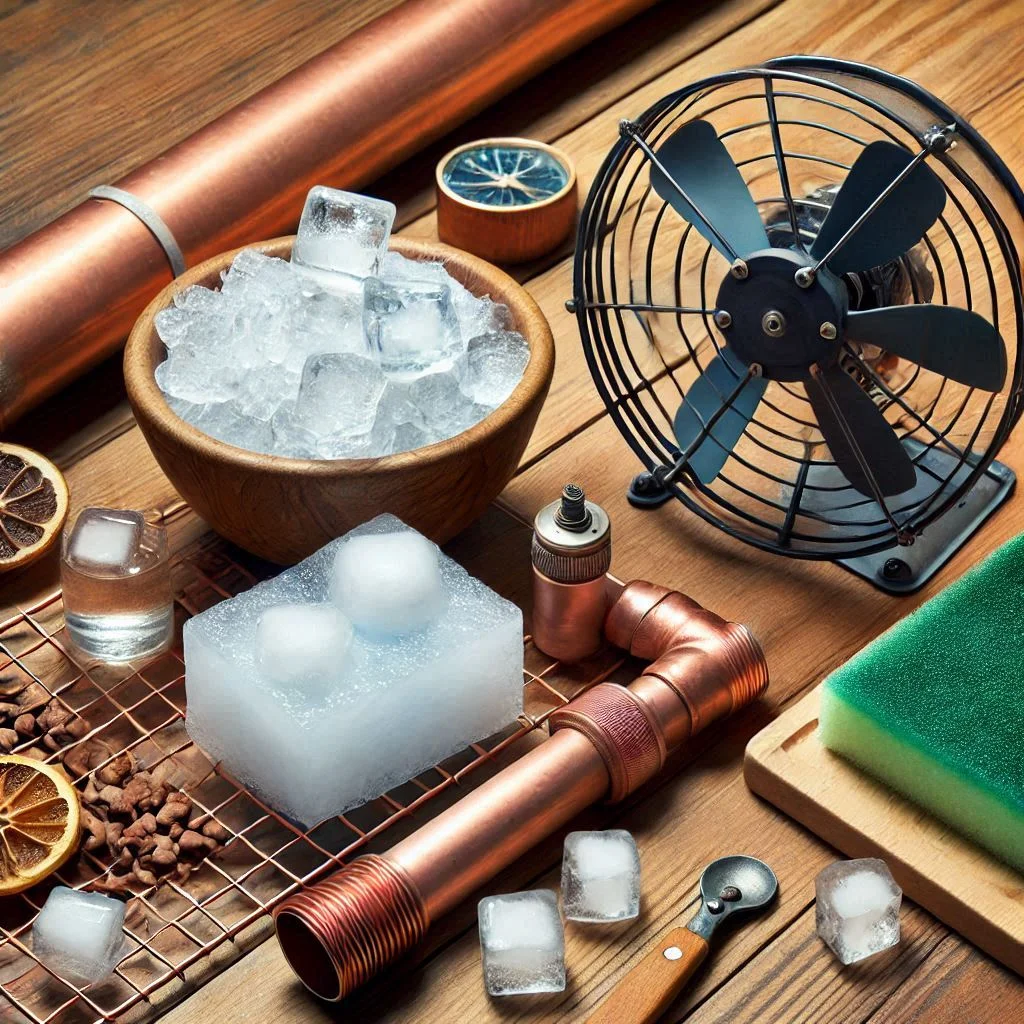
- Copper Tubing: Copper tubing plays a key role in cooling the air. The water circulating through the copper tubing helps to lower the temperature as it evaporates. Copper is highly efficient at conducting temperature changes, making it the perfect material for this task.
- Recommendation: Choose ¼-inch or ½-inch copper tubing for easier handling and fitting. You’ll need approximately 10–15 feet of tubing, depending on your setup.
- Tip: Copper tubing is flexible, so you can bend it into the shape that works best for your fan and cooling needs. If you’re unable to find copper, consider using flexible plastic tubing as an alternative.
- Water Pump: A small water pump is required to circulate the water through the copper tubing. The pump pushes water from a container, flowing it through the tubing and into the cooling system. This creates the evaporative cooling effect.
- Recommendation: Look for submersible pumps with a low voltage to ensure energy efficiency, especially if you’re using a battery pack or a small solar panel. Choose a pump with adjustable flow rate options to control how fast the water circulates.
- Tip: Ensure the pump is waterproof and designed for low-power applications, as it will run continuously during use.
- Water Container: A container holds the water that will be circulated through the system. This container is essential for creating the evaporative cooling effect. You can use a bucket, small cooler, or any container that can hold enough water to keep the system running for several hours.
- Recommendation: A plastic cooler or large bucket with a secure lid works well because it can hold enough water for several hours of cooling. Ensure the container is easy to carry and refill.
- Tip: Consider adding ice to the water for an even more powerful cooling effect during extremely hot days.
- Flexible Tubing/Connectors (Optional): These are optional but can help with connecting the copper tubing to the water pump and fan. Flexible plastic tubing can be used as connectors, especially when you need to redirect water flow.
- Tip: Use waterproof silicone sealant to secure any joints and prevent leaks in your system.
- Power Source (Optional): Depending on your camping environment, you may need an external power source to run the fan and pump. Solar panels or a portable power bank can provide an eco-friendly solution for running your air conditioner off-grid.
- Recommendation: A 12V solar panel is a great option for sustainable energy during extended camping trips.
- Tip: Consider investing in a portable power bank with sufficient capacity to power both your fan and pump for the duration of your camping trip.
How to Source Materials for Your DIY Camping Air Conditioner
Local Stores:
- Hardware Stores: Most of the components for building a DIY camping air conditioner can be found in your local hardware store. Materials like copper tubing, small water pumps, flexible tubing, and fans are commonly stocked.
- Tip: If you’re unsure about the pump or fan, ask a store associate for guidance to ensure you purchase the appropriate size and type.
- Camping or Outdoor Stores: Some camping stores also carry fans and cooling equipment. You might find portable fans or small water pumps specifically designed for outdoor use.
Online Shopping:
- Amazon: Amazon is a great place to source all the materials you need, with a wide selection of fans, pumps, and copper tubing available for delivery. You can easily compare prices, read reviews, and choose the best options based on your needs.
- Tip: Look for items that are labeled as “battery-operated” or “portable” for convenience.
- Home Improvement Retailers (e.g., Home Depot, Lowe’s): These retailers offer a vast selection of DIY supplies for building an air conditioner. You can browse through their websites, order materials, and even have them delivered to your campsite or home.
- Tip: Keep an eye on seasonal sales or discounts, especially during summer months when cooling equipment is in demand.

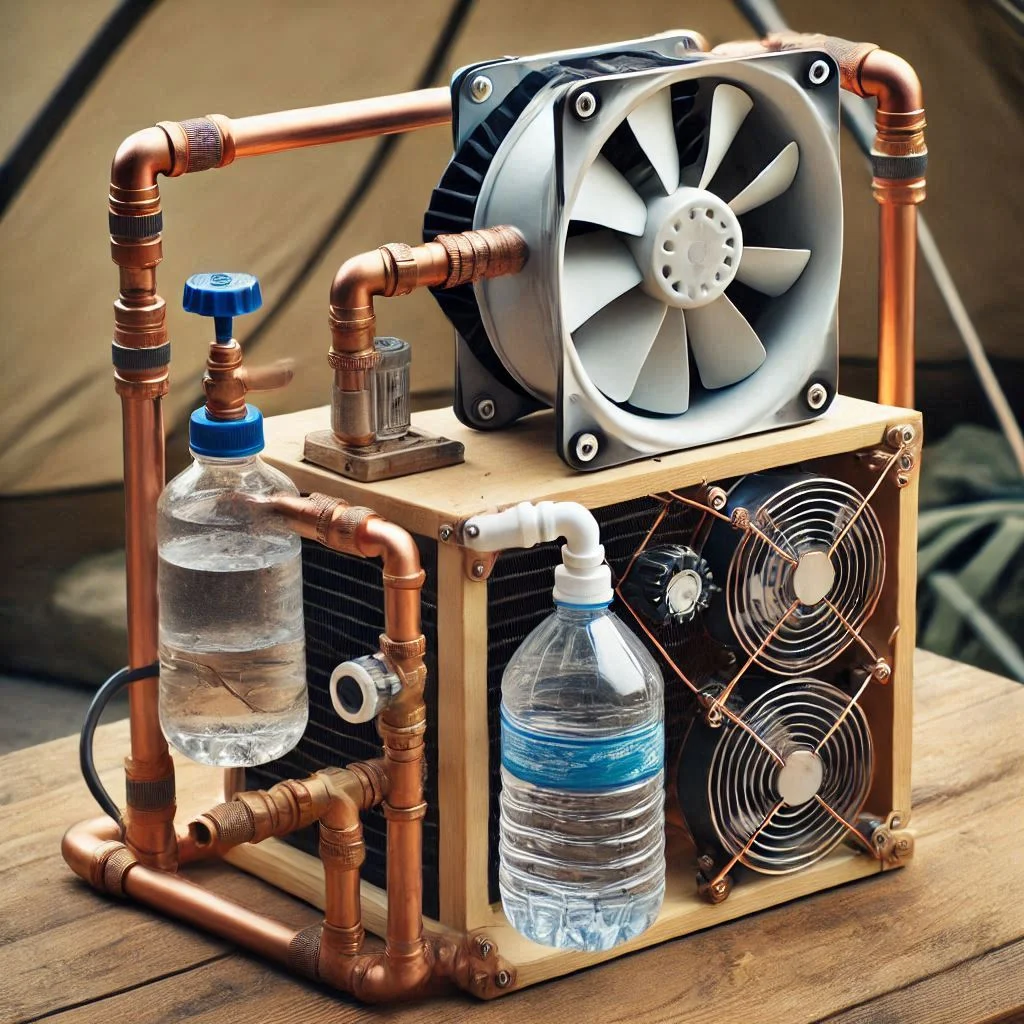
Step 2: Building the Fan Cooling System
Now that you’ve gathered all the necessary materials, it’s time to build your DIY camping air conditioner. In this step, we will guide you through attaching the copper tubing to the fan to create the cooling system that will help reduce temperatures inside your tent or RV. Properly connecting the fan and copper tubing is crucial to ensure maximum efficiency and to avoid any potential issues such as leaks or inefficient airflow.
Detailed Instructions on Attaching Copper Tubing to the Fan:
- Prepare the Copper Tubing:
- Begin by measuring and cutting the copper tubing to the appropriate length. You’ll need enough tubing to form a coil or loop that can be positioned near the fan’s airflow. Typically, 10–15 feet of tubing will suffice, depending on the size of your fan and the area you need to cool.
- Tip: To easily manipulate the copper tubing into the desired shape, use pliers or a tube bender to avoid any kinks that could restrict the water flow.
- Secure the Copper Tubing to the Fan:
- Position the fan in a stable location, ensuring it’s angled towards the area you want to cool (typically the center of the tent or camper).
- Place one end of the copper tubing near the back of the fan. If you’re using a fan with adjustable settings, ensure that the airflow is directed toward the tubing.
- Secure the copper tubing to the fan using a strong adhesive (such as epoxy or silicone adhesive) or zip ties. The tubing should be placed securely, ensuring that it will not move or slip during operation. The goal is to have the fan blow air directly through the tubing to help cool it down.
- Tip: If you’re working with a larger fan, you may need to create a custom mounting bracket or structure to hold the copper tubing firmly in place.
- Create a Coil or Spiral with the Tubing:
- After securing the tubing near the fan, you’ll need to create a coil or spiral with the remaining copper tubing. This coil will act as the cooling mechanism, allowing air to pass over the tubing, which will be cooled by the evaporating water.
- The more loops you create, the greater the surface area for air to cool, which increases the cooling efficiency. Ensure that the tubing is evenly spaced and not tangled.
- Tip: Space the coils evenly, and make sure the fan is blowing directly through the tubing without obstruction to maximize airflow.
- Connect the Copper Tubing to the Water Pump:
- At the other end of the copper tubing, use a small piece of flexible tubing or a connector to attach the copper tubing to the water pump. This will allow water to flow through the tubing and cool the air.
- Tip: Make sure the connection between the tubing and the pump is tightly secured with hose clamps or waterproof tape to prevent any leaks.
- Test the Fan Cooling System:
- Once the copper tubing is securely attached to the fan and the pump is connected, it’s time to test your system.
- Fill the water container with cold water (and ice if desired for extra cooling). Turn on the pump to circulate the water through the copper tubing. The fan should blow air through the cooled tubing, effectively lowering the air temperature in your space.
- Tip: If the fan is not blowing enough air through the coils, adjust the positioning or angle of the fan, or try increasing the fan speed if possible.
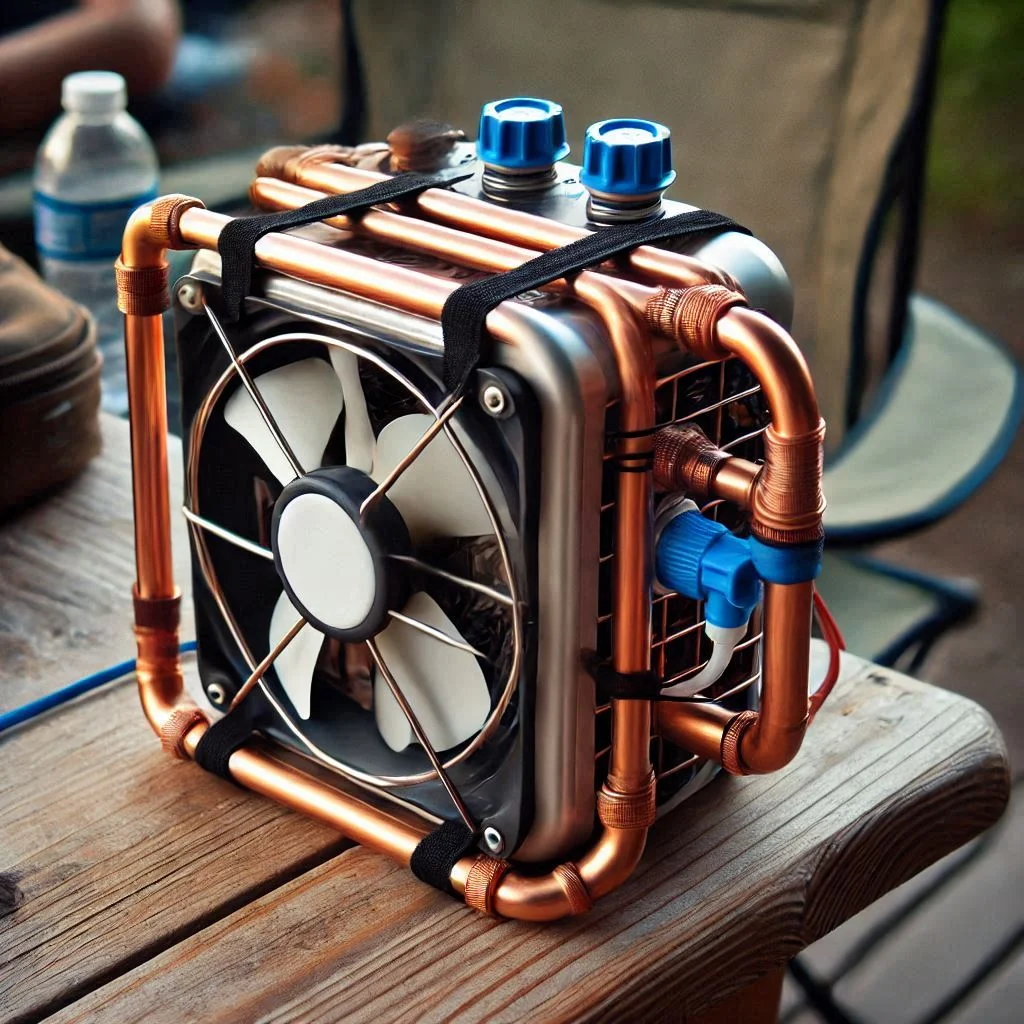
Importance of Securing the Tubing to Avoid Leakage or Inefficiency:
Securing the copper tubing to the fan and ensuring the connections are tight is crucial to maintaining an efficient cooling system. If the tubing is not properly secured, several issues can arise:
- Leaks:
- Loose or poorly connected tubing can cause water to leak out, reducing the cooling effect and making the system inefficient. To prevent this, always double-check the connections with clamps or waterproof tape.
- Reduced Airflow:
- If the copper tubing is not properly aligned or blocked by the fan’s airflow, the cooling efficiency will decrease. This could result in the air conditioner being ineffective, especially in hotter climates. Be sure the fan’s airflow directly interacts with the copper tubing for optimal cooling.
- Inefficiency:
- An insecure setup can cause the system to lose water and air pressure, reducing its cooling ability. This could lead to wasted energy, water, and time, as the system won’t be able to cool the air as intended.
By securing the copper tubing properly and ensuring the pump and tubing are working as intended, you’ll maximize the cooling effect and prevent leaks or inefficiencies from affecting your DIY camping air conditioner.
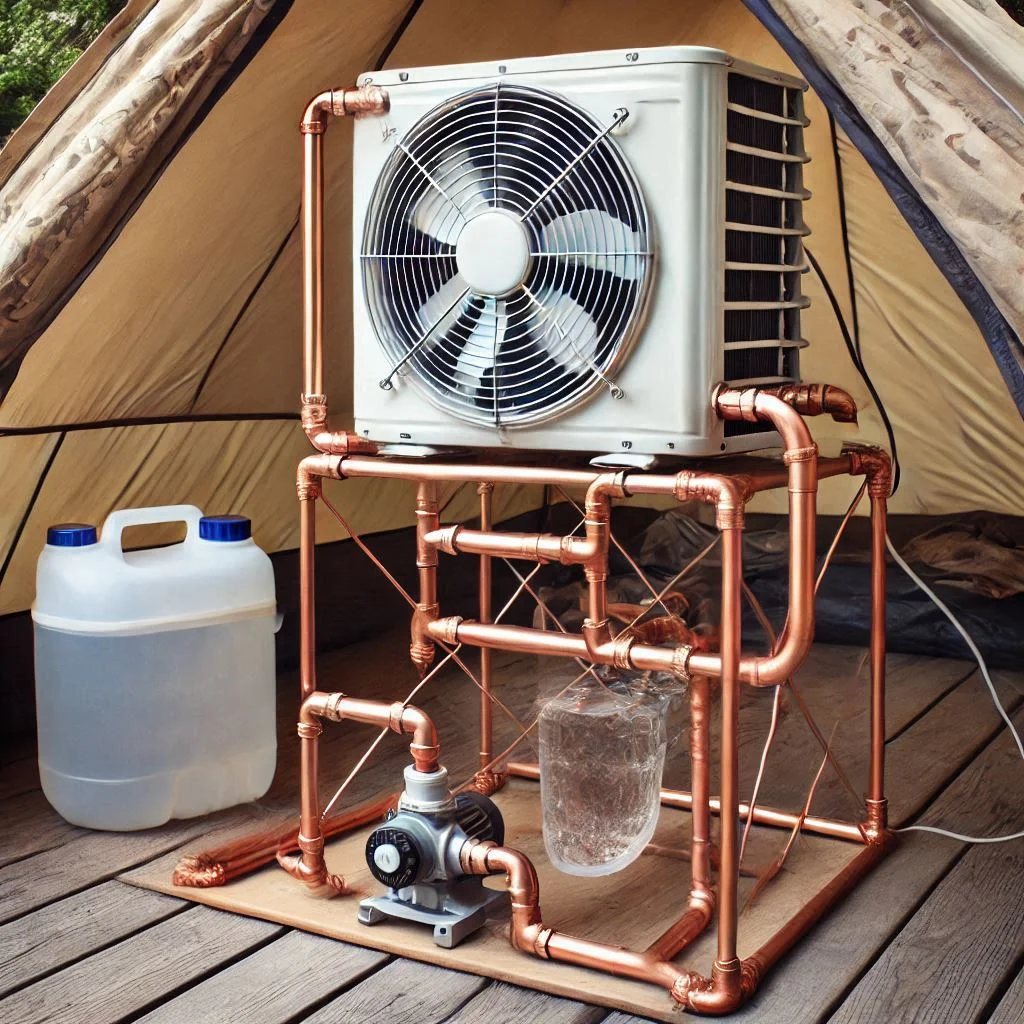
Step 3: Installing the Water Pump for Efficient Cooling
In this step, we will walk you through the process of installing the water pump for your DIY camping air conditioner. The water pump plays a vital role in ensuring that the cooling system operates efficiently. It circulates water through the copper tubing, where it absorbs heat and creates a cooling effect as it evaporates. Proper installation and understanding of how the water pump works is essential to achieving the best performance from your homemade air conditioner.
Detailed Instructions on Attaching the Water Pump to the Tubing and Fan System:
- Choose the Right Water Pump: Before installing the pump, make sure you’ve selected a pump with the appropriate power and size for your system. A small, submersible water pump is ideal for this DIY project because it’s energy-efficient and designed to be submerged in water. Look for a pump with adjustable flow rates, as this allows you to control the speed at which water circulates through the copper tubing.
- Recommendation: Opt for a 12V DC submersible water pump, which is commonly used in DIY air conditioners and small water systems. It’s energy-efficient and can run on a battery or solar panel, making it perfect for camping.
- Tip: Ensure the pump has a flow rate between 100 to 300 GPH (gallons per hour), as this will provide a sufficient water flow rate for the system.
- Submerge the Water Pump in the Container: The water pump needs to be placed inside the water container that holds the cold water. This container can be a bucket, cooler, or any other suitable vessel. Place the pump at the bottom of the container to ensure it is fully submerged in water.
- Tip: If you are using ice to cool the water, place the pump below the ice level to ensure it remains submerged as the ice melts.
- Note: Make sure the water pump is securely positioned, as any movement can affect the water flow and cooling performance.
- Connect the Pump to the Copper Tubing: Now, it’s time to connect the pump to the copper tubing. Use flexible plastic tubing or hose clamps to securely attach the outlet of the water pump to one end of the copper tubing. The pump will push the water through the tubing, allowing it to circulate and cool the air.
- Tip: Make sure the connection is tight to avoid leaks. Use waterproof silicone sealant or hose clamps to secure the tubing in place.
- Note: If your copper tubing has small diameter openings, you may need to use a connector or adapter to ensure a snug fit between the pump and the tubing.
- Position the Copper Tubing Near the Fan: Once the pump is connected to the tubing, place the other end of the copper tubing near the fan’s air intake. The fan will blow air over the copper tubing, which will be cooled by the water circulating through it. This is where the evaporative cooling effect occurs, as the water absorbs heat from the air and lowers the temperature.
- Tip: Ensure that the fan is blowing air directly over the tubing to maximize the cooling effect. The more direct airflow the tubing gets, the more efficient the cooling will be.
- Note: You may need to experiment with the positioning of the tubing to achieve the best cooling effect, especially if you are using a larger fan.
- Test the Water Pump and Cooling System: Once everything is set up, it’s time to test your cooling system. Turn on the water pump and the fan. The water should start circulating through the tubing, and you should feel cool air blowing from the fan. If the air isn’t cool enough, check for any leaks or blockages in the system and ensure the water pump is working properly.
- Tip: Adjust the pump’s flow rate to control the speed of the water circulation. A faster flow will cool the air more quickly, but if it’s too fast, it could cause inefficiencies. Test different speeds to find the optimal setting for your cooling needs.
- Note: If you’re camping in very hot conditions, adding ice to the water container will provide an additional cooling boost.

How Water Flow Contributes to the Cooling Effect:
The water pump plays a crucial role in creating the cooling effect in your DIY camping air conditioner. When the water circulates through the copper tubing, it absorbs heat from the surrounding air, and the fan blows this cool air into the space. Here’s how the water flow contributes to the cooling:
- Evaporative Cooling: As the water flows through the copper tubing, it loses heat to the surrounding air. The fan blows air over the tubing, which causes the water to evaporate faster. As water evaporates, it absorbs heat, lowering the temperature of the air around the tubing. This is the core principle behind evaporative cooling.
- Efficient Heat Transfer: Copper is an excellent conductor of heat, which means it transfers the heat from the air into the water effectively. The more water flowing through the tubing, the faster this process occurs, and the cooler the air becomes.
- Consistent Cooling: The water pump ensures a continuous flow of water through the copper tubing, which means the cooling effect is constant. A well-maintained flow prevents the water from warming up too much, ensuring that the air remains cool for a longer period of time.
By ensuring that the pump is installed correctly and operates efficiently, you can maximize the cooling effect and enjoy a more comfortable camping experience.
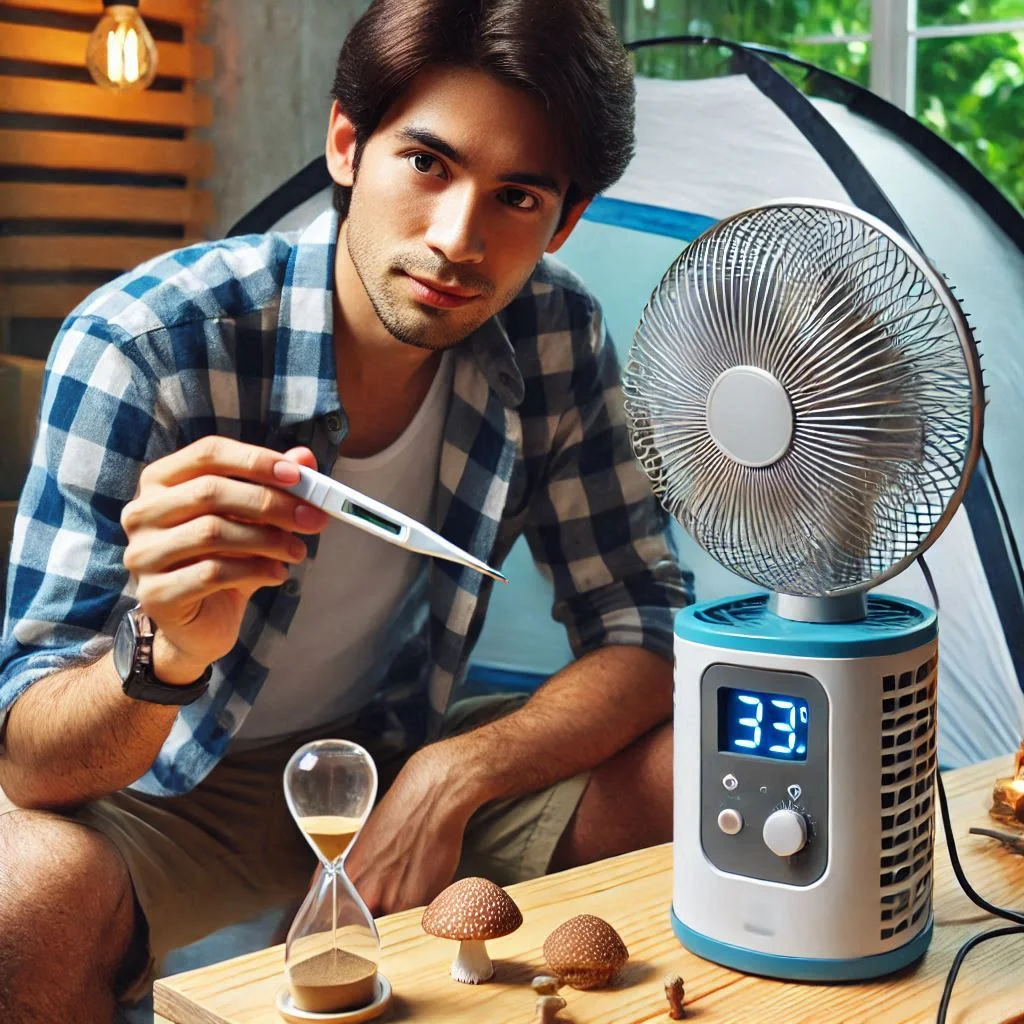
Step 4: Testing and Adjusting Your DIY Camping Air Conditioner
Once you’ve assembled your DIY camping air conditioner, the next crucial step is to test the system and make adjustments for optimal cooling performance. In this step, we will guide you through testing your setup and fine-tuning the water flow and fan speed for the best results. Proper adjustments ensure that your homemade air conditioner works efficiently and effectively, providing a cool and comfortable environment during your camping trip.
Test the System to Ensure It’s Cooling Effectively:
- Initial Testing: After assembling the entire system, it’s important to perform an initial test. Fill the water container with cold water and ice (if desired) to increase the cooling potential. Turn on both the fan and the water pump.
- Tip: Ensure that the water pump is submerged and the copper tubing is properly connected to the fan. If everything is set up correctly, the fan should blow air over the copper tubing, which should be cooled by the circulating water.
- Note: If the fan is not blowing cool air, check the connections between the tubing, pump, and fan. Any loose or improperly sealed connections could lead to inefficiency.
- Check Air Temperature: Place a thermometer in the air stream coming from the fan and check the temperature. Ideally, you should notice a significant drop in temperature when the fan is blowing air over the cooled copper tubing. If the air is not cool enough, there are several adjustments you can make to improve performance.
- Tip: A successful DIY camping air conditioner can lower the temperature by 10–15°F (5–8°C), depending on the ambient temperature, water temperature, and air humidity.
- Note: If the temperature drop is minimal, it could indicate issues with water flow, fan speed, or the setup of your copper tubing.
- Inspect for Leaks or Blockages: While testing, ensure there are no leaks in the system. If you notice any water dripping from the tubing or connections, tighten them with hose clamps or seal them with waterproof tape or silicone. Blockages in the copper tubing can also hinder water flow and reduce cooling effectiveness, so check for any kinks in the tubing.
- Tip: Be sure that the water pump is providing adequate flow through the tubing. A weak flow can result in inefficient cooling.
Tips on Adjusting Water Flow or Fan Speed for Optimal Performance:
- Adjusting Water Flow: The water flow rate plays a crucial role in the cooling efficiency of your DIY camping air conditioner. If the flow is too slow, the water won’t absorb enough heat, and the system will not cool effectively. If the flow is too fast, the water may not have enough time to evaporate and cool the air.
- Tip: Most submersible water pumps have an adjustable flow rate. Start by setting it to a moderate speed and then test the system. If the air is still warm, slightly increase the flow. If the system is noisy or inefficient, reduce the flow to avoid water wastage.
- Note: When adjusting the flow rate, make sure that the pump is still capable of circulating water effectively. A very low flow rate might cause the pump to overheat or malfunction.
- Adjusting Fan Speed: The speed of the fan is another critical factor in cooling effectiveness. If the fan is set too low, the air may not pass through the copper tubing quickly enough to benefit from the evaporative cooling process. If the fan speed is too high, it could cause too much air to flow through the system without allowing enough time for cooling.
- Tip: Set the fan speed to a moderate setting that ensures adequate airflow without overworking the system. If your fan has multiple speed settings, start on the lowest speed and gradually increase it while monitoring the cooling effect.
- Note: The size of your fan matters. Larger fans may need to be set to a higher speed to ensure sufficient airflow over the copper tubing, whereas smaller fans may not require as much speed to cool effectively.
- Adjusting Copper Tubing Position: Sometimes, the position of the copper tubing can impact the system’s performance. Ensure that the copper tubing is positioned so that the fan blows air directly over it. The more air that flows over the tubing, the better the cooling effect will be.
- Tip: You can experiment with the angle or height of the tubing to find the most effective position for cooling. If possible, raise the tubing slightly above the water container to help ensure a constant water flow and to prevent backflow into the pump.
- Note: Make sure the fan is not obstructed by the tubing or water container, as this can reduce the airflow and cooling efficiency.
General Troubleshooting:
- Air Isn’t Cool Enough: If the air isn’t cooling sufficiently, consider adding more ice to the water container or increasing the water flow rate. You could also check the fan’s positioning and ensure it’s blowing directly over the tubing.
- Water is Leaking: If you notice water leaking from the system, inspect all connections between the tubing and the pump, fan, and water container. Tighten any loose fittings or reapply waterproof tape.
- Weak Water Flow: If the water flow is too weak, check for blockages or kinks in the copper tubing. Also, ensure that the pump is working efficiently and is properly submerged in the water container.
- Pump Not Operating Correctly: If the water pump isn’t working, check its power supply (especially if it’s battery-operated) and ensure that it’s properly connected to the tubing. Also, make sure that the pump is fully submerged in the water container.
Alternative DIY Camping Air Conditioner Ideas for Budget Travelers
When you’re camping, especially on a budget, finding cost-effective ways to stay cool is essential. A DIY camping air conditioner doesn’t have to be complicated or expensive. There are various alternatives to traditional fan-based cooling systems, some of which rely on ice or simple materials that are easy to find. This section will explore alternative DIY air conditioning ideas for different camping environments, from desert climates to humid regions, ensuring that every camper can stay cool without breaking the bank.
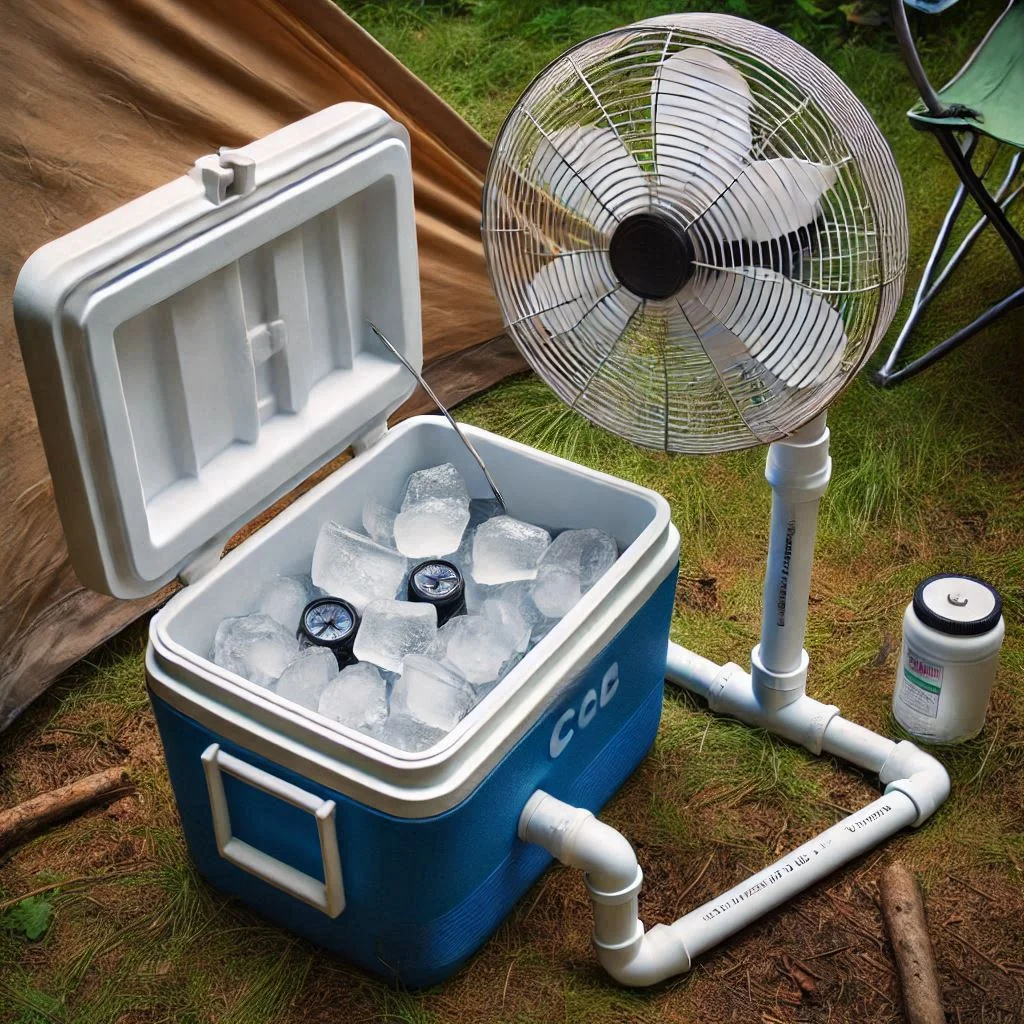
1. Ice-Powered Cooling System: The Ultimate Budget-Friendly Option
An ice-powered cooling system is one of the simplest and most effective DIY air conditioner alternatives, especially when you don’t want to invest in complex materials. The system works by harnessing the cold air produced from melting ice and directing it towards you for cooling.
How it works:
- Materials Needed: A cooler, fan, ice, and PVC pipe or tubing.
- Instructions:
- Prepare the Cooler: Fill the cooler with ice. The more ice you add, the cooler the air will be.
- Attach the PVC Pipe: Cut a small hole in the cooler lid and insert a PVC pipe that will direct the cold air out of the cooler. Attach a fan to blow air over the ice and out through the pipe.
- Position the Fan: Place the fan on top of the cooler, ensuring the airflow is directed through the pipe and out into your tent or camping area.
- Start the Fan: Turn on the fan to circulate the cold air produced by the melting ice.
Benefits:
- Extremely budget-friendly
- Doesn’t require electricity (unless you use a battery-powered fan)
- Simple to assemble with minimal tools
Tip: You can also experiment with adding frozen water bottles to the cooler for longer-lasting cold air.
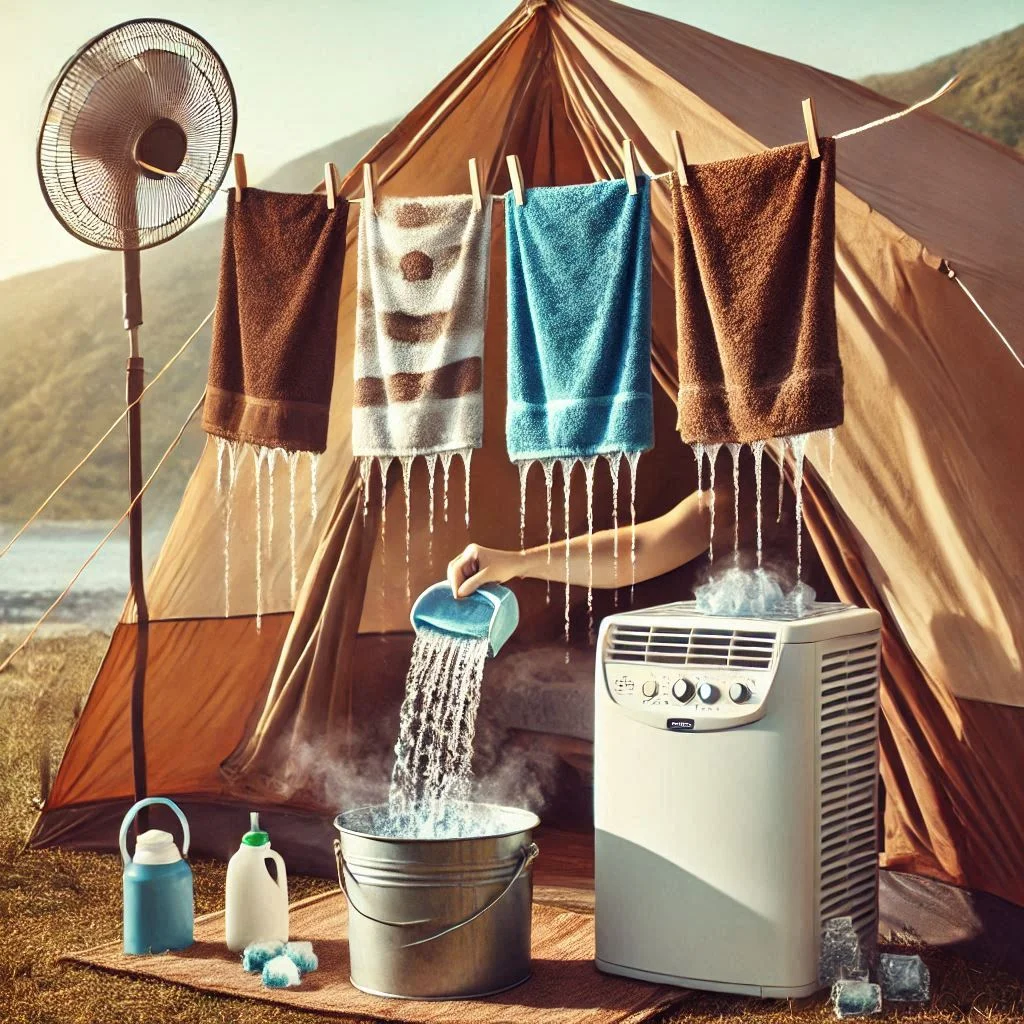
2. The Wet Towel Cooling Method: Quick and Effective
For those looking for a very simple solution, the wet towel method is an old but effective cooling technique. This method doesn’t require complex materials, making it an ideal choice for budget travelers who need a quick cooling solution.
How it works:
- Materials Needed: Towels, a bowl of cold water, or access to a nearby water source.
- Instructions:
- Soak the Towels: Soak several towels in cold water. You can add ice to the water to increase the cooling effect.
- Place Towels Around You: Hang the towels inside your tent or drape them over yourself while you rest. As the water evaporates from the towel, it creates a cooling sensation.
- Wring Out Regularly: For continued cooling, wring out the towels and dip them back in the cold water to keep them wet.
Benefits:
- No electricity required
- Very budget-friendly
- Easy to implement in almost any camping environment
Tip: You can also use this method for cooling your body directly by placing wet towels on your neck, wrists, and forehead.
3. Portable Evaporative Cooler for Dry Climates
In desert climates where the air is hot and dry, an evaporative cooler (also known as a swamp cooler) can be a more effective solution. These coolers work by using water to cool down the air, making them perfect for low-humidity environments.
How it works:
- Materials Needed: A fan, wet sponge or cloth, and a container of water.
- Instructions:
- Soak the Sponge: Soak a large sponge or cloth in water. The wetter, the better.
- Place the Sponge in Front of the Fan: Position the sponge in front of the fan to allow air to pass through the wet sponge. The fan blows air over the sponge, and the evaporation process cools the air.
- Continue Adding Water: Keep the sponge wet to ensure consistent cooling.
Benefits:
- Ideal for dry, desert environments
- Low-cost and simple
- Can be powered by a small battery or solar panel
Tip: If you’re in an extremely dry area, you may need to refill the water container frequently to maintain airflow.
4. Fan with a Dampened Sheet for Cooling in Humid Climates
In humid climates, the evaporation process might not work as well as it does in dry climates. However, you can still benefit from a cooling effect by using a fan and a dampened sheet to increase airflow.
How it works:
- Materials Needed: A fan and a large sheet (preferably a thin cotton or linen fabric).
- Instructions:
- Dampen the Sheet: Soak the sheet in cold water. The wetter the sheet, the more effective it will be.
- Hang the Sheet in Front of the Fan: Hang the damp sheet in front of the fan so that the air blows through it.
- Let the Airflow Cool You: As the fan blows air over the damp sheet, it will create a cooling effect by increasing evaporation.
Benefits:
- Ideal for humid environments where traditional cooling systems might not work
- Simple to make and use
- Can be used with minimal resources
Tip: Using a thin, breathable sheet will allow for better air circulation and cooling. Be sure to wring out excess water to avoid dripping.
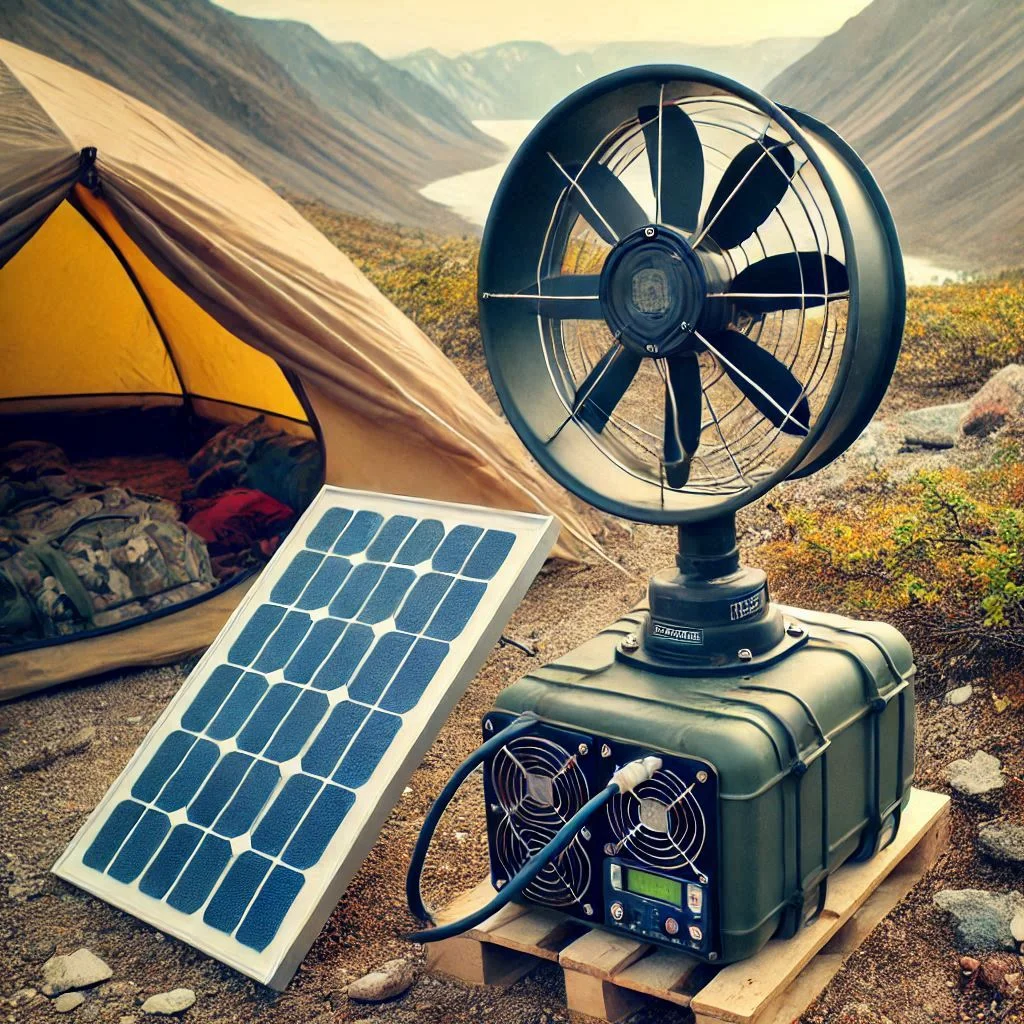
5. DIY Solar-Powered Cooling System for Remote Camping
For those camping off the grid or in more remote locations, a solar-powered air cooling system can be an ideal solution. While it may require a bit of upfront investment in solar panels, it can provide a sustainable and environmentally friendly way to stay cool.
How it works:
- Materials Needed: Small solar panel, fan, copper tubing or piping, and water container.
- Instructions:
- Set Up the Solar Panel: Position the solar panel where it will get maximum sunlight.
- Connect the Fan to the Solar Panel: Use the solar panel to power the fan. If necessary, use a battery to store the solar energy.
- Build the Cooling System: Set up the fan and copper tubing (similar to a DIY evaporative cooler) to create a cooling effect.
- Place the Fan Near the Tubing: Ensure that the fan blows air over the cooled tubing for maximum cooling efficiency.
Benefits:
- Sustainable and eco-friendly
- Provides cooling even in remote locations
- Minimal reliance on conventional power sources
Tip: This solution works best in areas with consistent sunlight, so ensure your campsite receives adequate solar exposure.
FAQs about DIY Camping Air Conditioner
As the popularity of camping continues to grow, so does the demand for innovative, cost-effective ways to stay cool in the great outdoors. A DIY camping air conditioner offers a simple solution to this problem. Below, we answer some frequently asked questions about DIY air conditioners, providing you with insights into their effectiveness, cost, and materials for the best results.
1. Can a DIY camping air conditioner cool a tent effectively?
Yes, a DIY camping air conditioner can effectively cool a tent, but its efficiency largely depends on the size of the tent and the cooling system’s design. Small, one- to two-person tents are more easily cooled compared to larger family tents. The DIY system works best by utilizing either ice, water, or solar-powered fans, combined with a cooling method such as evaporation or air circulation.
How it works:
- Small Tents: For small tents, ice-powered cooling systems or damp towel fans are highly effective. The confined space allows the cool air to circulate quickly and maintain a lower temperature inside.
- Larger Tents: Larger tents may require more substantial cooling systems, such as evaporative coolers with stronger fans or multiple DIY setups.
Key Tip: To maximize the cooling effect, seal the tent properly to trap the cool air inside and reduce the entry of hot air.
2. How much does it cost to make a DIY camping air conditioner?
The cost of making a DIY camping air conditioner can vary depending on the materials used and the complexity of the system. On average, a basic DIY air conditioning system can be created for as little as $30 to $50, especially if you’re using simple materials such as a fan, ice, and PVC pipes.
Estimated Costs:
- Ice-Powered Systems: Materials like a cooler, ice, PVC pipes, and a small fan can cost between $30 to $40.
- Evaporative Coolers: A DIY evaporative cooler might cost around $40 to $60 if you’re using basic materials like a fan, water container, and sponge or cloth.
- Solar-Powered Systems: For solar-powered DIY air conditioners, the cost could be a bit higher, around $70 to $100, due to the price of a small solar panel and battery.
Comparison to Portable AC Units:
Portable air conditioners typically range from $150 to $500, depending on the brand and features. By creating a DIY system, you can save a significant amount of money while still achieving effective cooling.
Key Tip: You can also reduce costs by using materials you already have on hand, such as old fans or unused coolers.
3. What are the best materials to use for the most effective DIY cooling?
The effectiveness of your DIY camping air conditioner is highly influenced by the materials you use. Here are some high-quality materials that will provide maximum cooling efficiency:
- Fans: A powerful fan is crucial for circulating air effectively. Look for energy-efficient, battery-operated fans or USB-powered fans for portability.
- Copper Tubing or PVC Pipe: Copper tubing is highly effective for air cooling systems due to its excellent heat conductivity. However, if you’re on a budget, PVC pipes are a cost-effective alternative.
- Ice or Frozen Water Bottles: For an ice-powered cooling system, use large blocks of ice or frozen water bottles. They last longer and help provide a steady flow of cool air.
- Sponge or Cloth: For evaporative coolers, a highly absorbent sponge or cloth is essential. Choose a natural fabric like cotton or linen for better moisture retention.
- Solar Panels: If you’re opting for a solar-powered system, ensure that you use a reliable, durable solar panel that can charge even in low sunlight conditions.
Key Tip: Always use high-quality, durable materials to ensure your DIY system works effectively and lasts longer.
4. Can this DIY AC system work in extremely hot weather?
While a DIY camping air conditioner can provide cooling relief, its effectiveness may diminish in extremely hot conditions, particularly when outdoor temperatures exceed 90°F (32°C). However, there are ways to maximize the efficiency of your DIY system during heatwaves or intense outdoor conditions.
Tips for Hot Weather Efficiency:
- Increase Ice Supply: If you’re using an ice-powered system, increase the amount of ice you use to prolong cooling. Larger blocks of ice melt slower and provide longer-lasting cold air.
- Use Multiple Fans: Adding additional fans to your system can help circulate the cool air more effectively. Position them strategically around your tent to ensure proper airflow.
- Shaded Area: Set up your DIY air conditioner in a shaded area to prevent it from being overwhelmed by the sun’s heat. The cooler the environment around your system, the more effectively it will cool your tent.
- Seal the Tent: Ensure the tent is sealed properly to prevent hot air from entering. Using tarps or reflective materials around the tent can further reduce the heat buildup inside.
Key Tip: While DIY systems are effective for mild to moderate heat, in extreme conditions, it might be necessary to use additional cooling methods, such as misting systems or extra insulation for your tent.
