
Understanding Freon and Its Role in Your RV’s AC System
When it comes to keeping your RV cool on a hot day, the air conditioning system is one of the most important components. The refrigerant inside your RV’s AC system, commonly known as Freon, plays a crucial role in the cooling process. Understanding how Freon works and its importance can help you troubleshoot any potential issues with your RV’s air conditioner and maintain a comfortable environment in your camper.
What Is Freon?
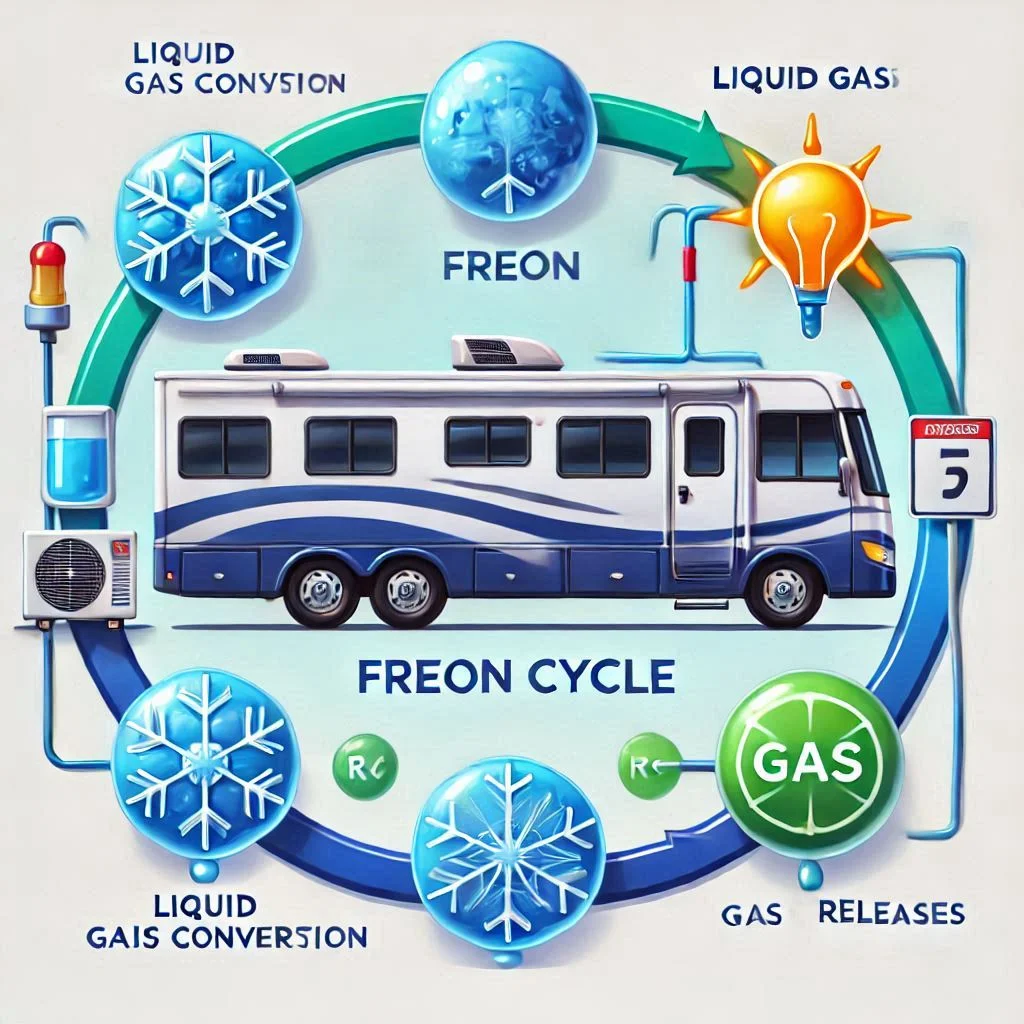
Freon is a brand name commonly used to refer to a variety of refrigerants used in air conditioning systems, including RV AC units. Technically, Freon refers to chlorofluorocarbons (CFCs) or hydrofluorocarbons (HFCs) that are chemically engineered to help transfer heat. These substances are stored in liquid form inside the system and are essential for cooling the air inside your RV.
Freon circulates through the air conditioning system, absorbing heat from inside your RV and releasing it outside. The cooling process involves Freon changing from a liquid to a gas as it absorbs heat, and then back into a liquid as it releases heat outside the RV. This cycle is critical for maintaining the cool air inside your camper.
The Problem With Freon
While Freon plays an essential role in cooling your RV, there are some problems associated with it that RV owners need to be aware of. Over time, Freon can leak out of the air conditioning system, leading to reduced cooling efficiency. This can happen due to worn-out seals, loose connections, or even physical damage to the AC system. If your RV AC is not cooling as effectively as it should, it could be a sign that there is a low level of Freon in the system.
Another issue with Freon is that it is a chemical compound that is harmful to the environment. As the use of older refrigerants like Freon (CFCs) has been phased out due to their ozone-depleting properties, many RV owners may still be using outdated systems. Newer RV air conditioners often use more eco-friendly refrigerants like R-410A, which are less harmful to the environment but still require periodic maintenance to ensure the system is functioning properly.
If you suspect a Freon leak, it’s crucial to address the issue immediately. Continuing to run an air conditioner with low Freon not only reduces cooling efficiency but also puts unnecessary strain on the system, which could lead to costly repairs down the road.
Signs Your RV AC Needs Freon Recharging
Freon is a crucial part of your RV’s air conditioning system, and if the levels drop too low, it can result in reduced cooling performance. To ensure your RV remains cool and comfortable, it’s important to recognize the signs that your AC unit might need Freon recharging. Early detection can help prevent further damage to your AC system and keep it running efficiently.
Symptoms of Low Freon in Your RV AC
Several signs may indicate that your RV AC is running low on Freon. Recognizing these symptoms early can help you address the issue before it becomes more serious. Here are the most common signs that your AC may need Freon:
- Warm Air Blowing from Vents: One of the most obvious signs of low Freon is when your RV’s air conditioner blows warm or hot air, despite the AC unit being turned on. This typically occurs because the refrigerant is no longer circulating effectively, preventing the system from cooling the air properly.
- Inconsistent Cooling: If your RV AC cools certain areas of the camper but not others, it could be a sign of low Freon. Insufficient refrigerant leads to uneven cooling, as the AC system struggles to maintain the proper temperature throughout the entire vehicle.
- AC Unit Running but Not Cooling: If your AC system runs normally but isn’t producing cool air, it could be due to a low Freon level. The system might still function, but the cooling capacity is significantly reduced, leaving the cabin uncomfortably warm.
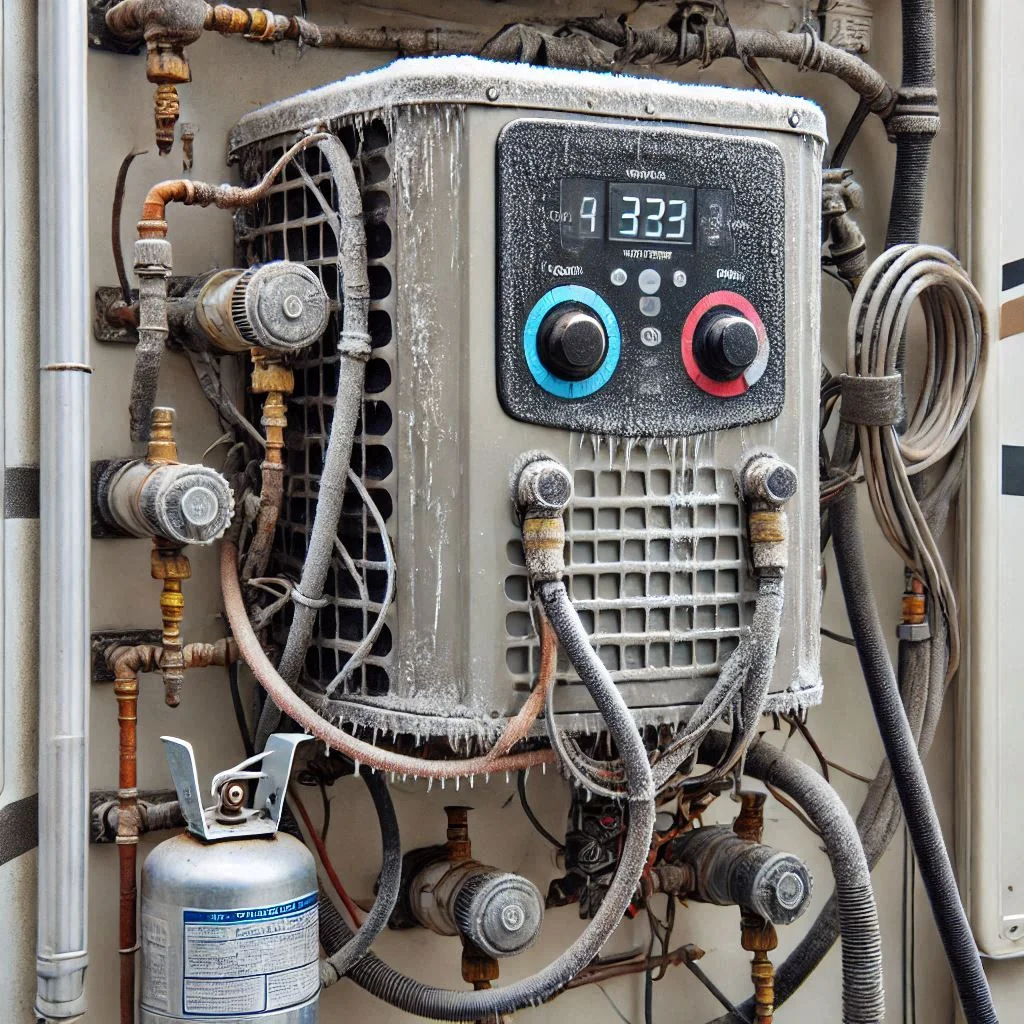
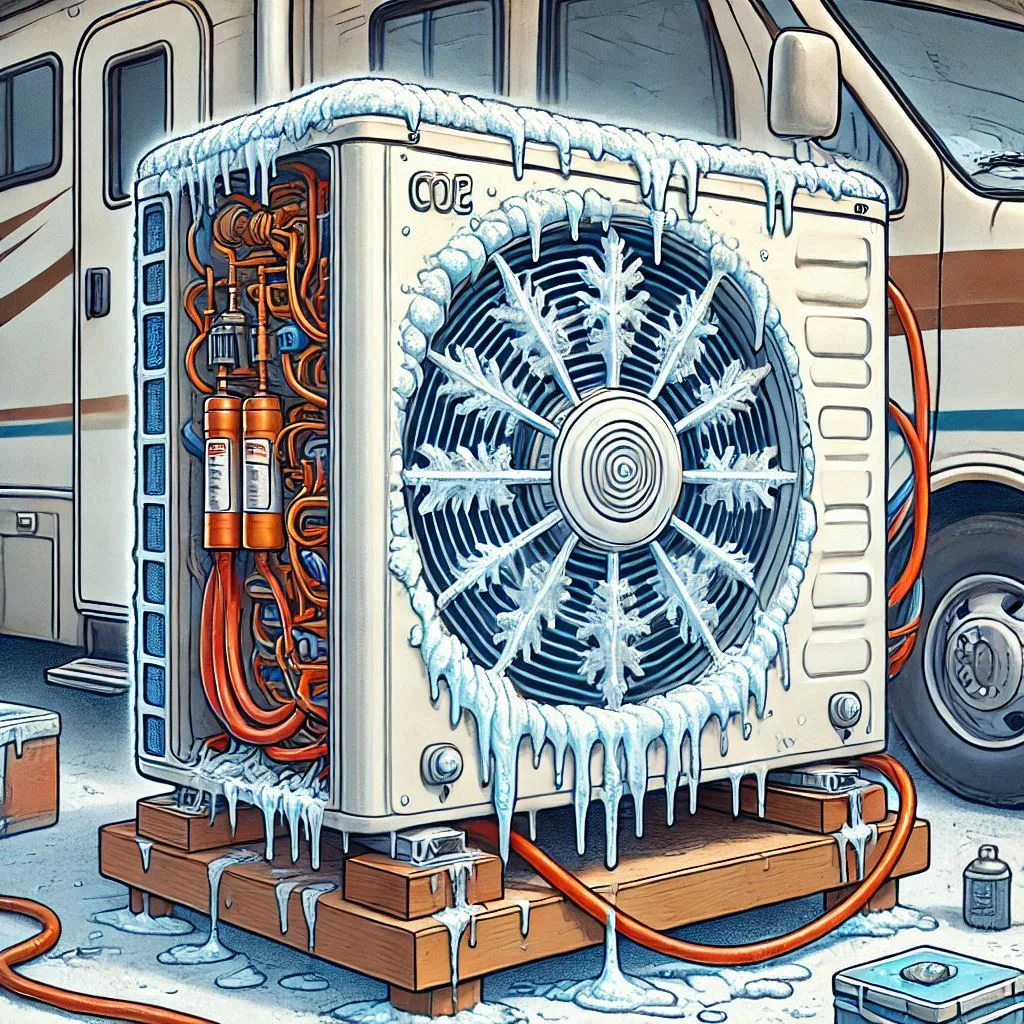
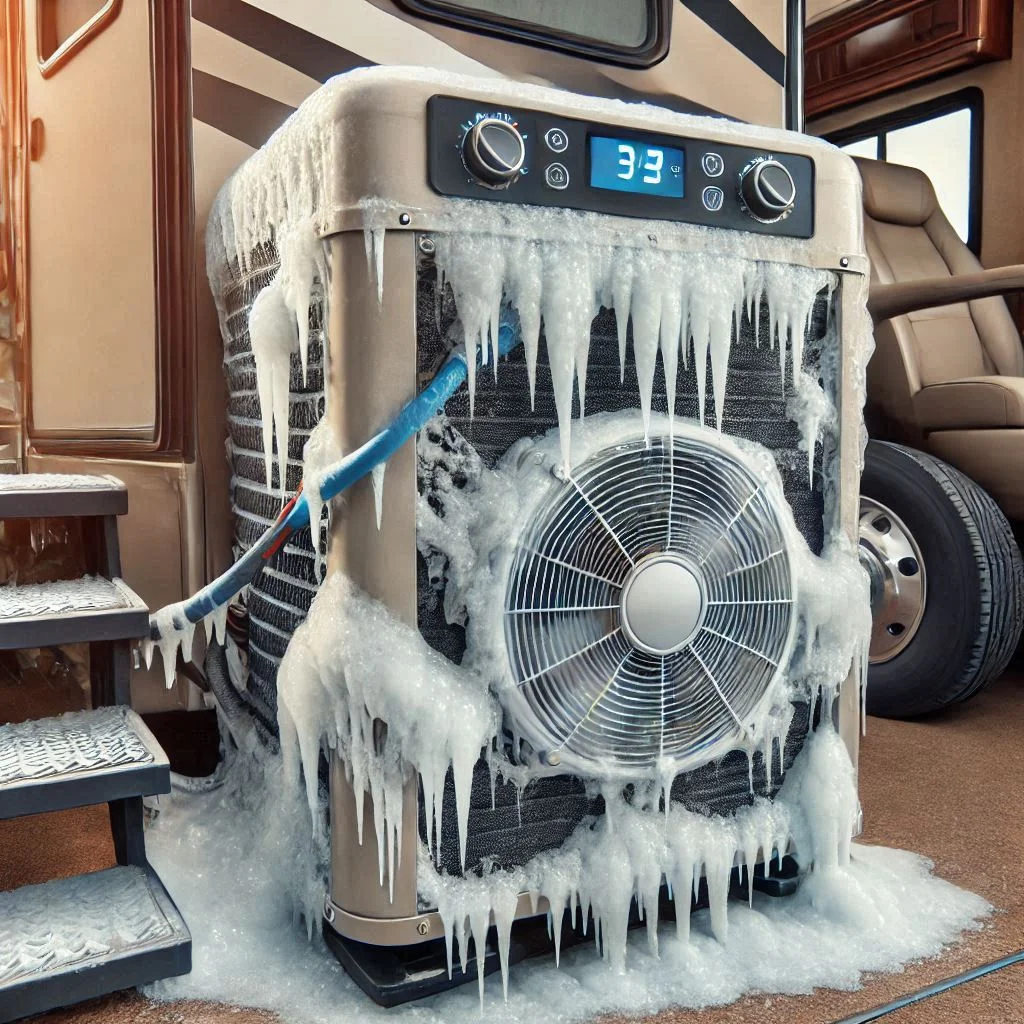
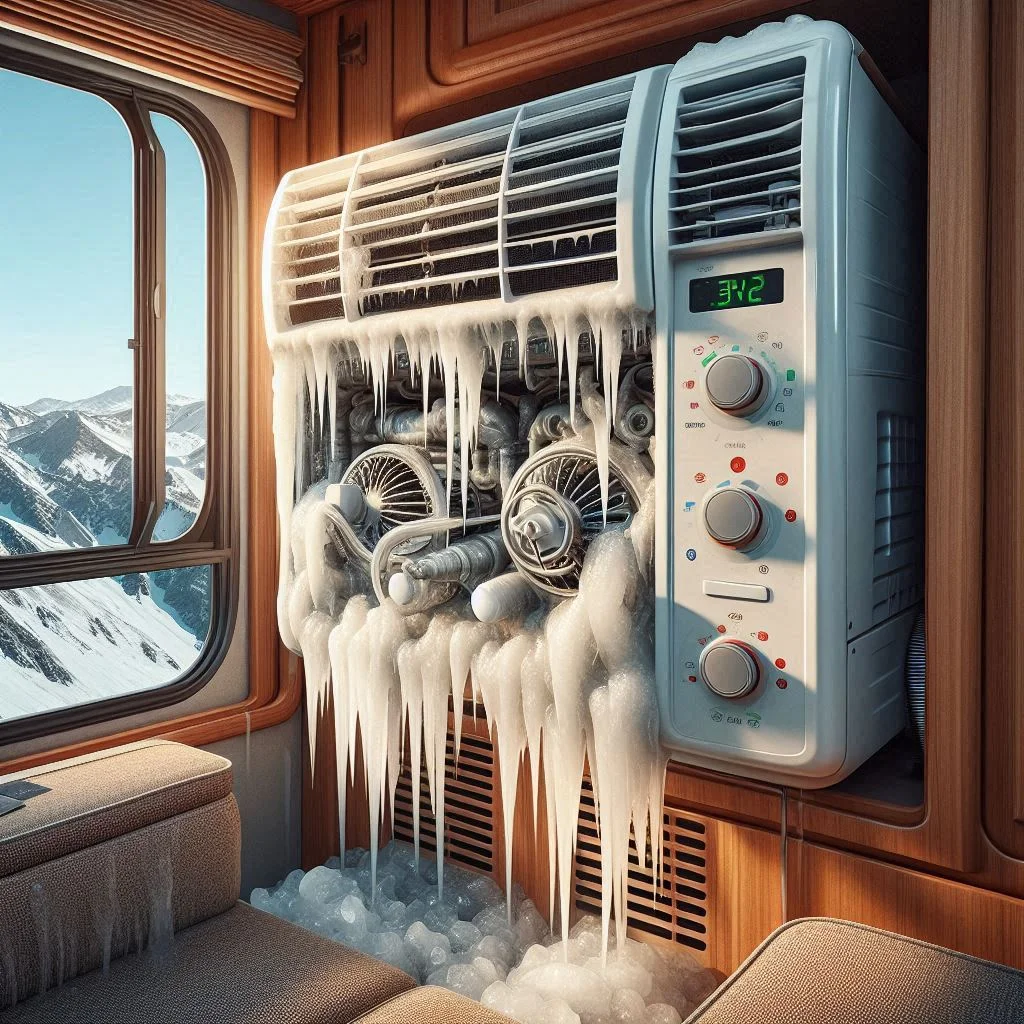
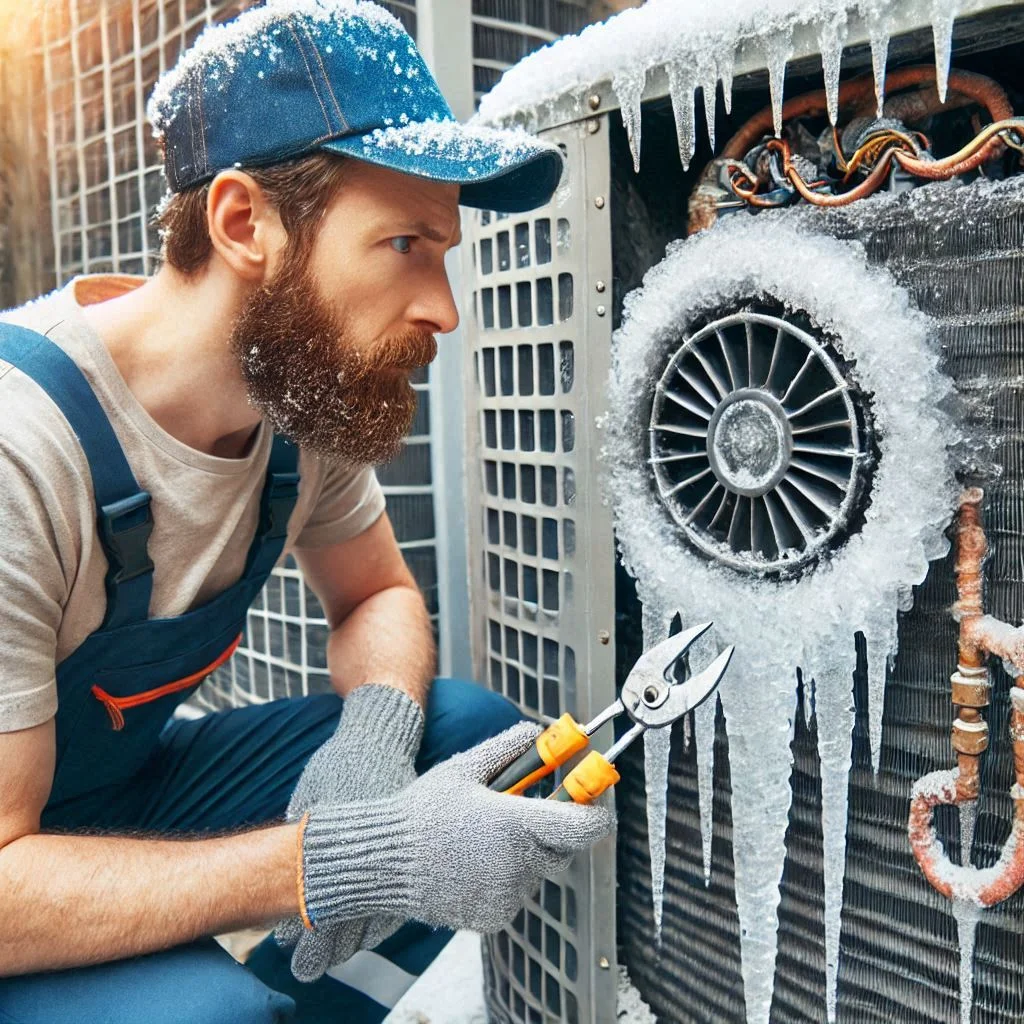
- Frozen Coils or Lines: Another sign of low Freon is the formation of ice on the coils or refrigerant lines. When Freon levels drop too low, the pressure inside the system decreases, causing moisture to freeze. This can obstruct the airflow and damage the system if not addressed promptly.
Troubleshooting Your AC Before Adding Freon
Before adding Freon to your RV AC, it’s important to troubleshoot the system to ensure that the issue is indeed a Freon deficiency. Here are the steps to troubleshoot your AC and determine whether you need a recharge:
- Check for Blocked Airflow: Ensure that the vents and filters are not blocked or clogged. Restricted airflow can cause your RV’s AC to perform poorly. Clean or replace filters if necessary, as dirty filters can mimic symptoms of low Freon by restricting airflow and reducing cooling efficiency.
- Inspect for Leaks: If you notice that your Freon levels are low, inspect the AC system for possible leaks. Refrigerant leaks are one of the most common causes of Freon depletion. If you see signs of oil or grime buildup around the refrigerant lines or connections, this could indicate a leak. In such cases, adding Freon won’t solve the problem unless the leak is fixed first.
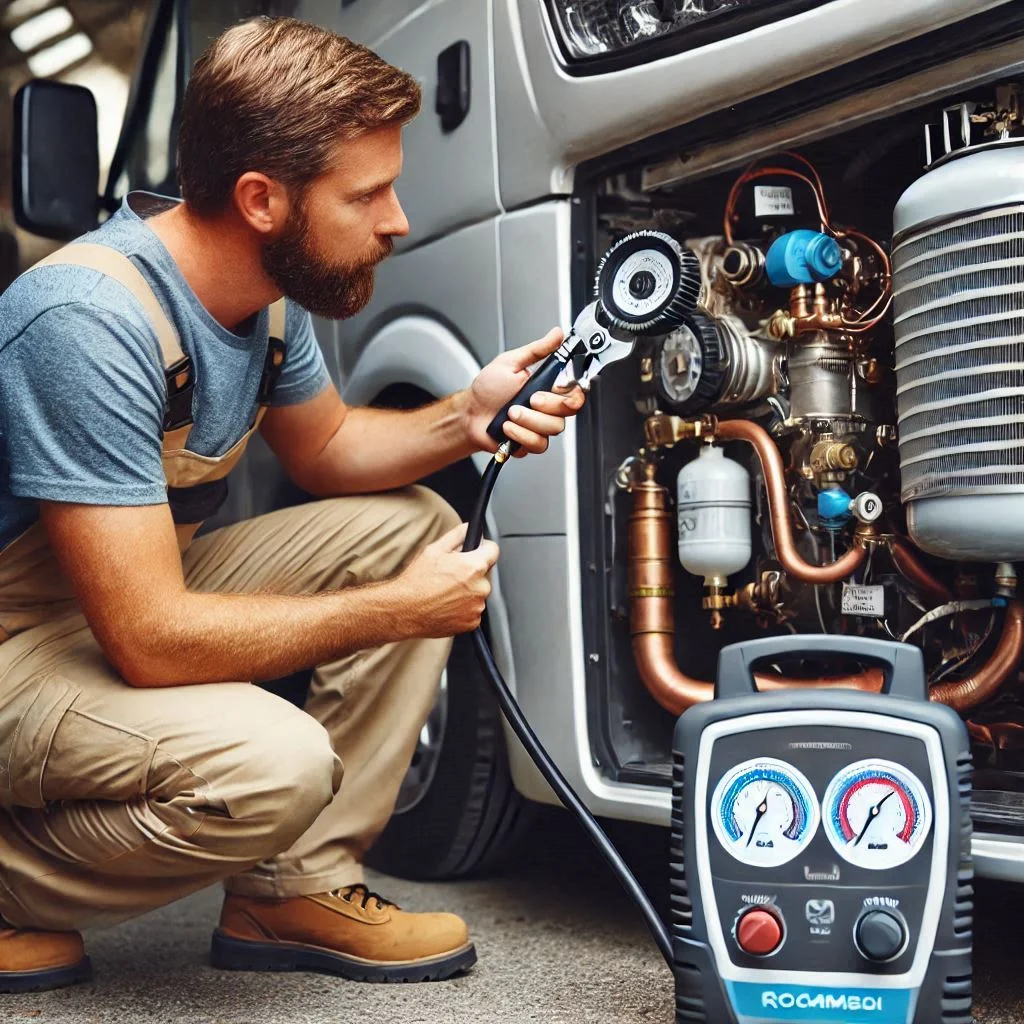
- Test the AC’s Performance: If you’ve ruled out airflow issues and leaks, it’s time to test the AC’s performance. Turn on the AC and check if the compressor is running. If the compressor is functioning but the air isn’t cooling, low Freon is likely the cause. You can also use a manifold gauge to check the refrigerant pressure. Low pressure on the gauge typically indicates that the system is low on Freon.
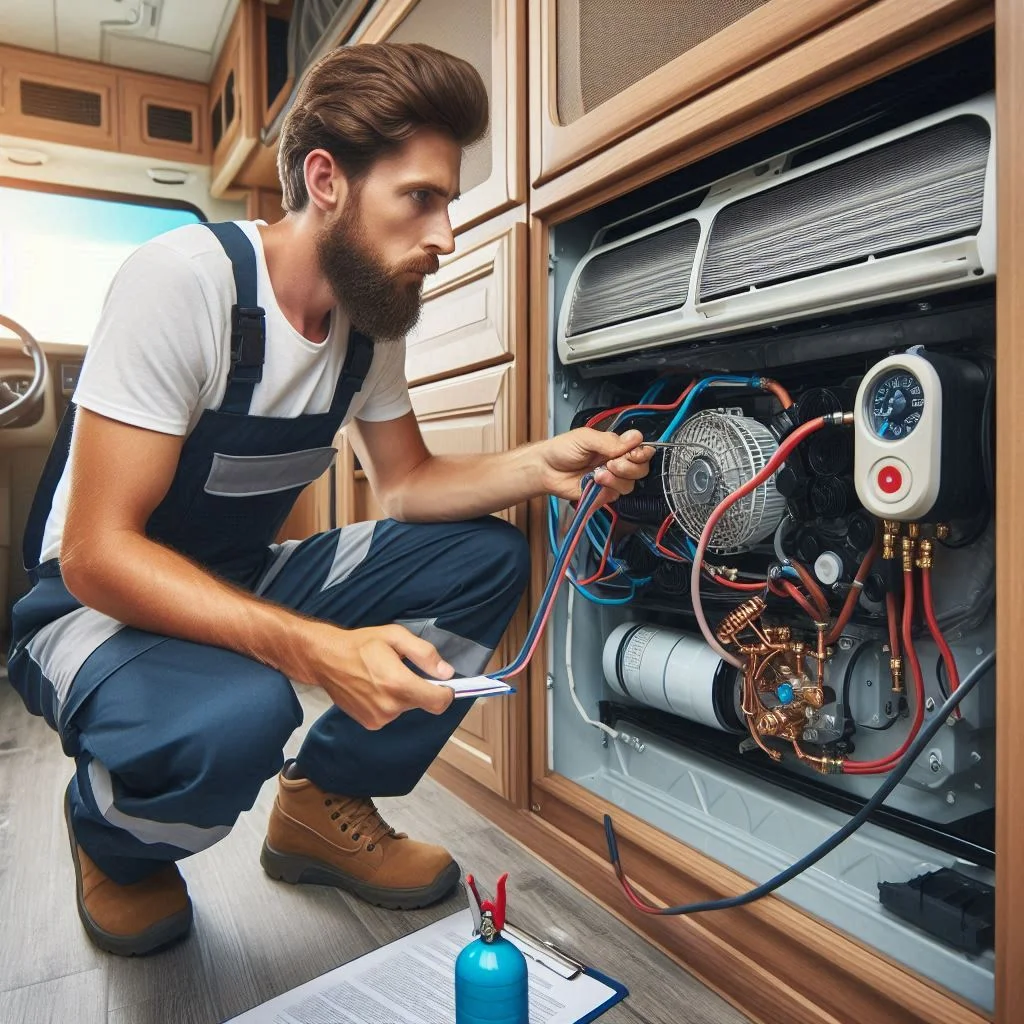
- Consult a Professional: If you’ve troubleshot the system and are still unsure, it’s best to consult a professional HVAC technician. They can accurately diagnose the issue and determine if the AC needs a Freon recharge or if there are other underlying problems that need attention.
Step-by-Step Guide to Adding Freon to Your RV Air Conditioner
Adding Freon to your RV air conditioner is an essential maintenance task to keep your AC system running efficiently, especially if you’ve noticed that it’s not cooling as effectively as it should. Properly recharging your AC with Freon can restore its performance and extend its lifespan. In this guide, we’ll walk you through the tools you’ll need and the steps to safely add Freon to your RV AC system.
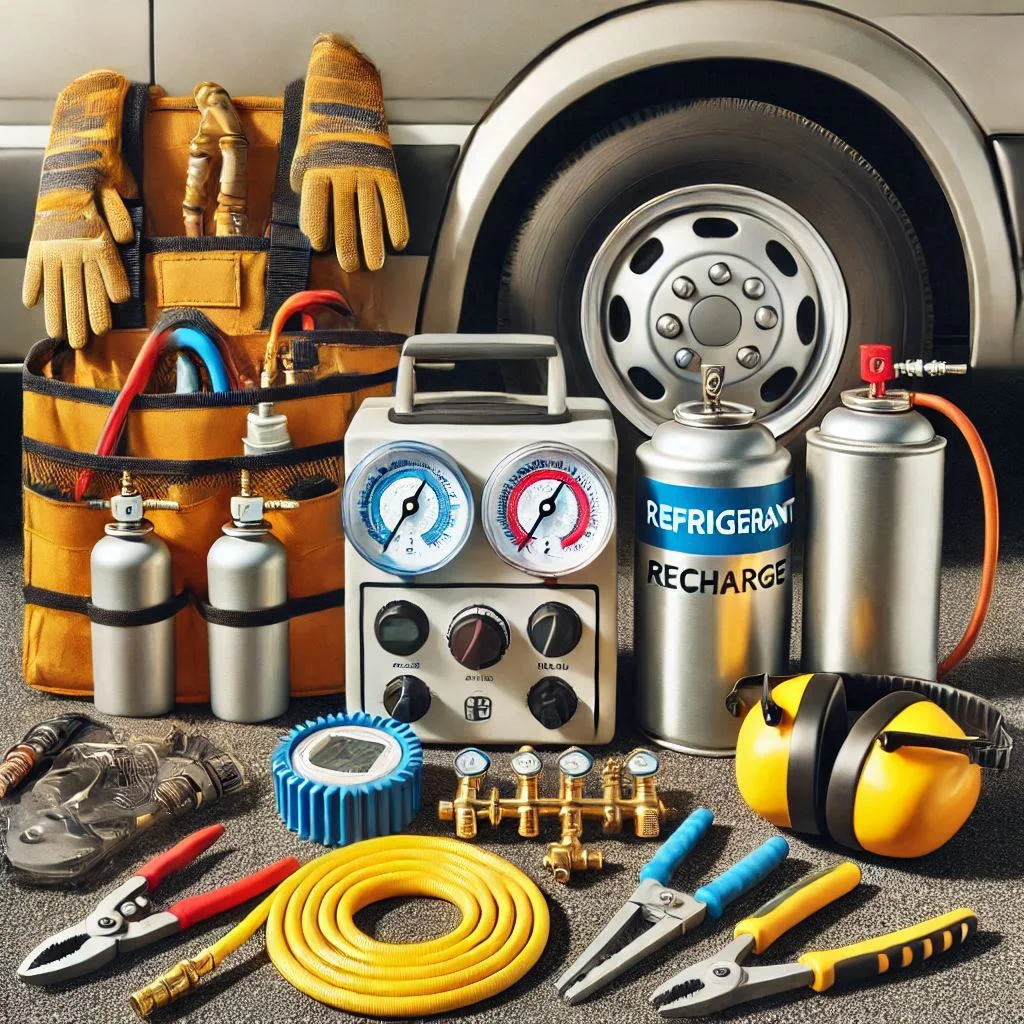
Tools and Equipment You’ll Need
Before you begin the process of adding Freon to your RV’s air conditioner, it’s important to gather all the necessary tools and equipment. Using the right tools ensures that you can complete the task safely and effectively. Here’s a list of the essential items you’ll need:
- Manifold Gauge Set: A manifold gauge set allows you to check the refrigerant pressure in your RV AC system. It helps you assess whether your system is undercharged and determine how much Freon needs to be added.
- Refrigerant (Freon): Ensure that you purchase the correct type of Freon that is compatible with your RV’s air conditioning system. Check your AC unit’s manual to determine whether it uses R-22, R-410A, or another type of refrigerant. It’s crucial to use the right refrigerant for the system to function properly.
- Recharge Hose: A recharge hose connects the refrigerant canister to the manifold gauge set and ultimately to your RV AC unit. Make sure to get a hose that’s long enough to reach your AC from the location where you’ll be performing the recharge.
- Safety Gear: Always wear safety goggles and gloves when handling Freon. Refrigerant is a pressurized gas that can cause injury if mishandled. Safety precautions are necessary to protect your eyes and skin from exposure.
- Thermometer: A thermometer is useful to measure the temperature of the air coming out of your RV’s AC vents. This will help you determine whether the system is cooling properly after the Freon recharge.
- Leak Detection Kit: If you’re concerned that your AC unit may have a leak, it’s a good idea to use a leak detection kit to identify any issues before adding more refrigerant.
How to Safely Add Freon to Your RV AC
Once you have gathered all the necessary tools, it’s time to start the process of adding Freon to your RV air conditioner. Follow these steps carefully to ensure that the process is done safely and effectively.
Step 1: Prepare Your RV AC System
Before beginning, ensure that your RV’s AC system is turned off. Open all windows and doors to promote airflow, and make sure that your RV is parked on level ground. This helps in maintaining accurate readings when checking refrigerant levels.
Step 2: Connect the Manifold Gauge Set
Attach the blue (low-pressure) hose of the manifold gauge set to the low-pressure service port on your RV’s AC unit. This is typically located on the suction side of the compressor. The red (high-pressure) hose should be attached to the high-pressure port. Make sure that the manifold gauge is securely connected to prevent leaks during the process.
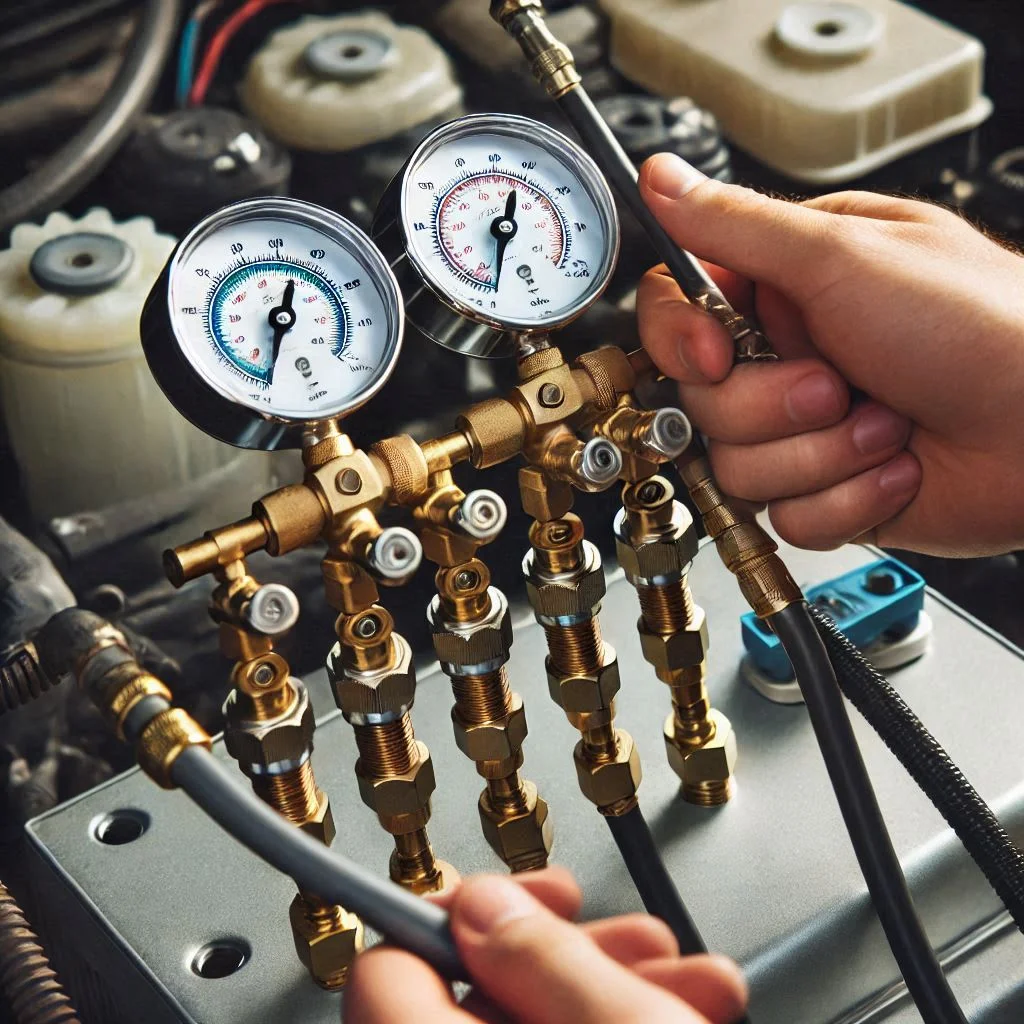
Step 3: Check the Refrigerant Pressure
With the manifold gauge connected, check the refrigerant pressure readings on the gauge. If the pressure is below the manufacturer’s recommended level, your system is low on Freon and requires a recharge.
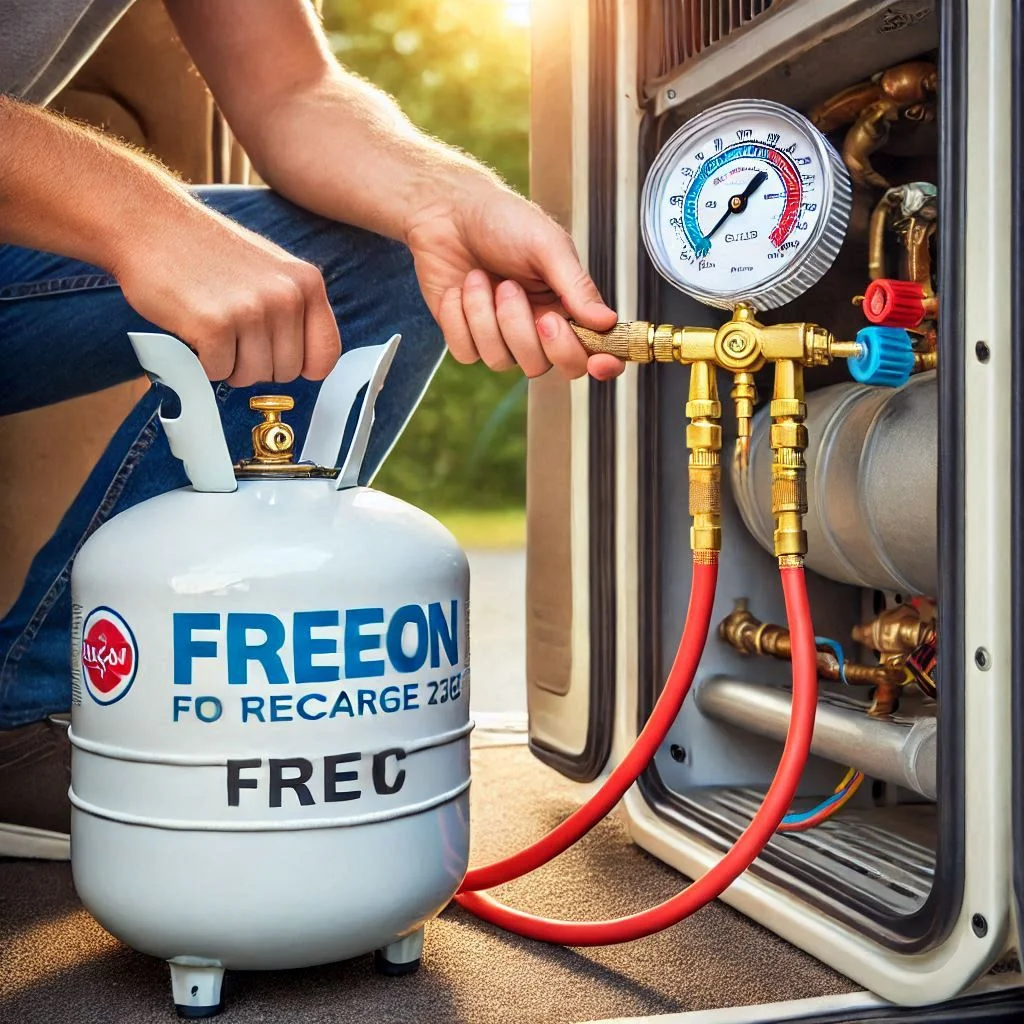
Step 4: Add Refrigerant to Your RV AC
Now that you know your system is low on Freon, it’s time to add refrigerant. Connect the refrigerant canister to the hose that leads from the manifold gauge. Open the valve on the refrigerant canister and begin adding Freon to the system slowly. Monitor the pressure gauge to avoid overcharging the system, which can cause damage.
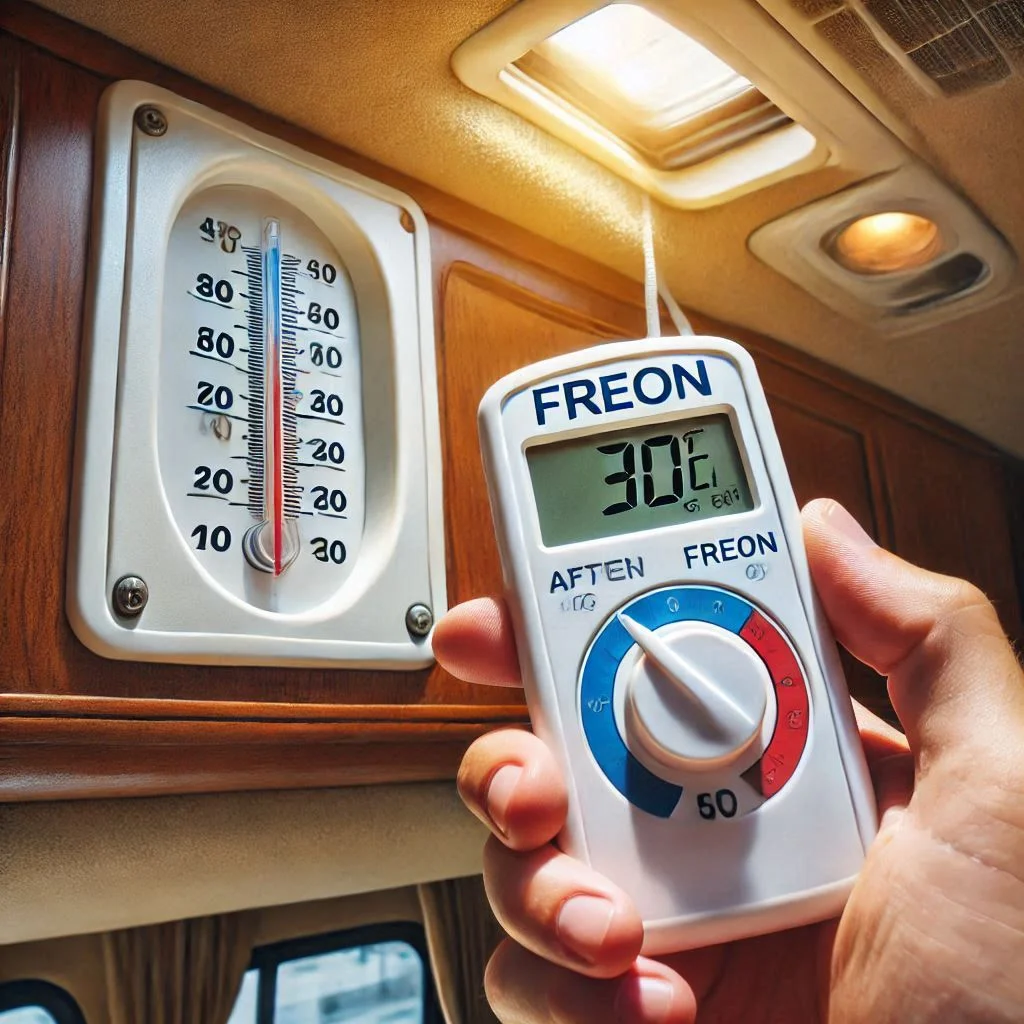
Step 5: Monitor the AC’s Performance
After adding the Freon, close the valve on the refrigerant canister and disconnect the hoses. Turn on your RV’s air conditioning and check the temperature of the air blowing out of the vents using a thermometer. The air should be noticeably cooler. If the system is still not cooling properly, you may need to check for leaks or consult a professional.
Step 6: Final Check and Clean-Up
Once your AC is functioning properly, double-check all connections to ensure that the hoses are securely removed and the ports are properly sealed. Clean up the area and store your tools and leftover refrigerant in a safe place. Keep track of the amount of Freon used, as it’s important to monitor refrigerant levels for future maintenance.
Preventing Future AC Problems: Tips for Maintaining Your RV’s Air Conditioning
Your RV’s air conditioning system is essential for staying cool and comfortable, especially during long road trips or hot weather. To ensure your AC unit continues to run efficiently and effectively, it’s crucial to maintain it properly. Regular maintenance can prevent expensive repairs, improve system performance, and extend the lifespan of your AC unit. In this section, we’ll discuss tips for preventing future AC problems and keeping your RV’s air conditioner in top condition.
Making Your RV Air Conditioner Run More Efficiently
A well-maintained RV AC system is not only more effective but also more energy-efficient. Here are some tips to help your air conditioner run more efficiently, saving you both energy and money:
- Regularly Clean the Air Filters: One of the easiest ways to improve the efficiency of your RV’s air conditioner is by cleaning or replacing the air filters regularly. Clogged filters restrict airflow, causing the system to work harder than necessary. A clean filter ensures that air flows freely and that the AC cools the cabin more efficiently.
- Keep the Coils Clean: Over time, dirt and debris can accumulate on the evaporator and condenser coils of your RV AC. Dirty coils reduce the unit’s ability to absorb and release heat, making the system work harder. Periodically inspect and clean the coils using a soft brush or coil cleaner to maintain optimal efficiency.

- Inspect and Maintain the Ductwork: Leaky or clogged air ducts can significantly reduce your RV AC’s performance. Inspect the ductwork regularly for any visible holes, cracks, or blockages. Sealing any leaks and cleaning the ducts ensures that cool air is distributed evenly throughout your RV, preventing energy loss and maintaining comfort.
- Check the Refrigerant Levels: Low Freon levels can cause your RV’s AC to work inefficiently. If you notice that your AC is struggling to cool the cabin, it could be due to a refrigerant issue. Make sure to check the refrigerant levels regularly and top them off as needed. If your AC is consistently low on Freon, you may have a leak that requires professional repair.
- Park in the Shade: When possible, park your RV in shaded areas to prevent the AC from working overtime in hot, direct sunlight. Using sunshades or covering the windows can also reduce the load on your AC unit by blocking out the sun’s rays and preventing the interior from getting too hot.

How to Extend the Life of Your AC System
An RV air conditioning unit is a significant investment, so it’s important to take steps to extend its life. Regular maintenance, early detection of issues, and proper usage can help keep your AC in good working order for many years. Here are some tips to help extend the lifespan of your RV’s air conditioning system:
- Schedule Regular Professional Maintenance: While you can perform basic maintenance tasks yourself, it’s also important to have a professional HVAC technician inspect and service your RV’s AC system regularly. A technician can identify any underlying issues, check the refrigerant levels, and clean components that may be difficult to reach on your own. Annual professional maintenance can prevent major problems and improve system efficiency.
- Monitor the System’s Performance: Pay attention to how your RV’s air conditioner is performing throughout the year. If you notice any unusual sounds, smells, or changes in cooling efficiency, address them immediately. Early intervention can prevent small issues from developing into larger, more costly repairs.
- Avoid Overusing the AC: Overworking your AC unit can lead to premature wear and tear. Avoid running the air conditioner constantly, and give it breaks when possible. Additionally, using the fan or natural ventilation when the weather is not excessively hot can help reduce the workload on your AC.
- Replace Old or Worn Parts: Regularly check for signs of wear on critical AC components, such as the compressor, evaporator coil, and condenser fan. If any parts appear to be damaged or worn out, replace them promptly to prevent further damage to the system. Keeping your AC parts in good condition helps ensure that your system runs smoothly for a longer time.
- Ensure Proper Insulation: Proper insulation in your RV can help your air conditioner work more efficiently by maintaining the cool air inside and blocking out heat from the outside. Ensure that your RV’s walls, roof, and windows are properly insulated to reduce the burden on your AC system.

Common RV AC Issues and When to Seek Professional Help
Your RV air conditioning system plays a crucial role in maintaining a comfortable and cool environment during your travels. However, like any other mechanical system, it can encounter issues over time. Some problems can be easily fixed with basic maintenance, but others may require professional intervention. In this section, we’ll explore common RV AC issues, signs to watch for, and when to call in an HVAC technician.
Signs of Other Problems with Your AC
It’s essential to monitor the performance of your RV’s air conditioning system and be aware of potential issues that may arise. Recognizing early warning signs can help you prevent more severe problems in the future. Here are some common signs that your RV AC might be experiencing issues:
1. Warm Air from Vents
If your RV’s air conditioner is blowing warm air instead of cool air, it could indicate several problems. A common cause is low refrigerant levels, which can result from a leak in the system. Another possibility is a malfunctioning compressor. If the air isn’t cooling properly, it’s essential to address the issue quickly to avoid further damage to the system.

2. Unusual Noises
Hearing strange noises such as rattling, buzzing, or grinding coming from your AC unit is a clear indication that something is wrong. These noises can be caused by loose parts, damaged fan blades, or debris caught in the system. While some sounds might be minor and can be resolved with basic maintenance, others, like grinding noises, may suggest a more serious issue, such as a failing motor or compressor.
3. Foul Smells
If you notice foul or musty odors coming from your RV’s air conditioning vents, it could indicate mold or mildew buildup in the system. This problem is often caused by clogged or dirty air filters, evaporator coils, or ductwork. Ignoring this issue can lead to poor air quality and health risks, so it’s essential to address it promptly.
4. AC Unit Freezing Up
If your RV’s AC unit is freezing up, it’s usually due to a lack of airflow or low refrigerant levels. Dirty air filters, blocked air ducts, or a malfunctioning evaporator coil can cause airflow issues. A frozen AC unit will be inefficient and could stop working entirely if not addressed.
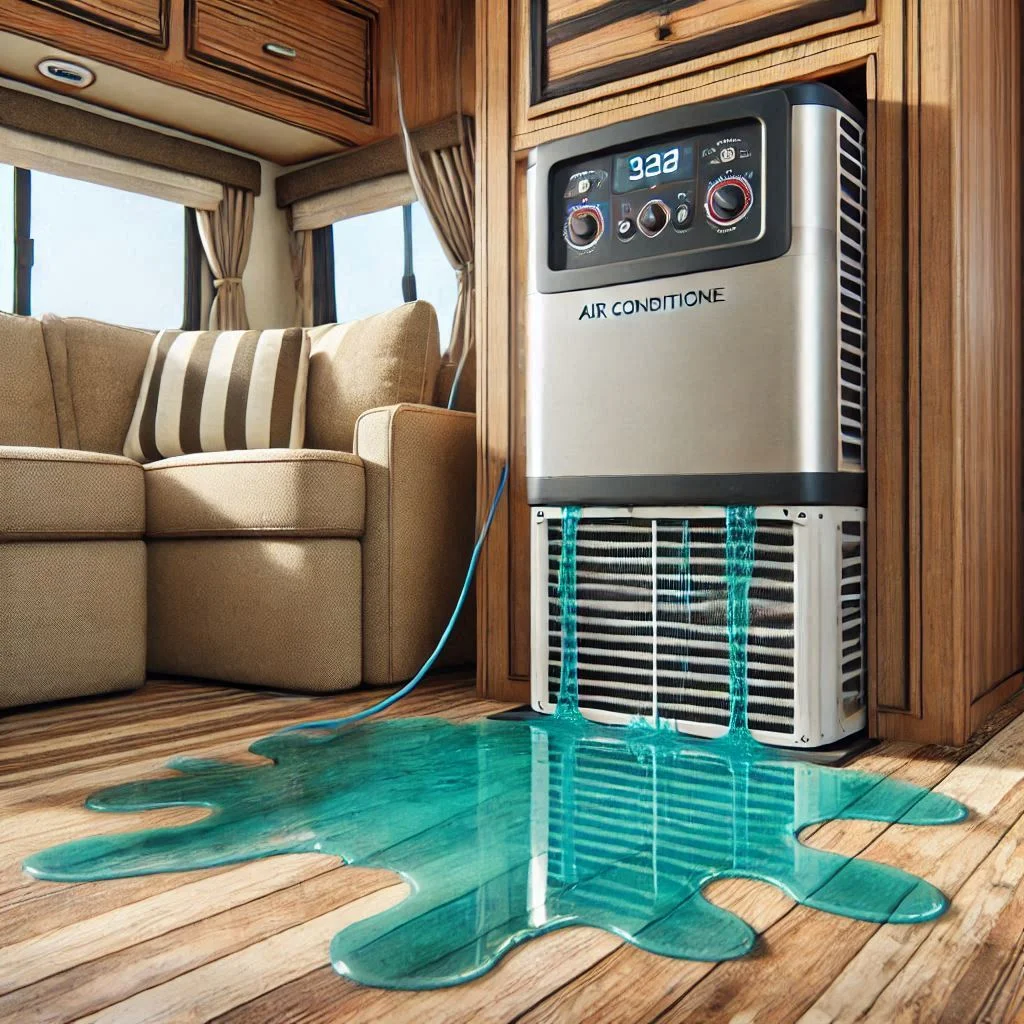
5. Water Leaks
If you notice water pooling around the base of your RV’s air conditioning unit, it could be a sign of a clogged drain line or a malfunctioning pump. While minor leaks can be resolved with cleaning and maintenance, larger leaks could indicate more significant issues with the internal components that need to be addressed by a professional.
6. System Short Cycling
Short cycling occurs when your RV air conditioner turns on and off repeatedly within a short period. This can be caused by electrical issues, a clogged air filter, or a faulty thermostat. It’s essential to fix short cycling problems promptly, as it can cause excessive wear and tear on your AC unit and lead to higher energy consumption.
When to Call an HVAC Technician
While some RV AC problems can be resolved with basic maintenance and troubleshooting, there are times when it’s best to seek professional help. Here are some situations where calling an HVAC technician is the right choice:
1. Persistent Refrigerant Leaks
If your RV air conditioner is low on refrigerant, it may be due to a leak in the system. While you can top off the refrigerant yourself, a persistent leak is a sign that the system requires professional repair. HVAC technicians have the tools and expertise to locate and fix leaks safely, preventing further damage to your system.

2. Electrical Issues
If your RV AC unit is experiencing electrical problems, such as tripped circuit breakers or malfunctioning thermostats, it’s best to consult a licensed technician. Electrical issues can be complex and dangerous if not addressed properly, so professional expertise is crucial for troubleshooting and fixing these problems safely.
3. Compressor Failures
The compressor is one of the most critical components of your RV’s air conditioning system. If your AC is running but not cooling effectively, or if it’s making unusual sounds, it could indicate a failing compressor. Replacing or repairing a compressor requires specialized knowledge and tools, making it essential to seek professional help in this situation.
4. Inability to Identify the Problem
If you’ve tried troubleshooting your RV AC system and can’t identify the root cause of the issue, calling a professional technician is the best course of action. HVAC technicians can perform a comprehensive inspection and accurately diagnose the problem, saving you time and effort and ensuring that the repair is done correctly.

5. Preventative Maintenance and Tune-ups
Even if your RV AC seems to be working well, regular maintenance by a professional technician is essential to ensure the system stays in top condition. A technician can clean the coils, check the refrigerant levels, replace worn-out parts, and perform other necessary tasks to extend the life of your AC unit and prevent future problems.
Frequently Asked Questions (FAQs) About RV Air Conditioning
To further help RV owners maintain their air conditioning systems, we’ve compiled a list of frequently asked questions (FAQs) to address common concerns. These answers provide valuable insights into maintaining, troubleshooting, and repairing RV AC systems, while also optimizing your air conditioner for efficient performance.
1. How often should I add Freon to my RV air conditioner?
Adding Freon (refrigerant) to your RV’s air conditioning system depends on several factors, including the age of the unit and whether there are any leaks in the system. In general, if your RV AC is functioning correctly, it shouldn’t need Freon recharging frequently. However, if the system isn’t cooling effectively or if you notice a drop in cooling performance, it may be due to low refrigerant levels.
Typically, you should check your RV’s refrigerant levels every 1–2 years as part of regular maintenance. If you’re unsure, it’s best to consult an HVAC technician to check and recharge the Freon levels if necessary.

2. What are the signs that my RV air conditioner needs to be repaired?
Several signs indicate that your RV air conditioner may need repair. These include:
- Warm Air: If your AC is blowing warm air, it could be due to low refrigerant, a damaged compressor, or clogged coils.
- Unusual Noises: Grinding, buzzing, or rattling sounds often point to loose parts or a malfunctioning motor.
- Water Leaks: Leaking water around the AC unit could mean a clogged drain line or other internal issues.
- Foul Odors: A musty smell may indicate mold or mildew buildup in the ducts or coils.
- Freezing: Ice forming around the AC unit suggests a problem with airflow or refrigerant levels.
If you notice any of these signs, it’s advisable to schedule an inspection with a professional HVAC technician.
3. How can I improve the efficiency of my RV’s air conditioner?
Improving the efficiency of your RV air conditioner involves regular maintenance and a few practical steps to reduce its workload. Here’s how to enhance its efficiency:
- Regularly clean the filters: A clogged air filter restricts airflow and causes the system to work harder. Clean or replace filters every 1–2 months, especially during peak usage.
- Clean the coils: Dust and debris on the evaporator and condenser coils reduce cooling efficiency. Periodically clean these coils to maintain optimal airflow.
- Check refrigerant levels: Low refrigerant can make your AC less efficient. Make sure the refrigerant is at the correct level to ensure maximum cooling power.
- Park in the shade: When possible, park your RV in shaded areas to prevent the AC from working overtime in direct sunlight. Using sunshades can also help block heat and reduce the strain on the system.

4. How do I know if my RV air conditioner needs Freon?
If your RV air conditioner is struggling to cool the interior, or if it’s blowing warm air, it may be a sign that your system is low on Freon (refrigerant). Here are some specific indicators:
- Ineffective Cooling: If the AC is running but not cooling effectively, it might be due to insufficient refrigerant.
- Longer Cooling Times: Your RV might take longer than usual to reach the desired temperature.
- Frost on the Coils: If the evaporator coils are frozen, it often indicates that the refrigerant level is too low.
If you experience any of these signs, it’s a good idea to have a professional technician check the refrigerant levels and top it off as needed.
5. What should I do if my RV air conditioner freezes up?
If your RV’s air conditioner freezes up, it can disrupt the cooling process and damage your system. Here’s what you should do:
- Turn off the AC: Immediately turn off the air conditioner to prevent further damage and allow the ice to melt.
- Check the filters: A clogged air filter can restrict airflow, causing the coils to freeze. Replace or clean the filters before turning the AC back on.
- Inspect the refrigerant levels: Low refrigerant can cause freezing. If you suspect this is the issue, call a technician to check and recharge the refrigerant.
- Check airflow: Ensure that there are no blockages in the air ducts or vents that could be restricting airflow and causing the freezing issue.
If the problem persists, it’s best to have an HVAC technician inspect the system for underlying issues.
Conclusion
Maintaining a properly functioning RV air conditioner is essential for ensuring a comfortable and enjoyable travel experience, especially during hot weather. Understanding the role of Freon, recognizing the signs of low refrigerant, and knowing how to troubleshoot and maintain your system are key steps in keeping your AC running efficiently. Whether it’s adding Freon, identifying early signs of potential issues, or performing regular maintenance, staying proactive can save you from costly repairs and discomfort on the road. If you’re ever unsure or face persistent problems, don’t hesitate to seek help from a professional HVAC technician to ensure your RV’s AC system stays in optimal condition. With the right care, your RV air conditioner will continue to provide cool relief for years to come, making every journey more comfortable.